

Taking jewelry photos isn’t always as easy as it looks. At first, you might feel like everything is fine, but the photo turns out a bit off. It usually comes down to small things—like lighting, focus, or even editing. In this guide, I’ll walk you through a few common mistakes and how you can fix them.
Lighting and Reflection Mistakes
Lighting and reflection can make or break your jewelry photos. Even small issues can change how the product looks in pictures. Many beginners struggle with shadows, glare, and color accuracy in macro jewelry photography. Fixing these problems helps your jewelry look more attractive and true to life.
Harsh Shadows
Harsh shadows often happen when the light is too strong or placed incorrectly. These shadows can hide important details and make the product look unbalanced. Use soft lighting or a diffuser to spread the light evenly. This will create a smoother and more natural look.
Unwanted Reflections
Jewelry surfaces easily reflect light, the camera, or even the photographer. These reflections can distract from the product and make the image look messy. Try changing the angle of your light and camera to reduce glare. You can also use a light tent or softbox to control reflections.
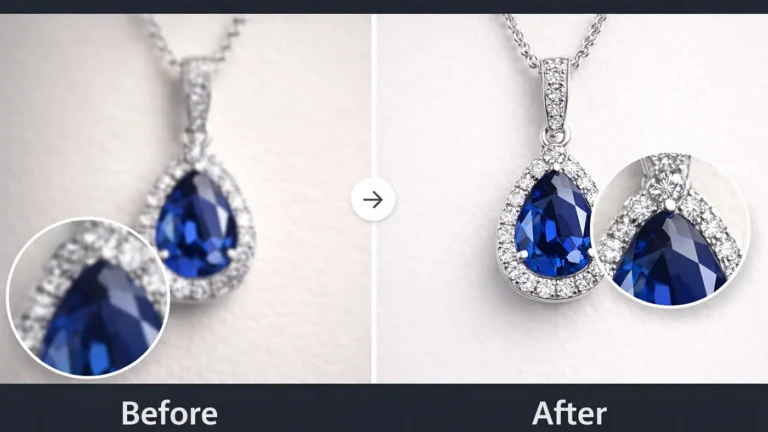
Dull Gemstones
If the lighting isn’t right, gemstones can look flat and lifeless. They lose their shine and depth in photos. Try adjusting the light so it hits the stones from the side or slightly above. This usually brings out their sparkle much better.
Uneven Lighting
Sometimes one part of the jewelry looks bright while another part looks too dark. This happens when the lighting isn’t evenly spread. Using more than one light or adding a reflector can help balance things out. Always take a quick test shot before finalizing.
Wrong White Balance
Wrong white balance can shift the actual color of your jewelry. Gold might look too warm, and silver can turn slightly blue. It’s a small setting, but it makes a big difference. Try to adjust it correctly while shooting or fix it later during editing.
Focus and Camera Setting Mistakes
Focus and camera settings play a big role in how sharp and clear your jewelry photos look. Even a small mistake can make your image look blurry or unprofessional. Many people overlook basic camera controls when using a phone. Paying attention to focus and stability will improve your results right away.
Soft Focus
Soft focus makes your jewelry look blurry and lacking detail. This usually happens when the camera fails to lock focus properly. Always tap on the main part of the jewelry before taking the shot. This helps your camera focus clearly on the product.
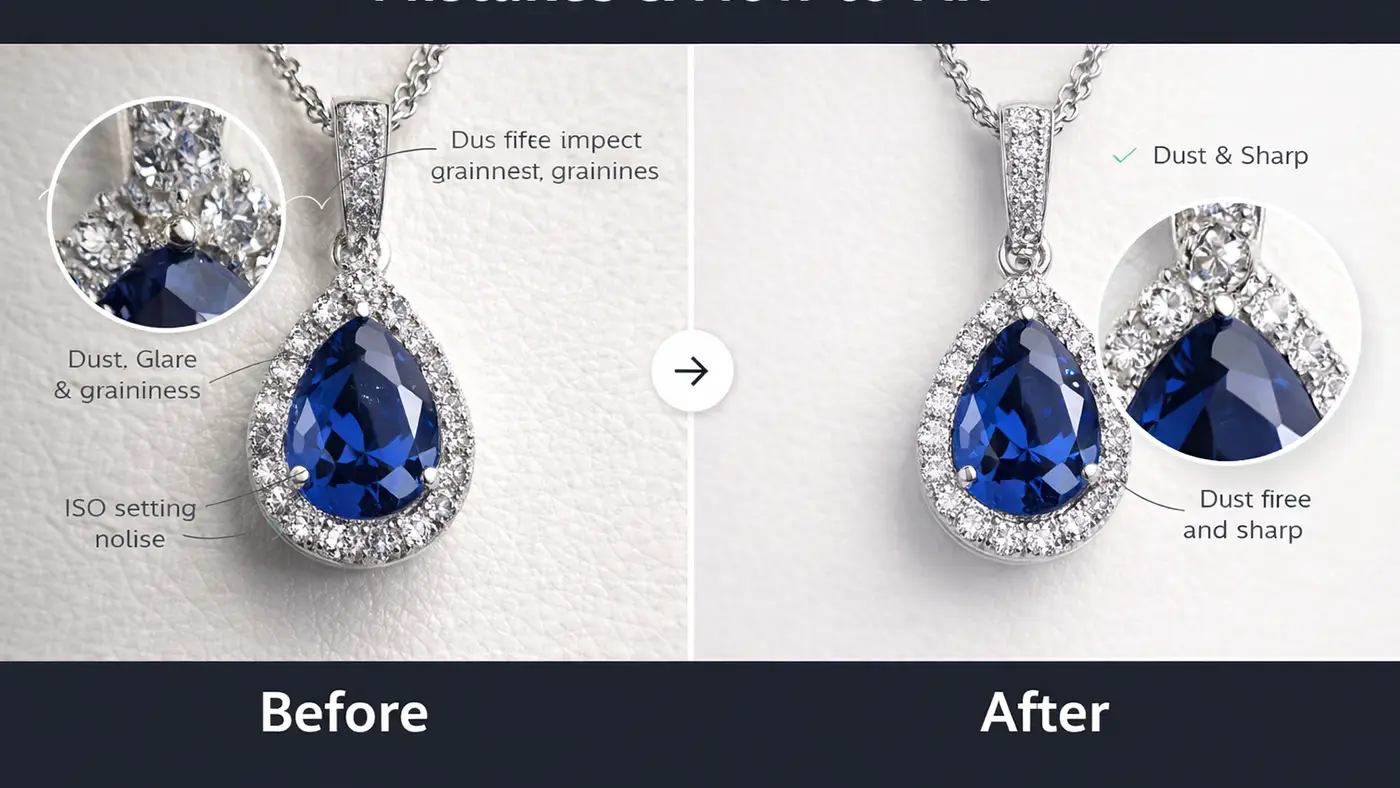
ISO Setting
ISO controls how sensitive your camera is to light. When the ISO is too high, your photos can look grainy and lose detail. This is especially noticeable in close-up jewelry shots. ISO setting on camera will help you get cleaner and sharper images.
Shaky Photos
Shaky photos happen when your hands move while taking the picture. Even a small movement can blur the image. Use a tripod or place your phone on a stable surface. This keeps your shots sharp and steady.
Wrong Focus Point
Focusing on the wrong area can make the main product look unclear. For example, the background may look sharp while the jewelry looks blurry. Always set the focus on the most important part of the item. This ensures the product stands out.
Low Aperture
A low aperture setting can reduce the depth of field too much. This may leave only a small part of the jewelry in focus. Try to use a balanced setting so more of the product stays sharp. This gives a clean and professional look.
Poor Angle
A bad angle can hide details and reduce the appeal of your jewelry. Some angles may also affect how light hits the product. Try different angles to find the best view. Choose the one that highlights the design and shines.
Preparation and Styling Mistakes
Good preparation and styling are just as important as lighting and camera settings. Small details can easily ruin an otherwise great photo. Clean, simple, and well-planned setups help your jewelry stand out. Taking a few extra minutes to prepare can make a big difference.
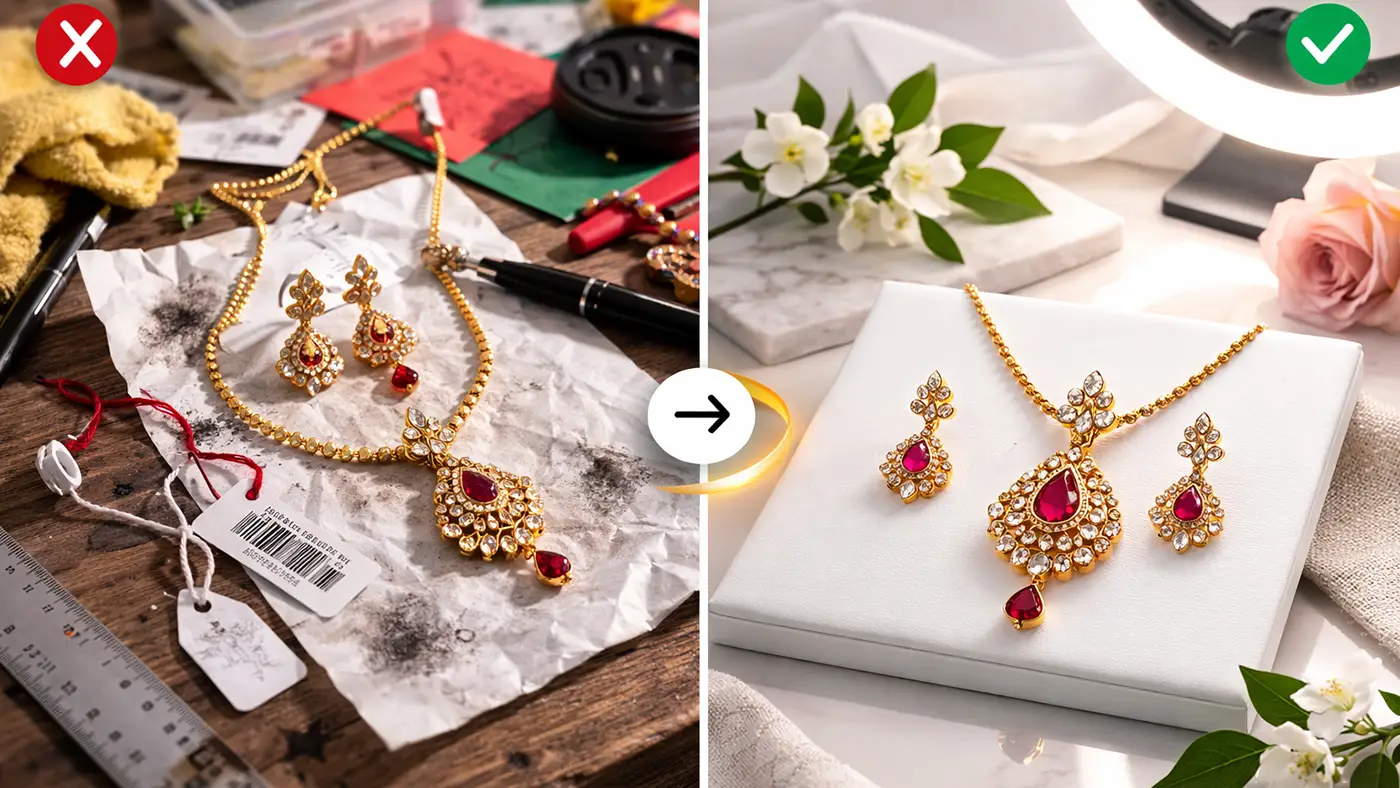
Unpolished/dirty Jewelry
Dirty or unpolished jewelry looks dull and unappealing in photos. Dust, fingerprints, and smudges become very visible in close-up shots. Always clean your jewelry before taking pictures. This helps it shine and look more professional.
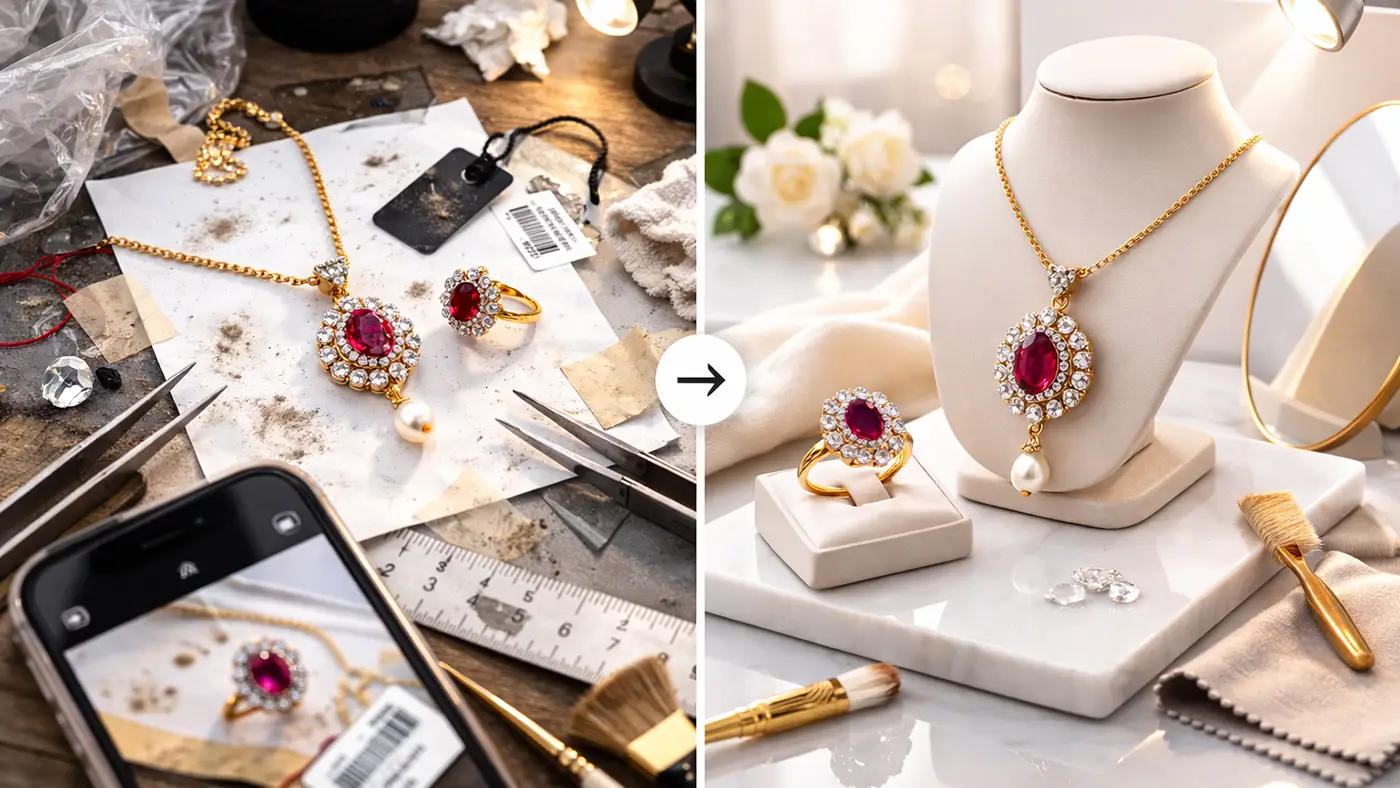
Cluttered Background
A busy background can distract from the jewelry. Too many elements make the image look messy and confusing. Use a simple and clean background to keep the focus on the product. Neutral colors often work best.
Visible Tags or Strings
Tags, threads, or strings can ruin the clean look of your photo. They make the image look unfinished and unprofessional. Always check your setup before shooting and remove anything unnecessary. This keeps the focus on the jewelry.
Unnatural Props
Using props that don’t match the jewelry can look forced. It can confuse the viewer and take attention away from the product. Choose simple and relevant props that support the style. Keep the overall look natural and balanced.
Color Clashes
Clashing colors can make your jewelry look less appealing. Strong or mismatched colors can overpower the product. Try to use colors that complement the jewelry. This helps create a clean and attractive visual.
Post-Processing and Strategy Mistakes
Jewelry retouching and strategy are the final steps that shape your jewelry photos. Even if the original shot looks good, poor editing can still affect the final result. Many people either over-edit or fail to stay consistent across images. A simple and consistent approach will help your photos look clean and professional.
Over-Editing
Over-editing can make jewelry look fake and unnatural. Too much brightness, contrast, or saturation can damage the true color and texture. Keep your edits light and realistic. Focus on enhancing, not changing, the original look.
Inconsistency
Inconsistent editing makes your product photos look unprofessional. Different tones, brightness, or styles can confuse customers. Try to follow the same editing style for all images. This builds a strong and clean brand look.
Incorrect Cropping
Cropping and sizing mistakes can cut off key parts of the jewelry or make the image feel off-balance. It can also reduce the visual appeal of the product. Make sure the item is centered and has enough space around it. A well-framed image always looks more professional.
Repetitive Pattern in Editing
Using the same editing style too aggressively on every image can feel repetitive. It may reduce the uniqueness of each product. While consistency is important, allow small variations when needed. This keeps your visuals fresh and natural.
Jewelry Photo Editing Fix Photography Mistakes
Fixing jewelry photography mistakes is easier when you follow a simple process. Good editing can improve your photos without making them look fake. Focus on small adjustments that keep the product natural and clear. A clean and consistent approach will give your images a professional look.
Polishing Your Jewelry Images
Photo editing helps refine your photos and fix small issues from the shoot. You can adjust brightness, contrast, and sharpness to improve clarity. Always keep the edits natural and close to the real product. Avoid heavy filters that change the original look.
Harsh Reflections and Glare
Reflections and glare can distract from the jewelry details. Instead of removing everything, try to reduce strong highlights. Small adjustments in exposure and contrast can help balance the image. This keeps the jewelry looking clean and realistic.
Dust, Smudges, and Scratches
Small imperfections become very visible in close-up shots. Use spot healing or clone tools to remove dust and marks. Make sure you clean the product before shooting to reduce editing work. This keeps your image smooth and professional.
Color Correction
Color correction ensures your jewelry looks true to life. Adjust white balance, temperature, and tint to match the real color. Avoid over-saturating the image. Accurate colors build trust with customers.
Backgrounds Correction
A clean background keeps the focus on the jewelry. You can remove distractions or smooth out uneven areas during editing. Use simple colors like white or soft tones. This creates a neat and professional look.
Shadow Management
Shadows can add depth, but too much can look harsh. Soften strong shadows and balance the light in editing. Keep a natural shadow to avoid a flat look. Shadow creation helps your product look realistic.
Cropping
Cropping helps frame your jewelry properly. Remove extra space and center the product clearly. Make sure you do not cut off important parts. A well-cropped image looks clean and focused.
Conclusion:
If your jewelry photos don’t look the way you expect, you’re not alone. Most of the time, it’s just a few small things causing the issue. Once you start paying attention to lighting, focus, styling, and editing, the difference becomes clear pretty quickly. You don’t need a perfect setup—just a bit of care and practice. Keep experimenting, and over time, your photos will start to look cleaner, more natural, and much more professional.


