


Resizing an image is a common photo editing task that many people do every day. If you use a Windows computer, you already have a simple tool for this—Microsoft Paint. You do not need any special skills or extra software.
You may want to make an image smaller to save space. You may also need the right size for social media, websites, or email. This is where learning how to resize the image in Paint becomes very useful.
In this guide, you will learn how to resize image in Paint step by step. You will also learn how to keep your image clear and avoid losing quality.
Understanding Microsoft Paint: A Simple Tool for Everyday Needs
Microsoft Paint has been a staple on Windows operating systems for decades. It allows users to perform simple tasks like crop, edit, and resize image Paint quickly without needing advanced skills. For beginners, Windows Paint resize image features are easy to use and highly effective.
Resizing images in Paint is especially helpful when you want to optimize photos for websites, social media, or emails. Unlike complex editing software, Paint provides a straightforward way to achieve your resizing goals without requiring advanced skills or additional installations.
Getting Started: Opening Your Image in Paint
Resizing an image in Microsoft Paint is simple, but getting the right result depends on how you adjust the settings. If you follow the correct steps, you can reduce image size while keeping it clear and properly shaped. The first step in learning how to resize the image in Paint is opening the application and loading your desired image. Here’s how:
- First, open Microsoft Paint and load your image.
- Click the Start menu on your Windows computer (bottom-left corner of the screen) and type “Paint” in the search bar. Open the Paint application from the results.
- Once Paint opens, go to the top-left corner of the screen and click on “File.” A dropdown menu will appear. From there, click on “Open.”
- Now navigate to the folder where your image is saved, select the file, and click “Open.” Your image will now appear inside Paint and is ready to edit.
At this stage, you are ready to resize photo in Paint using the built-in tools.
How to Resize Image in Paint: Using the Resize Tool
This is the easiest way to resize image Paint using built-in tools. The Resize tool in Paint allows you to adjust an image’s dimensions based on percentage or pixels. To access this feature, follow these steps:
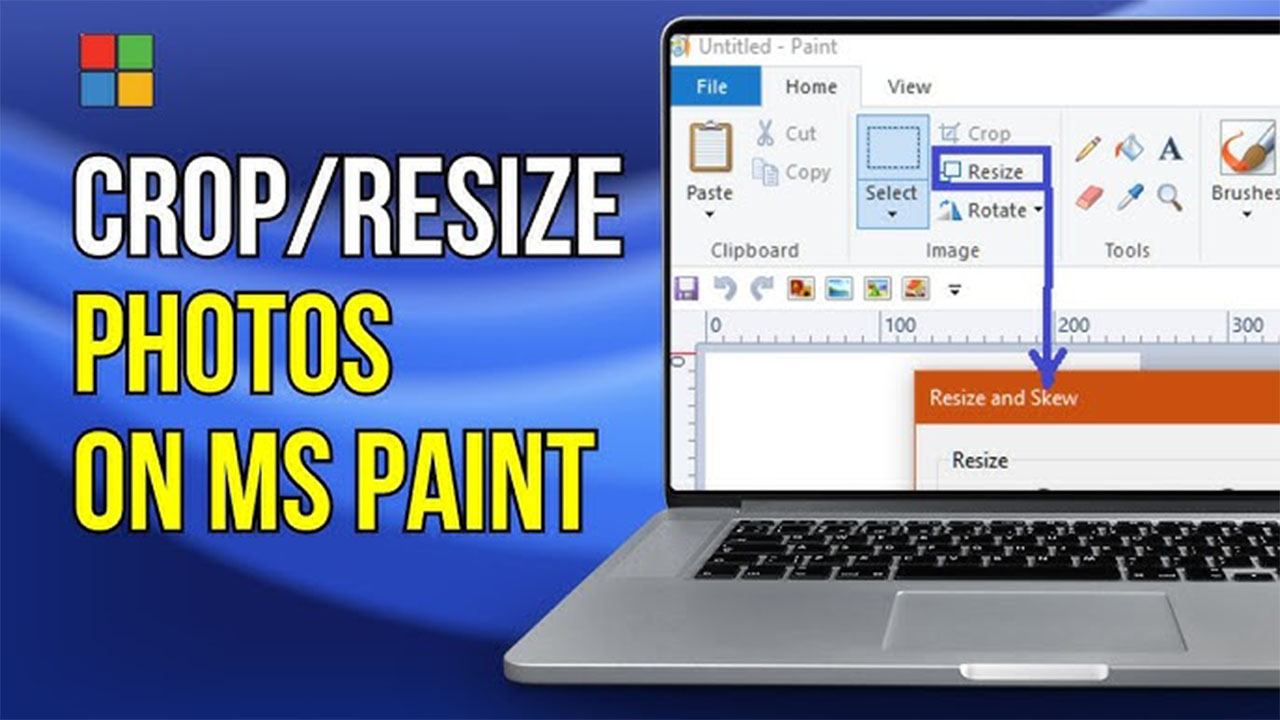
To resize image Paint, go to the top toolbar and click on the Home tab (this is the default tab when Paint opens).
In the middle section of the toolbar, you will find the “Resize” button. It usually has a small square icon with arrows.
Click on “Resize,” and a small window will pop up in the center of your screen.
Inside this window, you will see two options:
- Percentage
- Pixels
If you want quick resizing, you can use Percentage. For example, setting it to 50% will reduce both width and height by half.
However, if you want accurate control, choose Pixels. This is the best method to resize picture Paint when you need a specific size.
Choosing between percentage and pixels depends on your needs. Selecting “Percentage” allows you to scale the image proportionally (e.g., reducing it by 50% will halve its width and height). Alternatively, choosing “Pixels” lets you set exact dimensions, which is useful for creating images with specific resolutions.
Maintaining Aspect Ratio While Resizing
Before changing any values, look at the bottom of the Resize window. You will see a checkbox called “Maintain aspect ratio.”
Make sure this option is checked.
When you resize with Paint, this setting ensures that the width and height stay proportional. That means the image will not look stretched or squashed.
For example:
If you change the width from 2000px to 1000px, Paint will automatically adjust the height to match it correctly.
If you uncheck this option, you can manually enter both width and height. But when you resize in Paint this way, the image can easily become distorted. That is why it is recommended to keep this option enabled.
Entering the Right Size
Now enter your desired width or height in the box.
When you resize photo paint, choosing the right size depends on where you will use the image.
Smart ways to resize:
- For websites: reduce large images (e.g., 2000px → 800px) to make pages load faster
- For social media: use standard sizes (e.g., 1080 × 1080 for Instagram)
- For thumbnails: use sizes like 1280 × 720
Reducing size keeps the image sharp, but increasing size (for example, 500px → 2000px) will make it blurry.
Applying the Resize
After entering your new size, click the “OK” button at the bottom of the Resize window.
Your image will instantly change to the new dimensions.
Take a moment to check the result. If something looks wrong, you can press Ctrl + Z to undo and try again.
This step helps you safely resize image Paint without damaging quality.
Saving Your Resized Image
Once you are happy with the result, save your image properly. After using Windows Paint resize image options:
- Go again to the top-left corner and click on “File,” then select “Save As.”
- You will see different format options:
JPEG (smaller file size, best for web).
PNG (better quality, larger file).
BMP (larger size, less commonly used)
-
Choose your preferred format, give your file a name, select a folder, and click “Save.” By saving the resized image as a new file, you preserve the original version in case you need it later.
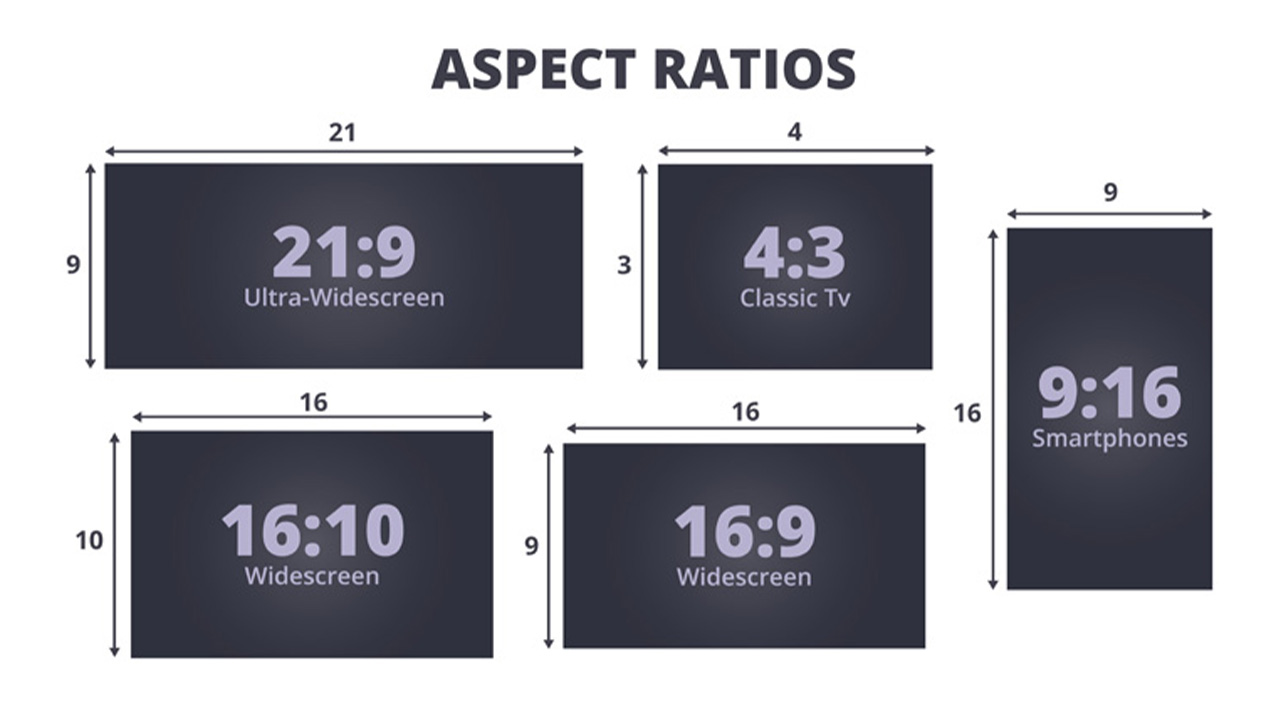
Exact Size Examples for Resizing
You need to use the correct dimensions to resize an image in Paint. Always keep “Maintain aspect ratio” checked in Paint to avoid stretching your image. Here are some common image sizes you can use:
– Passport photo: 600 × 600 px
– Instagram post: 1080 × 1080 px
– Instagram story: 1080 × 1920 px
– LinkedIn profile: 400 × 400 px
– Facebook profile: 180 × 180 px
– YouTube thumbnail: 1280 × 720 px
How to Reduce Image Size (KB) in Paint
If you want to reduce the file size (KB) of an image in Paint, you need to understand the difference between resizing and compression. For the best balance between quality and file size, resize your image first and then save it as a JPEG.
Resizing means reducing the image dimensions (width and height). Smaller dimensions automatically reduce the file size.
Compression means saving the image in a format that takes less space, like JPEG.
Easy Ways to Reduce Image Size in Paint:
Reduce dimensions: Click on the Resize option and lower the pixel size (for example, from 2000px to 800px).
Save as JPEG: Go to File → Save As → JPEG. This format reduces file size compared to PNG.
Avoid unnecessary large sizes: Use only the size you need for web, email, or social media.
Tips for Resizing Images in Paint
When learning how to resize the image in Paint, a few additional tips can enhance your results:
- Start with High-Quality Images: Resizing a low-resolution image can make it appear blurry or pixelated. Use high-resolution photos to maintain clarity.
- Experiment with Different Sizes: If you’re unsure about the dimensions, try resizing your image in small increments to find the perfect size.
- Use Online Resources: For more advanced editing tools, websites like Canva or Fotor offer free image resizing features that complement Paint’s capabilities.
Advanced Editing Alternatives
While Paint is a fantastic tool for basic resizing, some users may require more advanced features. In such cases, consider trying programs like GIMP or Photoshop, which offer precise control over image quality and dimensions. Additionally, online services like Image Expert India are ideal for professional photo editing and resizing.
Troubleshooting Common Issues
Occasionally, users encounter challenges when learning how to resize the image in Paint. Here are solutions to common problems:
- Image Looks Blurry: Ensure you’re starting with a high-resolution image. Resizing small images to larger dimensions can reduce quality.
- Distorted Image: Check the “Maintain aspect ratio” box before resizing to keep the proportions consistent.
- Changes Not Saving: Double-check that you’re saving your resized image as a new file, rather than overwriting the original.
Practical Applications of Resized Images
Understanding how to resize the image in Paint can benefit various tasks:
- Social Media Posting: Resize images to fit platforms like Instagram, Facebook, and Twitter without cropping important parts.
- Email Attachments: Reduce image sizes to make email attachments faster to send and easier to download.
- Document Inclusion: Adjust images to fit seamlessly into reports, presentations, or resumes.
https://www.youtube.com/watch?v=0vIcBIjDveM
Conclusion
Learning how to resize the image in Paint is a valuable skill for anyone working with digital photos. Whether you’re preparing images for personal use or professional projects, Paint’s intuitive interface makes the process simple and effective. By following this guide, you can confidently resize your images while preserving quality and clarity.
If you’re looking for professional editing options, don’t hesitate to explore tools like Fotor or Canva for additional functionality. For more comprehensive solutions, Image Expert India offers specialized services tailored to your needs.
Now that you know how to resize the image in Paint, you’re ready to handle a wide range of resizing tasks with ease. Enjoy the flexibility and convenience of this essential feature on Windows 10 and 11!
FAQs ( Frequently Asked Questions)
Q: How to Resize an Image in Paint Without Losing Quality?
A: To resize an image without losing quality, start with a high-resolution image and avoid increasing its size. Always keep the “Maintain aspect ratio” option checked in Paint, and reduce the size gradually instead of making large changes.
Q: How to Reduce Image Size in KB Using Paint?
A: You can reduce image size in Paint by lowering the image dimensions using the Resize tool and saving the file as a JPEG format. Smaller dimensions and compressed formats help reduce the file size significantly.
Q: What Size is Best for Social Media Images?
A: The best size depends on the platform. For example, Instagram posts work best at 1080×1080 px, stories at 1080×1920 px, and LinkedIn profile photos at 400×400 px. Using the correct size ensures your image looks clear and properly aligned.
Q: Can I Resize an Image in Paint Using Exact Pixel Dimensions?
A: Yes, Paint allows you to resize images using exact pixel values. Simply click on the Resize option, choose “Pixels,” and enter your desired width or height. Make sure “Maintain aspect ratio” is checked to avoid distortion.
Q: Why Does My Image Become Blurry After Resizing in Paint?
A: Images become blurry when you increase their size or start with a low-resolution file. To avoid this, always resize images to smaller dimensions and use high-quality original images whenever possible.


