

Choosing the best lighting for jewelry photography is one of the most important steps to making your jewelry look elegant, sharp, and professional. Jewelry photography requires patience, careful lighting, and a clear understanding of how metal and gemstones react to different environments. Small reflections, a slight shadow, or uneven brightness can completely change the look of a ring or necklace. That’s why so many beginners compare Lightbox vs natural light for jewelry photography to figure out which lighting setup is better.
In this guide, you’ll learn how each lighting style works, which tools help you achieve clean results, and how to avoid common mistakes. You’ll also get a practical step-by-step setup, simple lighting advice, and tips for beginners who want professional-looking jewelry photos without complicated gear.
Benefits of Using a Lightbox for Jewelry Photos
A jewelry lightbox provides soft, even, and diffused lighting, eliminating harsh shadows and reflections. Many people start with lightbox jewelry photography because it offers predictable results and a clean finish. Lightbox provides the best lighting for jewelry photography and highlights every detail and sparkle of the piece.
The best light box for jewelry photography helps beginners achieve professional lighting without buying a full studio kit. Key benefits of a jewelry light box kit include highlighting the intricate details and sparkle of jewelry and ensuring accurate color representation. Lightboxes use adjustable LEDs for true colour, like 5500K for gems and 6500K for diamonds. The best jewelry photography light box provides realistic images for e-commerce platforms like Etsy and Shopify.
Photographers prefer using a jewelry photo light box because it reduces the chance of glare. A jewelry light box is especially suitable for photographing diamonds, gold, and silver. It provides the best lighting for jewelry photography, helping to showcase each piece beautifully and boosting buyer confidence.
Benefits of Natural Light for Jewelry Photography
Natural light provides soft, natural illumination to enhance the jewelry’s sparkle and reduces harsh shadows. It creates a natural look that feels warm and realistic. Soft, natural light reduces glare and makes the jewelry look clean and beautiful. Many beginners love natural light jewelry photography because it requires minimal setup and effort. The soft, warm hues of sunrise and sunset add a magical depth to photos.
Natural lighting also works well for commercial lifestyle photography. If you shoot jewelry outdoors or near a window, you’ll notice soft shadows and natural color tones. This creates a more emotional and authentic style of jewelry product photography. Natural lighting in photography is completely free and easily available, so beginners don’t need expensive studio lights. Diffused light and reflectors enhance the sparkle of diamonds and other gemstones without overexposing them. Natural light works beautifully with gemstones, but it changes throughout the day. That means you need to observe the sun, move your setup, and adjust your angles. You can combine natural light with macro jewelry photography for extreme close-up detail. In photography, we can say natural light is one of the best lighting for jewelry photography to enhance sparkle and color.
Choosing the Right Background for Lighting
Backgrounds influence how jewelry looks in terms of contrast, reflection, and overall feel. If you’re searching for the best background for jewelry photography, the most common option is a clean white backdrop. A white background in jewelry photography white background is used in e-commerce because it removes distractions and highlights details. Many online businesses use a white background for jewelry to maintain a consistent catalog style.
For a premium look, photographers often choose a background for jewelry photography that includes dark surfaces or textures. A jewelry photography black background gives diamonds and gold a dramatic glow and increases contrast. A clean, distraction-free background is essential for the best lighting for jewelry photography.
If you want something unique, consider lifestyle boards, fabrics, or natural textures. Many beginners explore backgrounds for jewelry photography to find a look that matches their brand identity. Some even use a simple white box for jewelry photography to maintain a clean, minimal style.

How to Set Best Lighting for Jewelry Photography
Setting up lighting for jewelry photos might seem tricky, but it’s simple when you follow a few easy steps. The main goal is to create soft, even light so your jewelry looks clean and shiny in every shot. This is the best way to photograph jewelry for online stores or social media. For the best lighting for jewelry photography, soft, natural light and the correct angle should be used.
Clean the Jewelry
Jewelry collects dust and fingerprints very fast. Before you start taking photos of jewelry, wipe the piece with a soft cloth. Check it under the light to make sure nothing is left. Tiny marks become very noticeable in close-up jewelry photography.
Set Up the Background
Choose a background for jewellery photography before placing the product. Simple, neutral backgrounds keep the focus on your jewelry. Test different surfaces to see which makes the metal and gemstones look their best. A clean background also makes editing easier later.
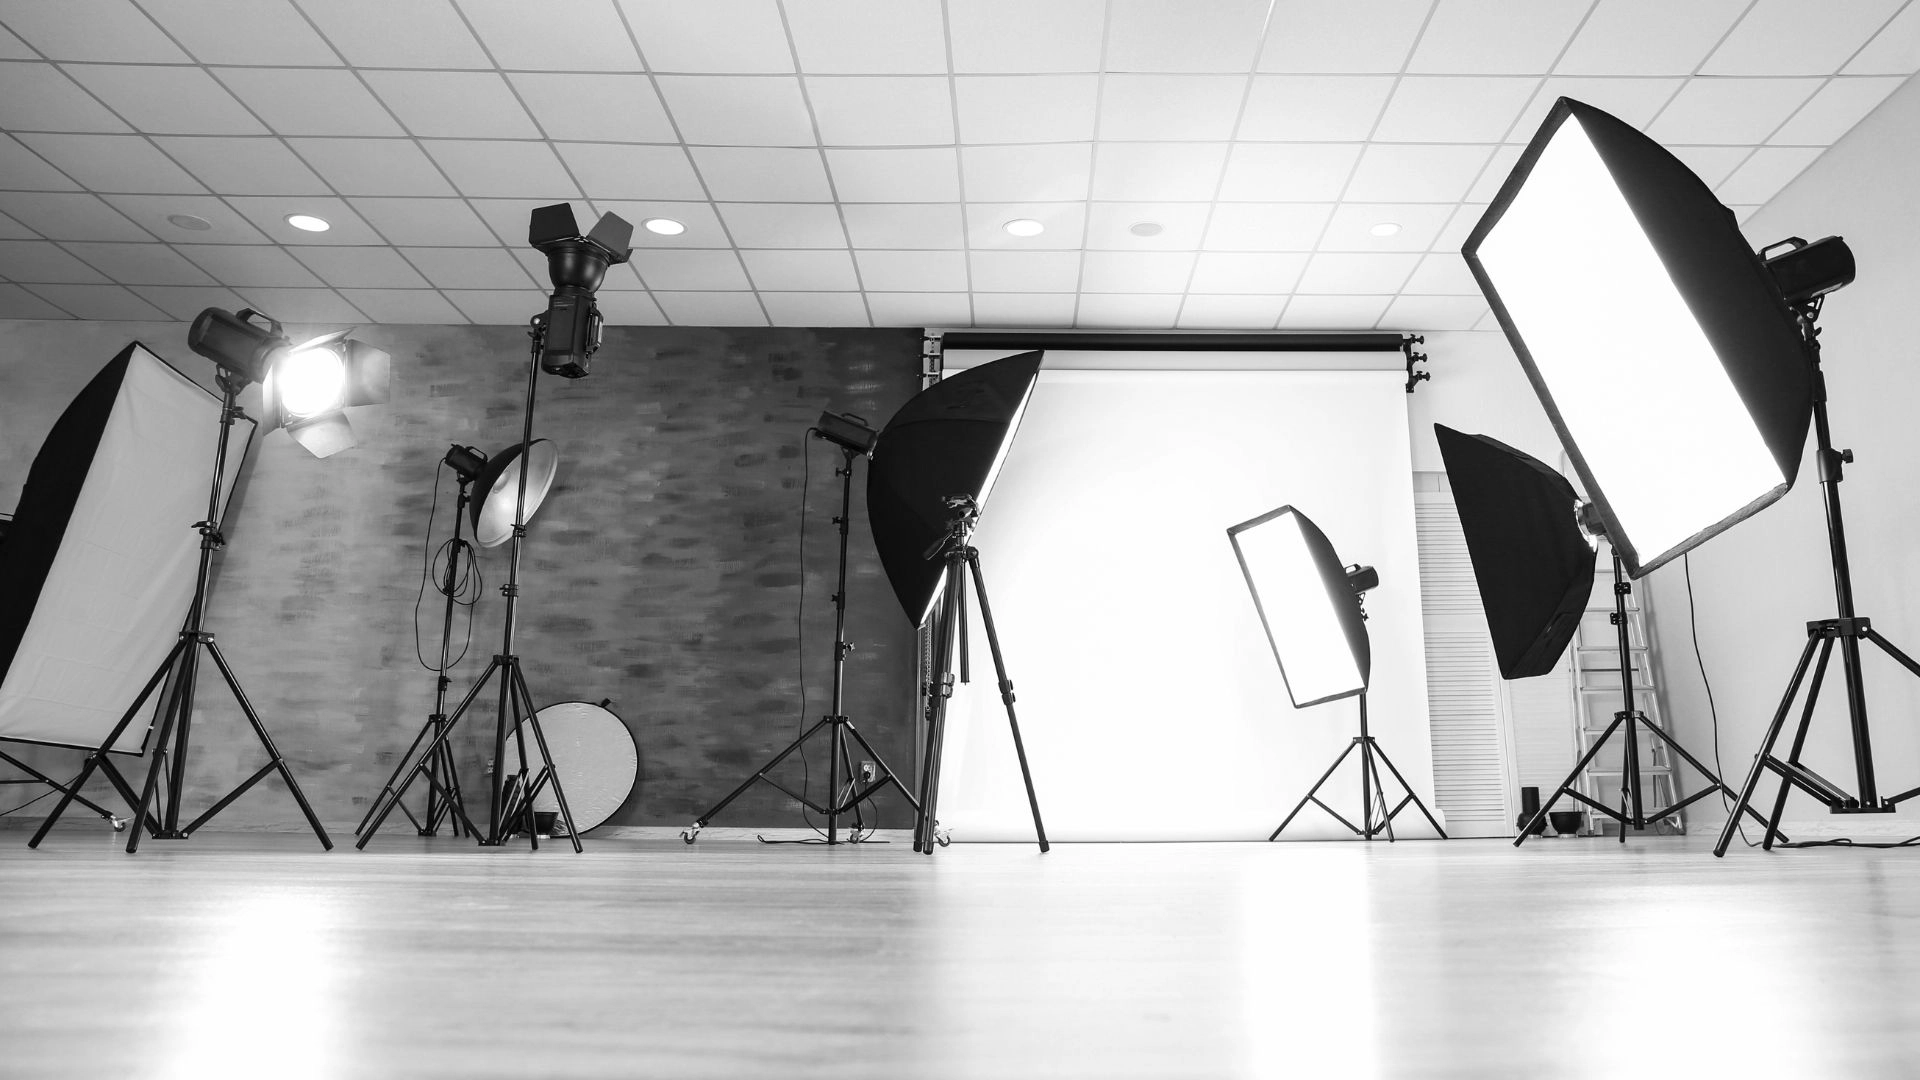
Position Your Light Source
For the best lighting for photographing jewelry, use soft, even light. If using a lightbox, turn on the built-in LEDs. If using natural light, place the jewelry near a big window. Avoid direct sunlight it creates harsh reflections. A proper jewelry lighting setup is key to showing sparkle and detail.
Add Reflectors
Reflectors or white cards help remove dark shadows. Place them on the sides to fill in shadows and make the jewelry shine evenly. Plain white paper works too if you don’t have reflectors.
Mount the Camera
Use a tripod to prevent shaking. This ensures sharp photos for product photography for jewelry. Make sure the camera is straight and stable before shooting.
Take Multiple Angles
Try different angles until you capture the jewelry perfectly. Take close-ups, side shots, and top views. Check your photos as you go and adjust the lighting, background, or angle as needed. This is the simplest method for taking photos of jewelry that look professional.

Common Jewelry Photography Mistakes & Solutions
Perfect lighting in jewelry photography can often be challenging. Therefore, you need to master the best lighting for jewelry photography to showcase the true beauty of each piece in every shot. Jewelry is difficult to photograph, so mistakes are normal. Here are common errors and how to solve them:
Harsh Reflections: Jewelry is reflective, so bright light sources create strong highlights. Diffuse the light with softboxes, white paper, or adjust the position slightly. These tips are essential when taking photos of jewelry or shooting small details.
Dark Shadows: Sometimes the light hits only one side of the product. Use fill cards or reposition your light. This is especially important for creative jewelry photography, where shadows affect mood.
Wrong Background Choice: The wrong color hides detail or causes a color cast. Choose a simple surface from your photos in your jewelry collection or use a neutral tone, and always make sure the background supports the jewelry instead of competing with it.
Incorrect Camera Settings: Low exposure or shallow depth of field creates blurry edges. Adjust exposure, aperture, and stabilize the camera, and always check a test shot to confirm that every part of the jewelry looks sharp and properly lit.

Comparison of Lightbox vs Natural Light for Photography
Choosing between a lightbox and natural light can feel confusing when you’re trying to take good jewelry photos. Both can make your rings, necklaces, and earrings look beautiful, but they create very different results. A lightbox gives you steady, controlled lighting, while natural light feels soft and more real. Knowing how they work will help you decide which one fits your style and project. It’s important to compare how a lightbox vs natural light work to achieve the best lighting for jewelry photography.
Why Professionals Use Both
Most professional photographers don’t stick to only one type of light. They use a lightbox when they need clean, clear, and matching product photos for online stores or catalogs. These photos look the same every time, which is great for brands. But for lifestyle photos, like showing jewelry on a model or creating a warm, cozy mood, they often use natural light. Sunlight helps the jewelry sparkle in a more natural and emotional way. Using both keeps their pictures consistent but still creative.
Key Considerations
Think about your style, budget, and time. A lightbox is perfect if you want repeatable results and don’t want to wait for the right weather. But if you love soft, warm photos and don’t mind working with the sun, natural light is a great choice. Both work well; you just pick the one that fits your needs.
Conclusion
Jewelry photography takes practice and patience. Every small adjustment improves your results. Try different angles, test new backgrounds, and don’t be afraid to experiment. With time, your images will look cleaner, sharper, and more professional. Keep learning, stay curious, and enjoy the process.
FAQs
1. What is the best jewelry photography method for beginners?
Using a lightbox is the easiest way to take jewelry photos. It gives soft, even light and stops harsh shadows or shiny spots. This makes rings, earrings, and necklaces look clear and bright. Sunlight can make pretty photos too, but it is harder to control. A lightbox helps you get nice, clean photos every time.
2. Can I shoot jewelry outdoors?
Yes, natural sunlight works well for jewelry. Early morning or late afternoon light is best because it’s soft. Avoid harsh midday sun, and use a reflector to fill in shadows for a brighter, cleaner look.
3. Do I need expensive equipment?
No, you don’t need expensive gear. A simple lightbox, a smartphone or basic camera, and a few reflectors are enough to take clean, professional-looking jewelry photos. You can get great results with affordable tools and good lighting.
4. How important is editing?
Editing is very important. It helps remove dust, fix small flaws, and make the jewelry look clear and polished. Learning basic jewelry photography editing tips can make your photos look professional and ready for display.
5. Can a single light source work?
Yes, a single light source can work for jewelry photography. It can create soft, even lighting if positioned correctly and paired with a reflector to fill shadows. This setup is simple and effective for clean, clear photos.


