Old black and white photos hold powerful memories. When you add color, you bring those memories back to life. Many people want to learn how to colourise a black and white photo in Photoshop because the process gives old images a fresh and modern look. With the right tools and simple steps, you can transform a dull, faded, or restored photo into a vibrant and realistic image.
Before you begin, make sure the photo looks clean and clear.Professional photo restoration services can improve the quality and colour of the image. A clean photo always gives better results when you begin the colorizing process.
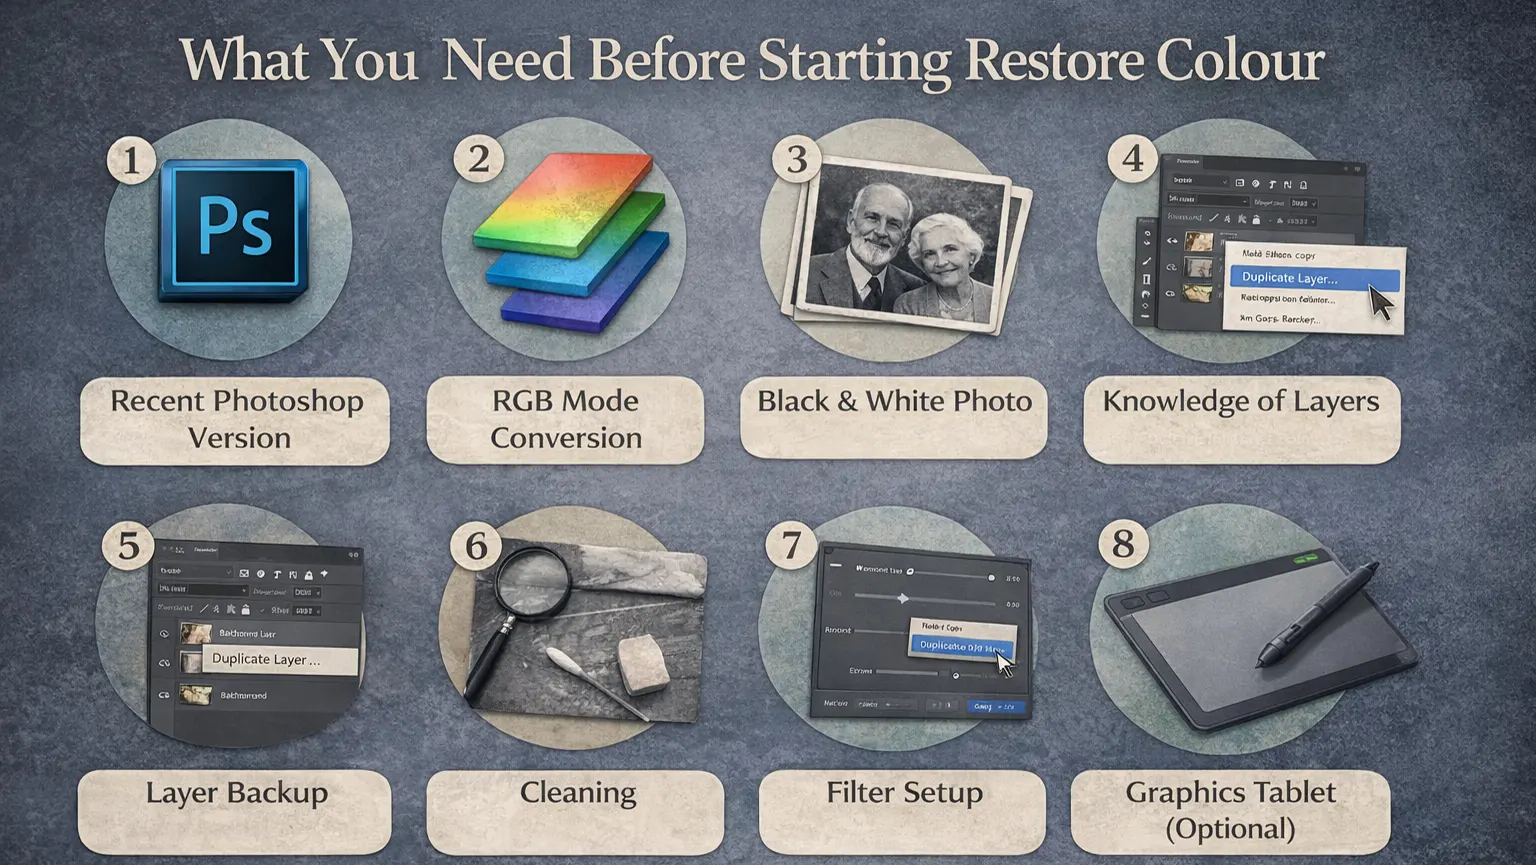
What You Need Before Starting Restore Colour
1. Which Photoshop Version?
You can use any recent version of Adobe Photoshop. Photoshop CC works great for colorizing photos. Older versions may still work, but some tools might look different. Always update Photoshop if possible for better performance.
2. Mode Conversion
Before you start, check the image mode. Go to Image → Mode and make sure it is set to RGB Color. Photoshop adds color only in RGB mode. If your image is in Grayscale, you must convert it first.
3. A Black and White Image
Choose a clear black and white photo. Make sure the image has good lighting and visible details. Blurry or very dark photos are harder to colorize. A sharp image gives better results.
4. Basic Knowledge of Layers
You should understand how layers work in Photoshop. Layers help you color different parts of the image separately. This makes editing easier and safer. You can also fix mistakes without damaging the original photo.
5. Layer Backup
Always duplicate the original background layer before editing. This keeps your original photo safe. If you make a mistake, you can go back easily. Right-click the layer and choose “Duplicate Layer.”
6. Cleaning
Clean the image before adding color. Remove dust, scratches, or small marks using the Spot Healing Brush or Clone Stamp Tool. A clean photo looks more realistic after colorizing. Small details make a big difference.
7. Filter Setup
You do not need filters to start colorizing. However, you can use slight noise reduction or sharpening if needed. Do this before adding color. Keep adjustments light to avoid losing details.
8. Selections
Learn how to use basic selection tools like the Lasso Tool or Quick Selection Tool. Selections help you color specific areas without affecting other parts. This gives you better control. Clean edges make the final image look natural.
9. High-Resolution Image
Use a high-resolution image whenever possible. Higher resolution keeps details sharp. Low-quality images may look blurry after editing. Good quality images give professional results.
10. Graphics Tablet (Optional)
A graphics tablet gives you better control while painting. It helps you color small areas more accurately. However, you can still do great work with a mouse. A tablet is helpful but not required.
Step-by-Step Guide to Colourise a Photo
Step 1: Open the Image in Photoshop
Go to File → Open and select your black and white photo. When the image opens, double-click the Background layer to unlock it. Click OK to turn it into a normal layer. This allows you to edit the image freely.
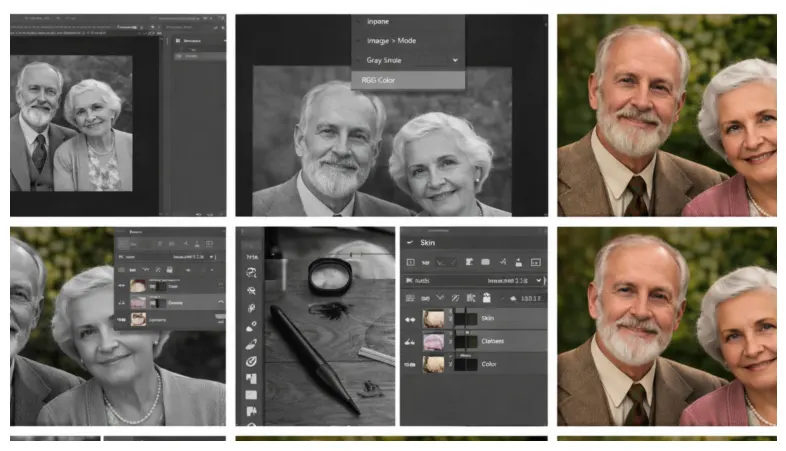
Step 2: Check and Convert Image Mode
Go to Image → Mode and make sure it is set to RGB Color. Photoshop can only add color in RGB mode. If the image is in Grayscale, switch it to RGB first. Without this step, you cannot paint color properly.
Step 3: Create a New Layer for Each Color
Click the New Layer icon in the Layers panel. Create a separate layer for each main area, like skin, hair, and clothes. This gives you better control and keeps your edits organized. It also makes fixing mistakes much easier.
Step 4: Change the Blend Mode to “Color”
Select the new layer and change its blend mode to Color. The Color mode keeps the original shadows and highlights. It only adds color without affecting brightness. This helps the photo look natural and realistic.
Step 5: Select the Brush Tool
Choose the Brush Tool from the toolbar. Use a soft round brush for smooth edges. Set opacity between 50% and 100% depending on the area. Lower opacity gives a softer, more natural look.
Step 6: Select the Skin Area
Use the Lasso Tool or Quick Selection Tool to select the skin. This prevents color from spilling into other areas. Zoom in for better accuracy. Clean selections make the final result look professional.
Step 7: Start Coloring the Skin
Pick a natural skin tone from the color picker. Gently paint over the selected skin area. Do not use very strong colors at first. You can adjust the tone later if needed.
Step 8: Add Color to Hair, Clothes, and Background
Create new layers for each object before painting. Use different colors for hair, clothing, and background. Keep each object on its own layer. This gives you full control over every area.
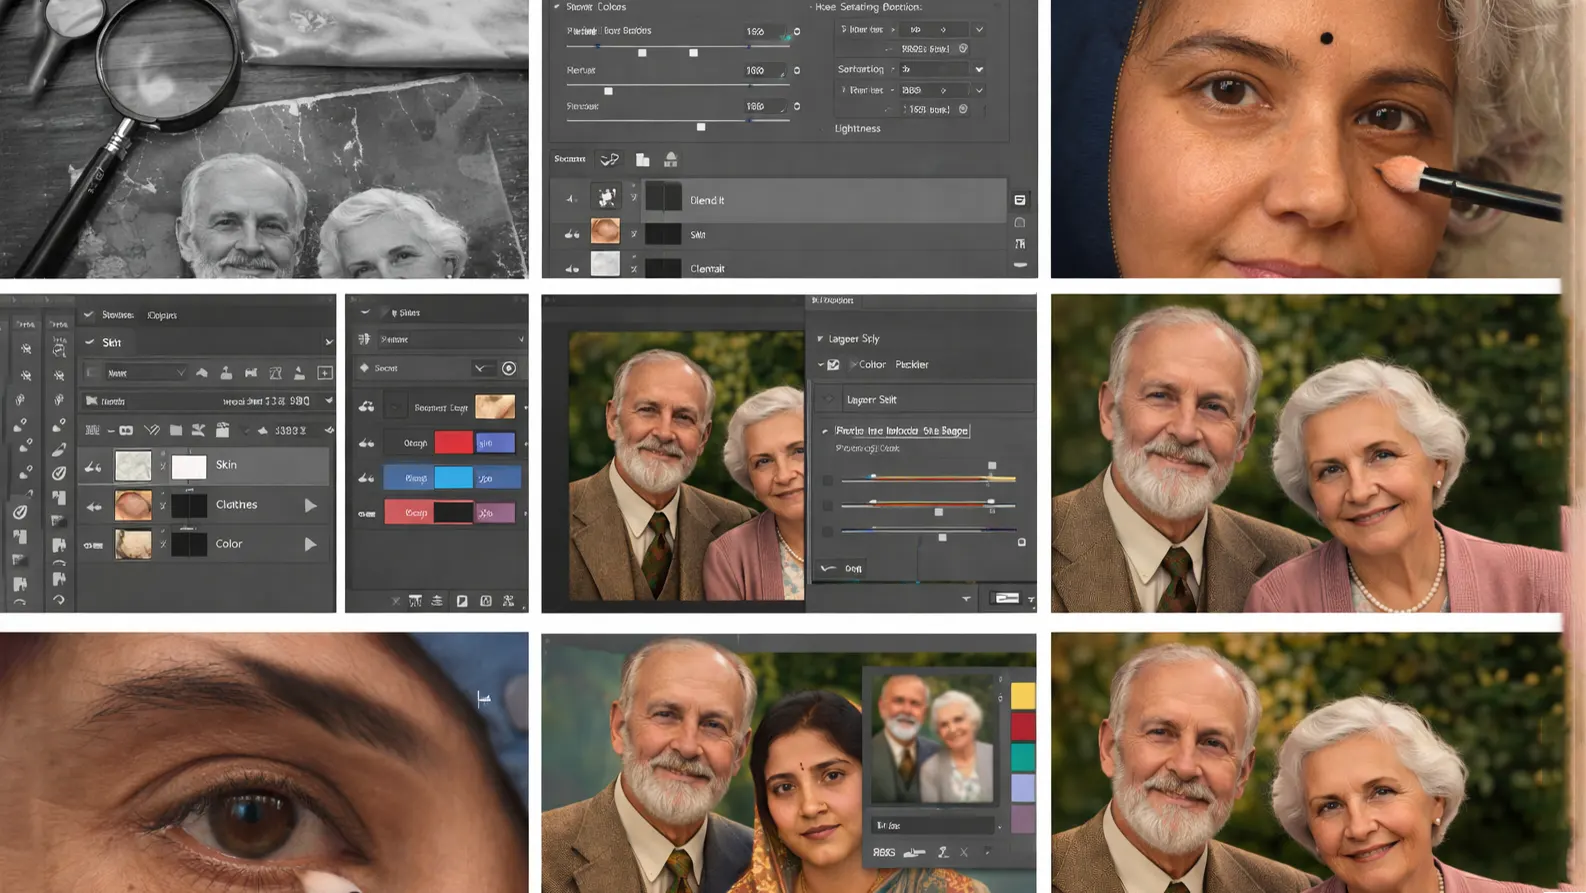
Step 9: Adjust the Colors
Go to Image → Adjustments → Hue/Saturation if needed. Use Color Balance to fine-tune warmth or cool tones. Adjust layer opacity to soften strong colors. Small changes often make a big difference.
Step 10: Refine with Layer Masking
Add a Layer Mask to fix edges or remove extra color. Use a soft black brush on the mask to erase unwanted areas. Switch to white if you need to bring color back. Masking helps create clean and smooth results.
Step 11: Add Final Adjustments
Use Curves to improve contrast and depth. Apply slight Color Balance if tones look uneven. If needed, add a small amount of grain to match the original photo texture. Keep adjustments subtle for a natural finish.
Tips for Realistic Colourisation
1. Fix Defects First
Before adding color, clean the photo carefully. Remove dust, scratches, and spots using the Spot Healing Brush or Clone Tool. Fixing small flaws makes the final image look more realistic. A clean base always gives better results.
2. Use Subdued Tones
Avoid very bright or strong colors at the start. Real-life colors are usually soft and balanced. Begin with muted tones and adjust slowly if needed. Subtle colors make the image look natural.
3. Choose Natural Skin Tones
Skin color should look realistic, not too orange or too pink. Pick a base tone and adjust it using Hue/Saturation if needed. Remember that shadows and highlights affect how skin appears. Always keep the tone soft and even.
4. Use Separate “Color” Layers
Create a new layer for each main object, such as skin, hair, or clothes. Change the blend mode to “Color” for each layer. This keeps brightness and shadows intact. Separate layers also make editing easier later.
5. Correct AI Errors (If Using AI Tools)
If you use AI colorization, review the image closely. AI often adds wrong colors to small details. Fix those areas manually with the Brush Tool. Small corrections can greatly improve realism.
6. Zoom In While Working
Zoom in to work on small details like eyes, lips, and edges. This helps you avoid messy lines and color spills. Take your time with fine areas. Clean details improve the overall quality.
7. Use a Soft Brush
Always use a soft round brush for smooth blending. Hard brushes can create sharp, unnatural edges. Adjust the brush size based on the area you are painting. Smooth transitions make the image look more real.
8. Use Lower Opacity for Natural Results
Lower opacity gives you better control over color intensity. It helps build color gradually instead of adding too much at once. You can layer strokes to deepen the color slowly. This method creates a more natural finish.
9. Use Reference Images
Look at real photos for color inspiration. Study skin tones, hair shades, and fabric colors. Reference images help you choose realistic tones. They also improve your understanding of light and shadow.
Colorizing Black and White Photos: Common Mistakes to Avoid
1. Skipping Contrast and Lighting Fixes
Many people jump straight into adding color without checking the photo’s lighting. If the image looks flat or dull, the colors will not look right either. Take a few minutes to adjust contrast using Curves or Levels first. Good lighting makes every color look more realistic.
2. Making Colors Too Bright
It is easy to get excited and choose bold colors, but that usually makes the photo look fake. Real-life colors are softer than we think. Start gently and build up the tone slowly. If something looks too strong, lower the opacity instead of repainting everything.
3. Putting Everything on One Layer
Working on just one layer may seem faster, but it creates problems later. If you need to fix one area, you might ruin another part. Separate layers keep your work clean and flexible. It also makes color adjustments much easier.
4. Forgetting About “Blend If”
A lot of beginners never touch the “Blend If” sliders. They focus only on painting and adjusting opacity. But this small setting can quietly improve your results. It helps color settle into the shadows and highlights instead of sitting on top of the image. Once you try it, you’ll notice the difference right away.
5. Not Using Selection Tools Carefully
Coloring without making a proper selection can get messy fast. Paint can easily cross the edges, especially around hair and fine details. Taking a few extra seconds to outline the area makes a big difference. Tools like the Lasso or Quick Selection Tool help you stay precise. Clean edges are one of the biggest signs of professional work.
6. Trusting AI Too Much
AI tools can be helpful, but they should not do all the work for you. Sometimes AI chooses the wrong skin tone or adds strange colors to small details. If you rely on it without checking, the photo may look unnatural. Always review the image closely and make manual adjustments where needed. Your eye and judgment matter more than any automatic tool.
7. Ignoring Damage in Old Photos
Old photos often have dust, scratches, or faded areas. If you add color before fixing these problems, they become more noticeable. Clean the image first. A restored photo will always look better after color is added.
8. Forgetting to Adjust White Balance
White balance affects how warm or cool the entire image looks. If the tones feel off, the photo may look unnatural. Use Color Balance to correct it at the end. Even a small change can make everything look more natural.
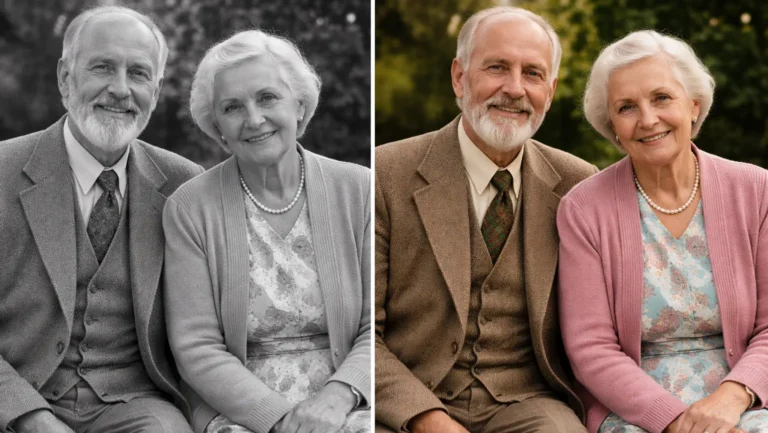
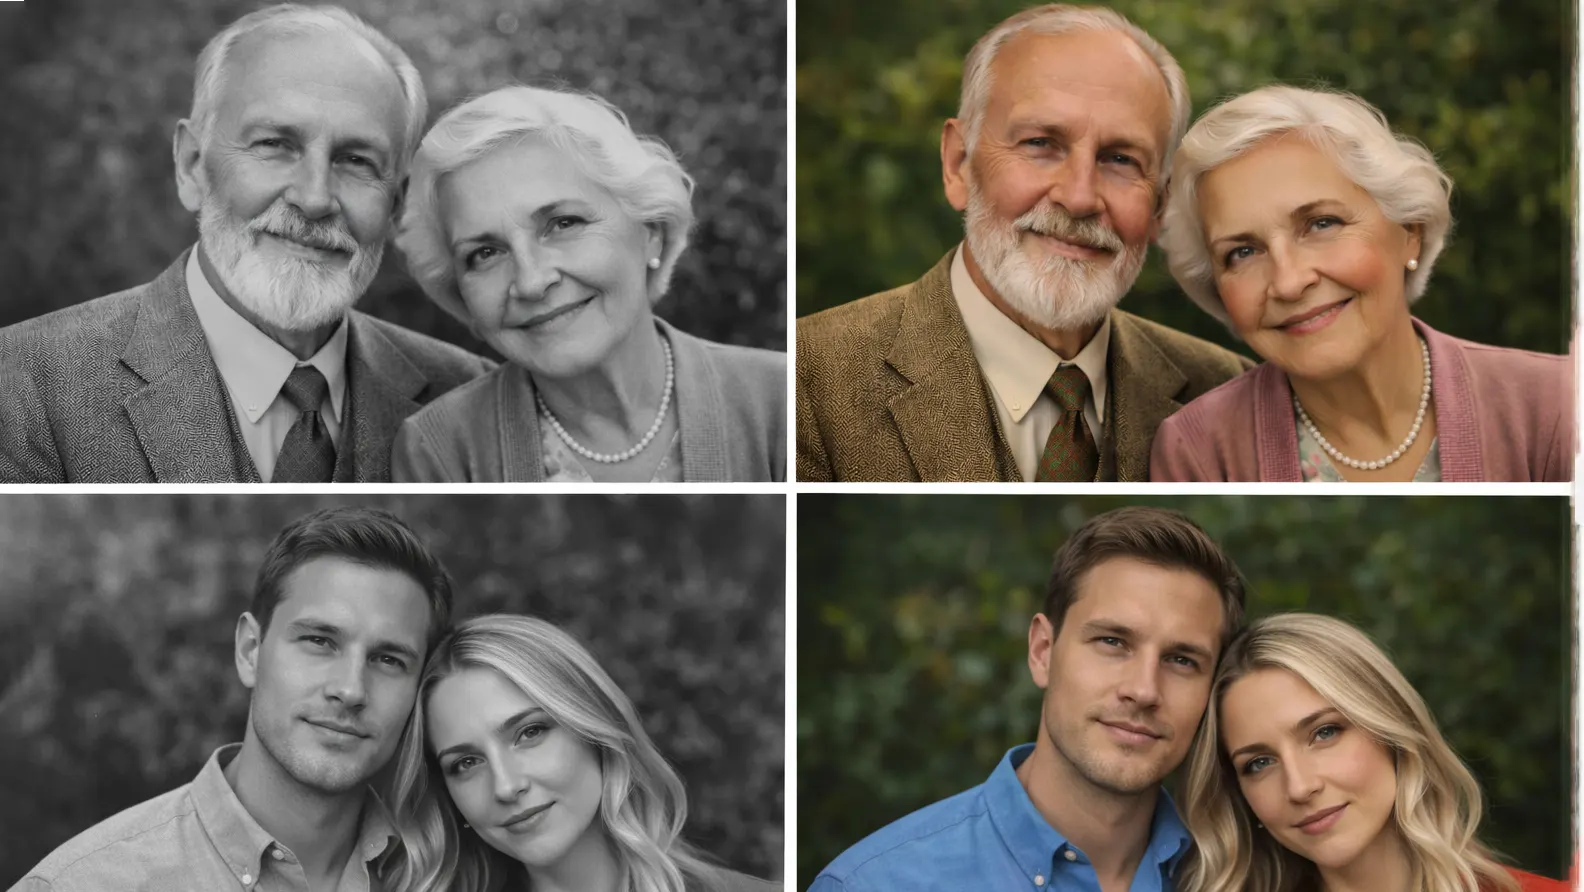
Final Result & Before/After
Once you finish colorizing, take a moment to compare the final image with the original black and white photo. Look at the lighting, skin tones, and small details. Make sure the colors feel natural and balanced, not too strong or dull.
It helps to place the before and after images side by side. This makes it easier to see the improvement and spot anything that still needs adjustment. Small refinements at this stage can make a big difference.
A strong before-and-after comparison also shows how much life color can bring back to an old photo. The main goal of a professional photo restoration service is to fix issues like stains, scratches, and fading in a photo and deliver a cleaner, better-quality result.
Conclusion
Seeing an old black and white photo in color for the first time feels different. The details pop more, and the picture feels closer and more alive. When you add color slowly in layers, the image looks natural instead of fake. Care and patience matter more than speed.
If the photo has scratches, fading, or other signs of age, deal with those first. You can repair small problems on your own in Photoshop. For heavy damage, a trusted photo restoration service can help recover lost detail before you begin coloring. Once the photo looks clean and balanced, the color will blend in more naturally and give the image a fresh new life.