

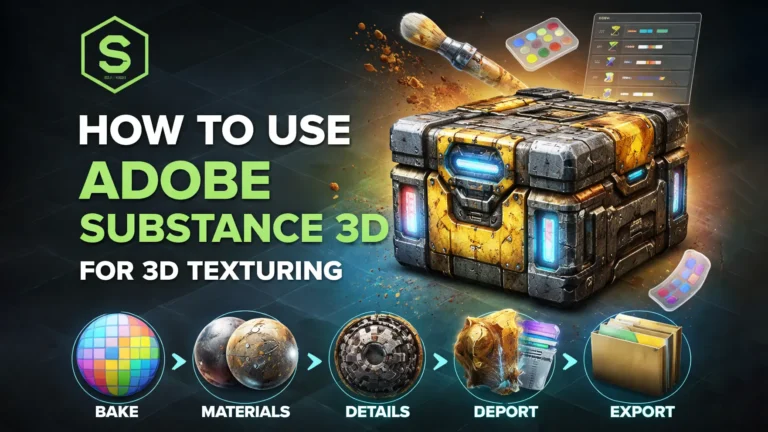
When I first started learning 3D texturing, everything felt confusing. However, Adobe Substance 3D made the process much easier. It gives you full control over materials, details, and surface effects. In this step-by-step guide, you will learn how to set up a project, bake mesh maps, apply materials, add realistic details, and export textures correctly.
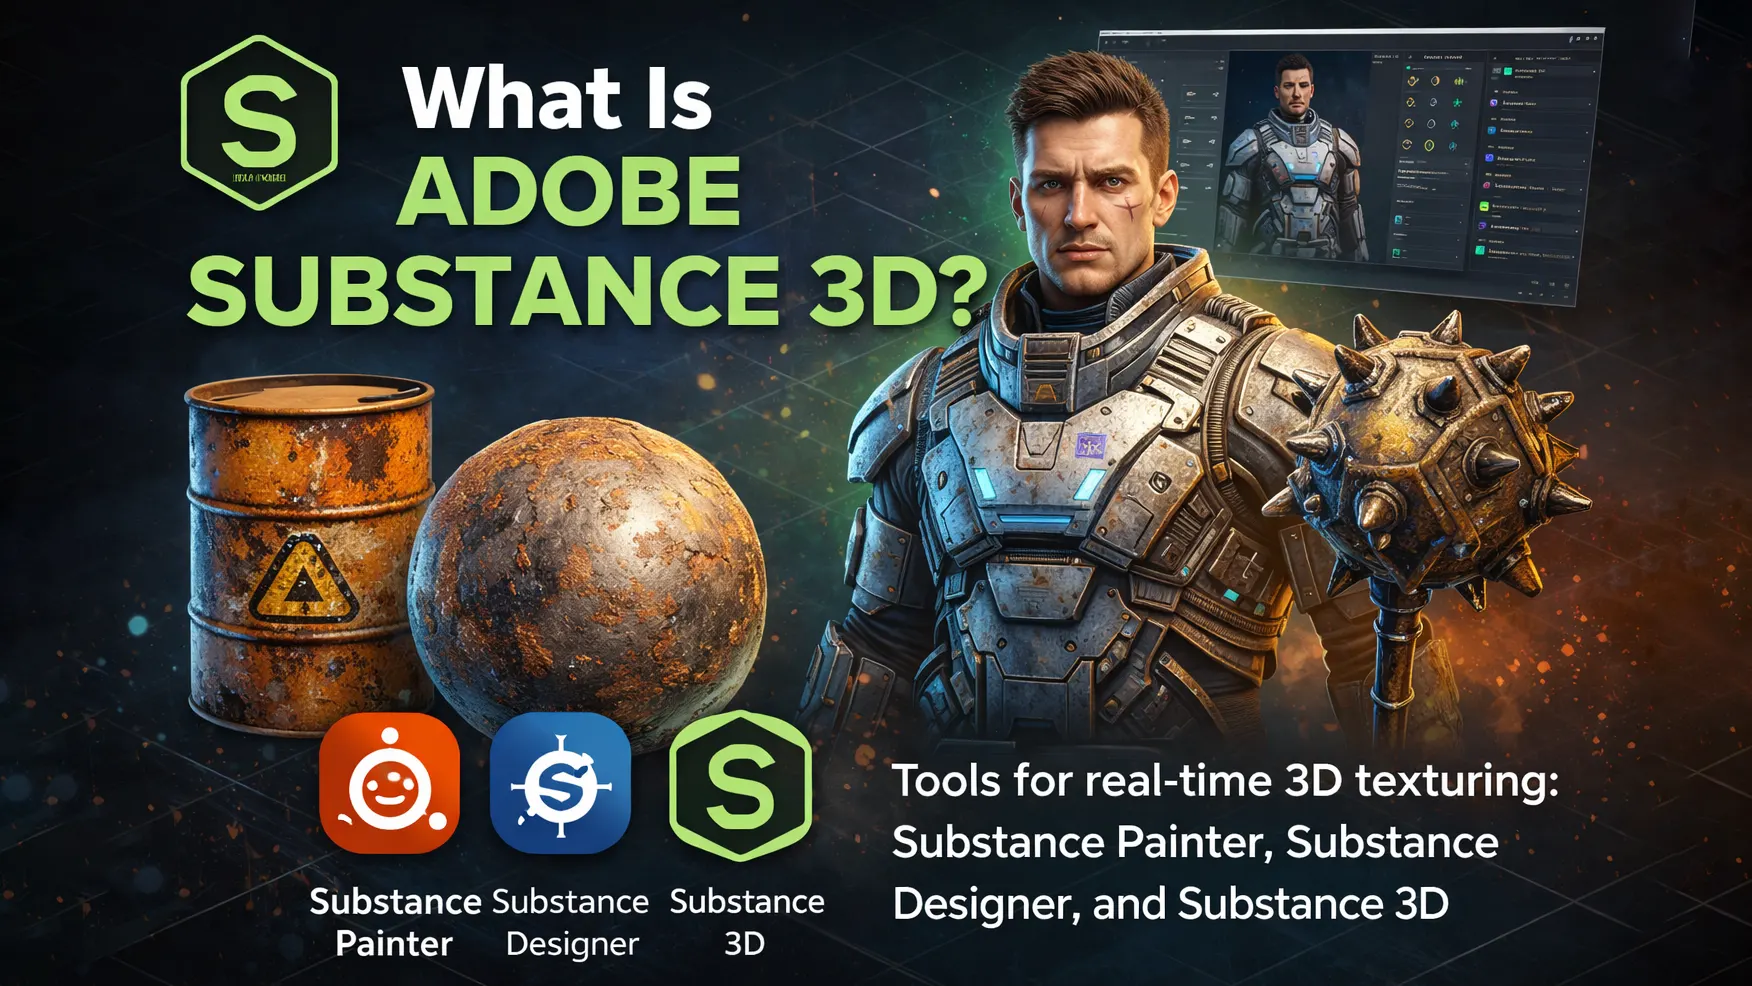
What Is Adobe Substance 3D?
Adobe Substance 3D is a set of tools used for creating textures and materials for 3D models. It helps artists make surfaces look realistic. For example, you can create metal, fabric, wood, or skin with fine details. Because of this, it is widely used for 3D game texturing and 3D asset creation.
The most popular tool in the package is Substance 3D Painter. Artists use it for character texturing using Substance 3D Painter and adding smart materials. These smart materials in Substance 3D react to edges and surface details automatically. As a result, textures look natural without painting everything by hand.
There is also Substance 3D Designer, which allows artists to build custom procedural materials. Together, these tools form a powerful Substance 3D pipeline used in modern game art workflow and Unreal Engine projects.
What You Need Before You Start
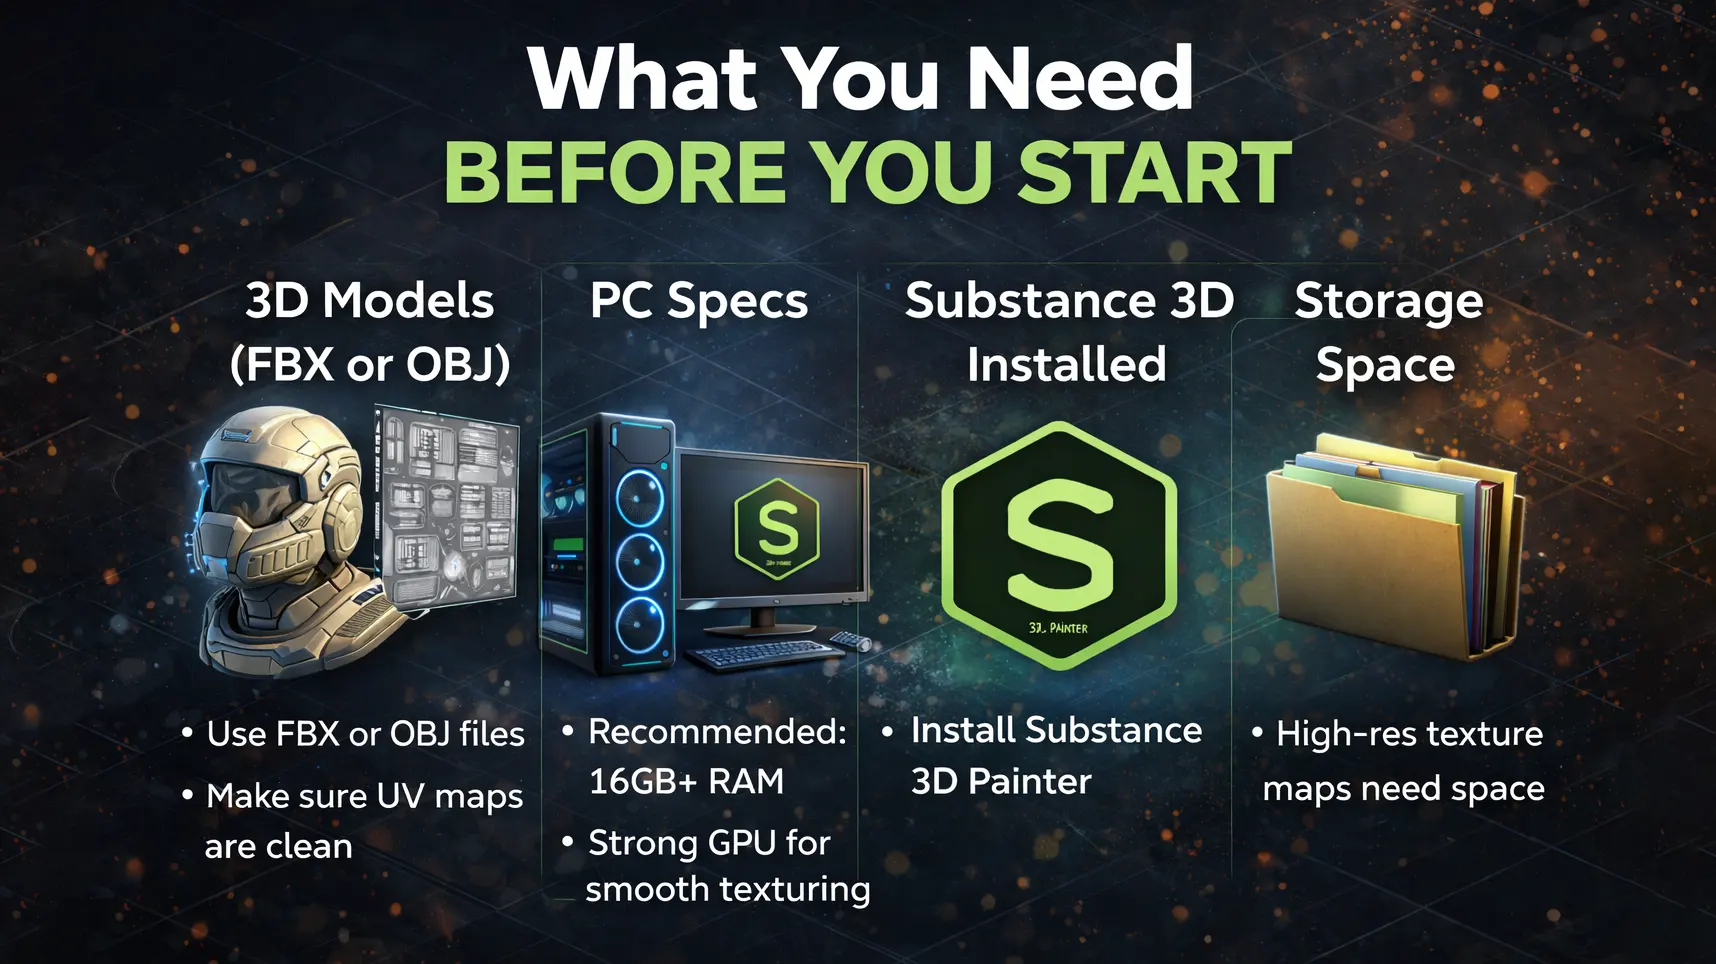
Before you begin, make sure you have a few important things ready. Proper setup will save you time and prevent problems later.
First, you need a 3D model in FBX or OBJ format. These formats work best in Substance 3D Painter. Also, make sure your model has clean UV maps. Good UV mapping is essential for smooth and accurate 3D texturing.
Next, check your computer specifications. You should have at least 8GB of RAM, but 16GB is strongly recommended for better performance. In addition, a decent graphics card is important. Since Adobe Substance 3D works in real time, a strong GPU helps you view textures smoothly without lag.
You also need Substance 3D Painter installed. This is the main tool used for 3D game texturing and 3D character texturing. If you plan to create custom materials, you may later explore Substance 3D Designer, but Painter is enough to get started.
Finally, make sure you have enough storage space. High-resolution texture maps can take up significant space, especially when working on detailed 3D asset creation projects.
Once everything is ready, open the software and start your project with confidence.
Step 1: Create a New Project
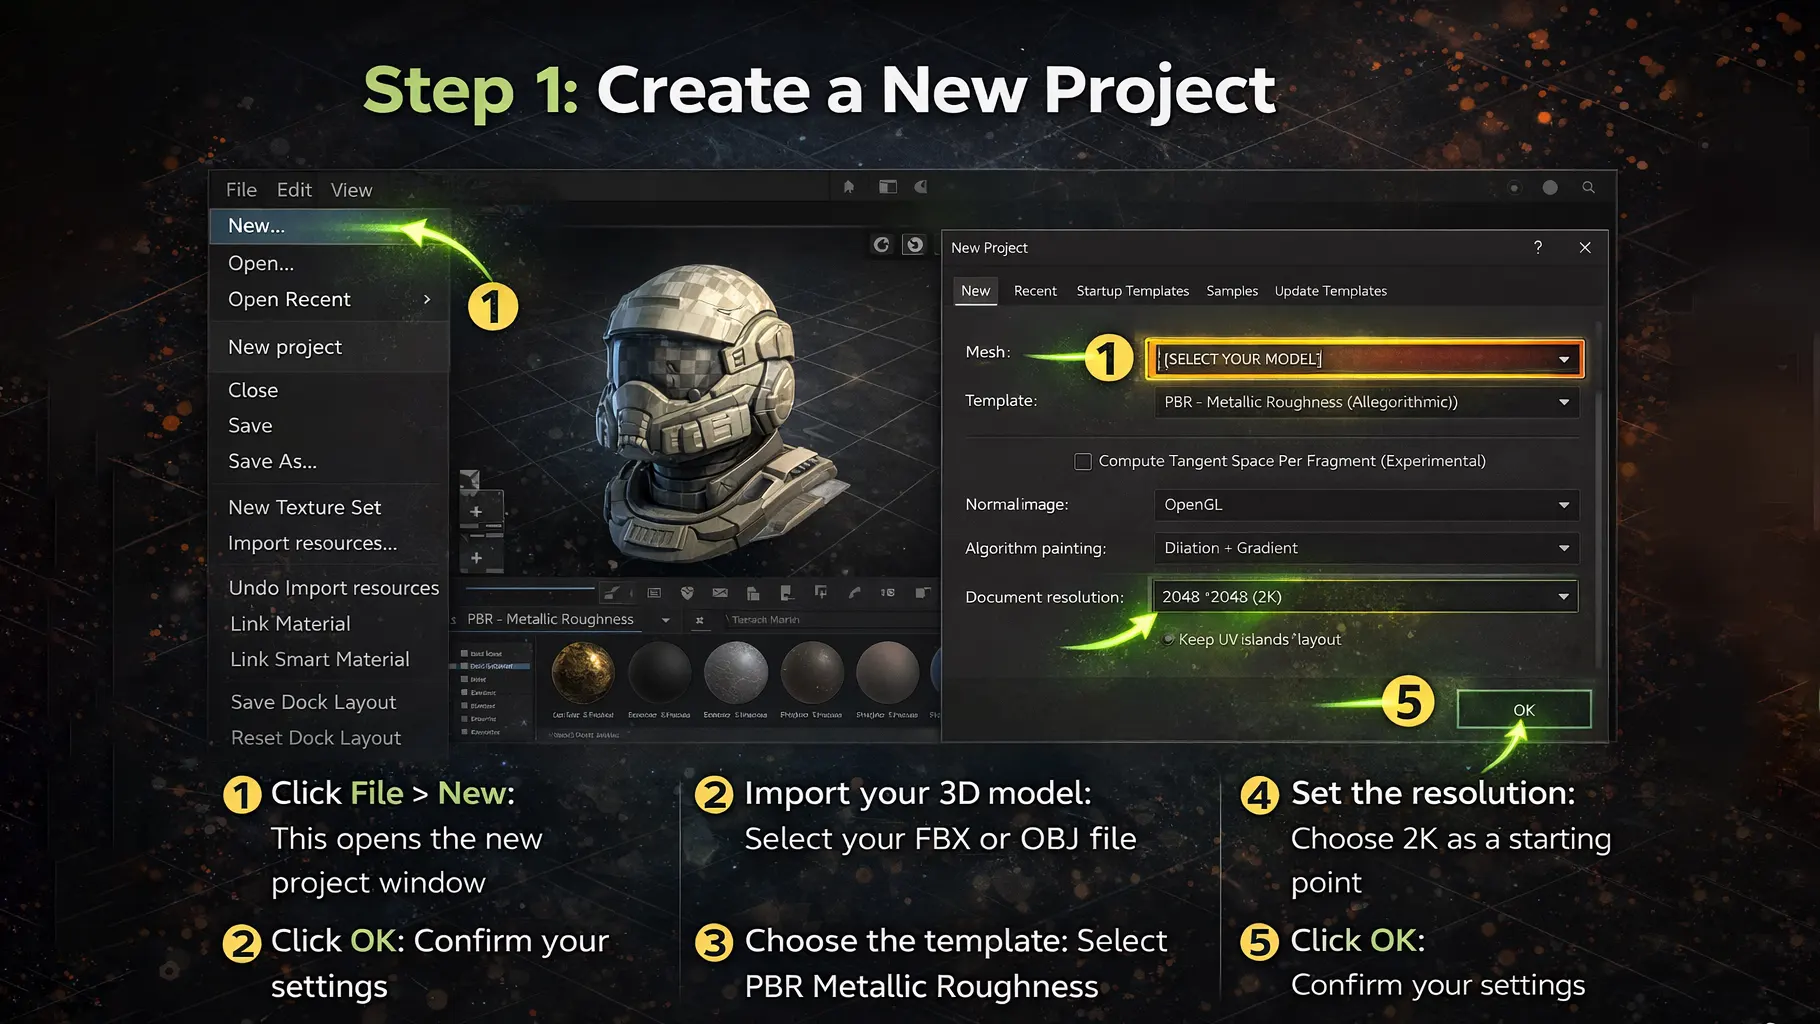
First, open Substance 3D Painter. This is where your 3D texturing process begins. Creating the correct project settings is important because it affects your entire workflow.
Follow these steps:
- Click File > New: This opens the new project window.
- Import your 3D model: Select your FBX or OBJ file. Make sure the model has proper UV mapping.
- Choose the template: Select PBR Metallic Roughness, which is the default and most commonly used template for 3D game texturing.
- Set the resolution: Choose 2K as a starting point. It offers good quality without slowing down performance. You can increase it later if needed.
After setting everything correctly, click OK.
Now your model will appear in the 3D viewport. You are ready to move to the next step in the Substance 3D pipeline.
Step 2: Bake Mesh Maps
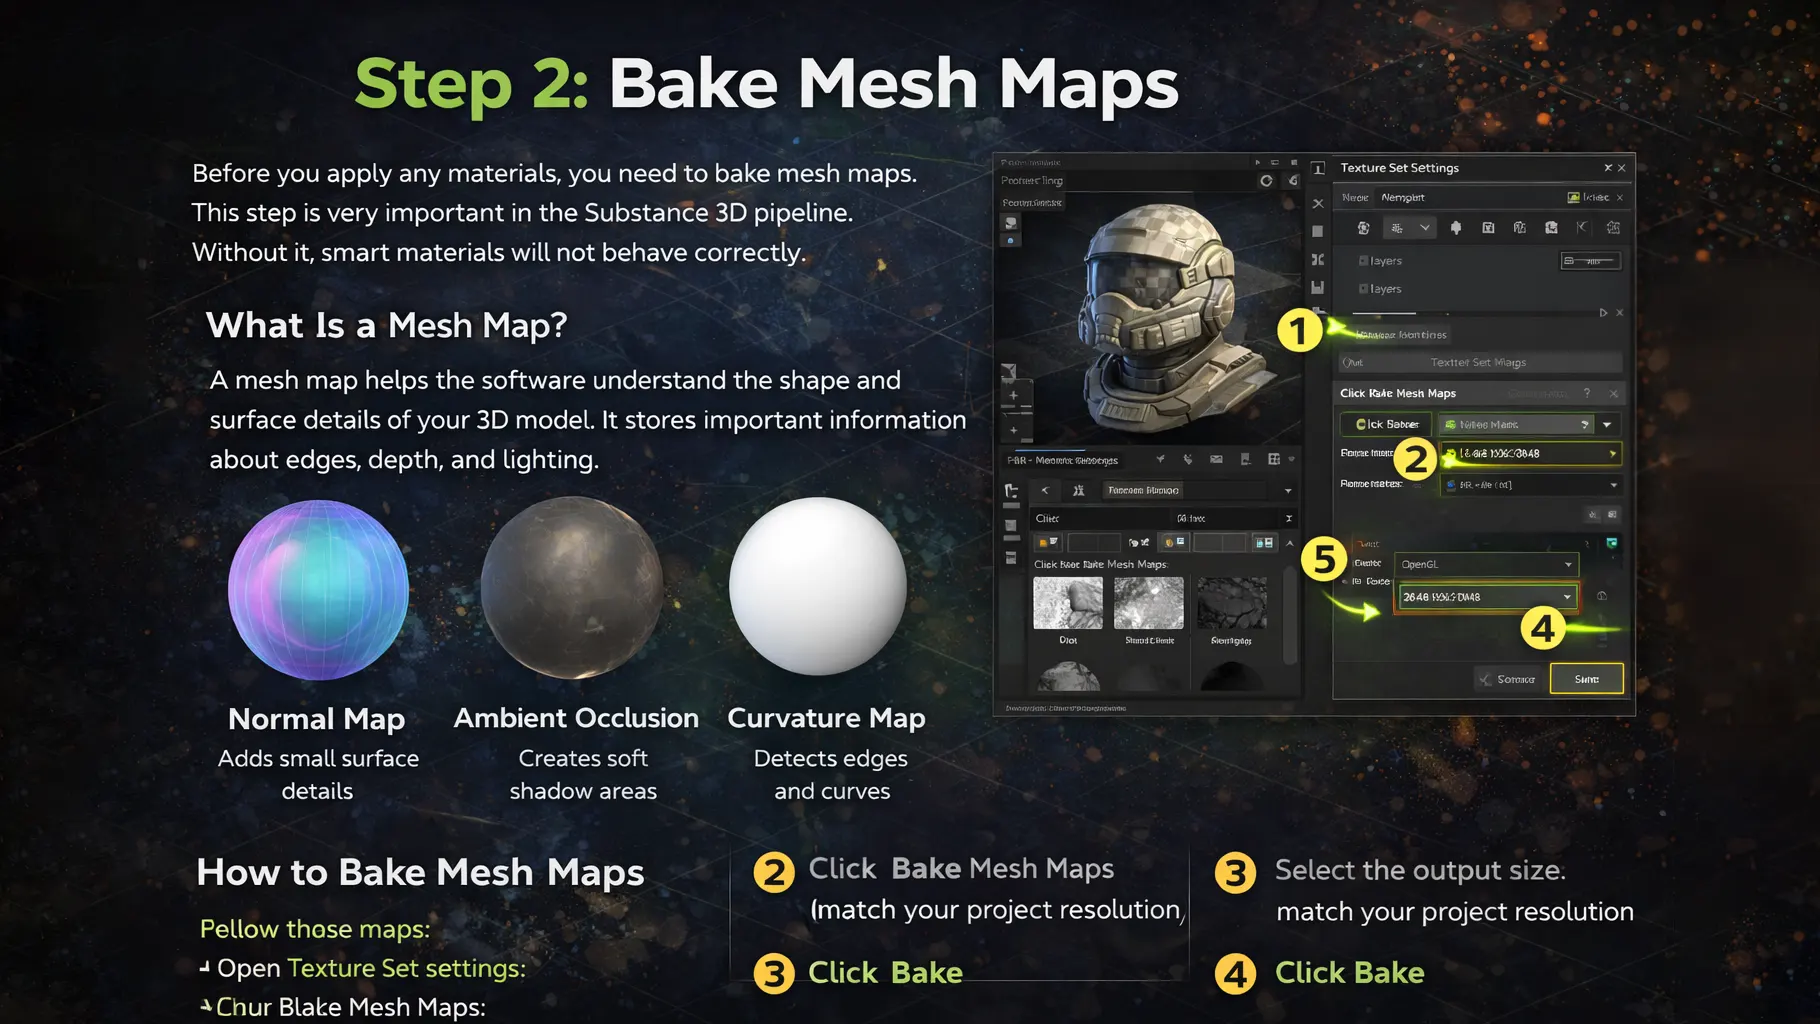
Before you apply any materials, you need to bake mesh maps. This step is very important in the Substance 3D pipeline. Without it, smart materials will not behave correctly.
What Is a Mesh Map?
A mesh map helps the software understand the shape and surface details of your 3D model. It stores important information about edges, depth, and lighting.
Common mesh maps include:
- Normal Map: adds small surface details without increasing geometry. It helps create the illusion of depth and fine details on flat surfaces.
- Ambient Occlusion (AO): creates soft shadow areas. It makes corners and tight spaces look darker and more realistic.
- Curvature Map: detects edges and surface curves. It allows smart materials to apply effects like edge wear and highlights automatically.
These maps improve the quality of 3D game texturing and 3D character texturing.
Why Is Baking Important?
Smart materials in Substance 3D rely on mesh maps. They use this data to detect edges, corners, and surface depth. If you skip baking, dirt, scratches, and edge wear effects will not appear correctly.
How to Bake Mesh Maps
Follow these steps:
- Open Texture Set Settings
- Click Bake Mesh Maps
- Select the output size (match your project resolution)
- Click Bake
Wait for the process to finish.
After baking, your materials will respond properly, and your textures will look much more realistic.

Step 3: Apply Materials
Now comes the creative part. This is where your model starts to look realistic.
On the left side, open the Shelf panel. From there, choose a smart material. Smart materials in Substance 3D are designed to react to edges and surface details automatically. This makes the 3D texturing process faster and more professional.
Follow these steps:
- Drag and drop the material onto your model
The material will instantly cover the entire mesh. - The base texture will apply automatically
You will see color, roughness, and surface detail appear at once. - Select the layer to adjust color
Click on the layer in the Layers panel to edit its properties. - Modify roughness and metallic settings
Adjust these values to control how shiny or matte the surface looks.
You can also add multiple layers. For example, you can place metal under paint or add fabric over a base surface. Layering adds depth and makes your texture more realistic, especially in 3D game texturing and 3D character texturing workflows.
Step 4: Add Details with Layers and Masks
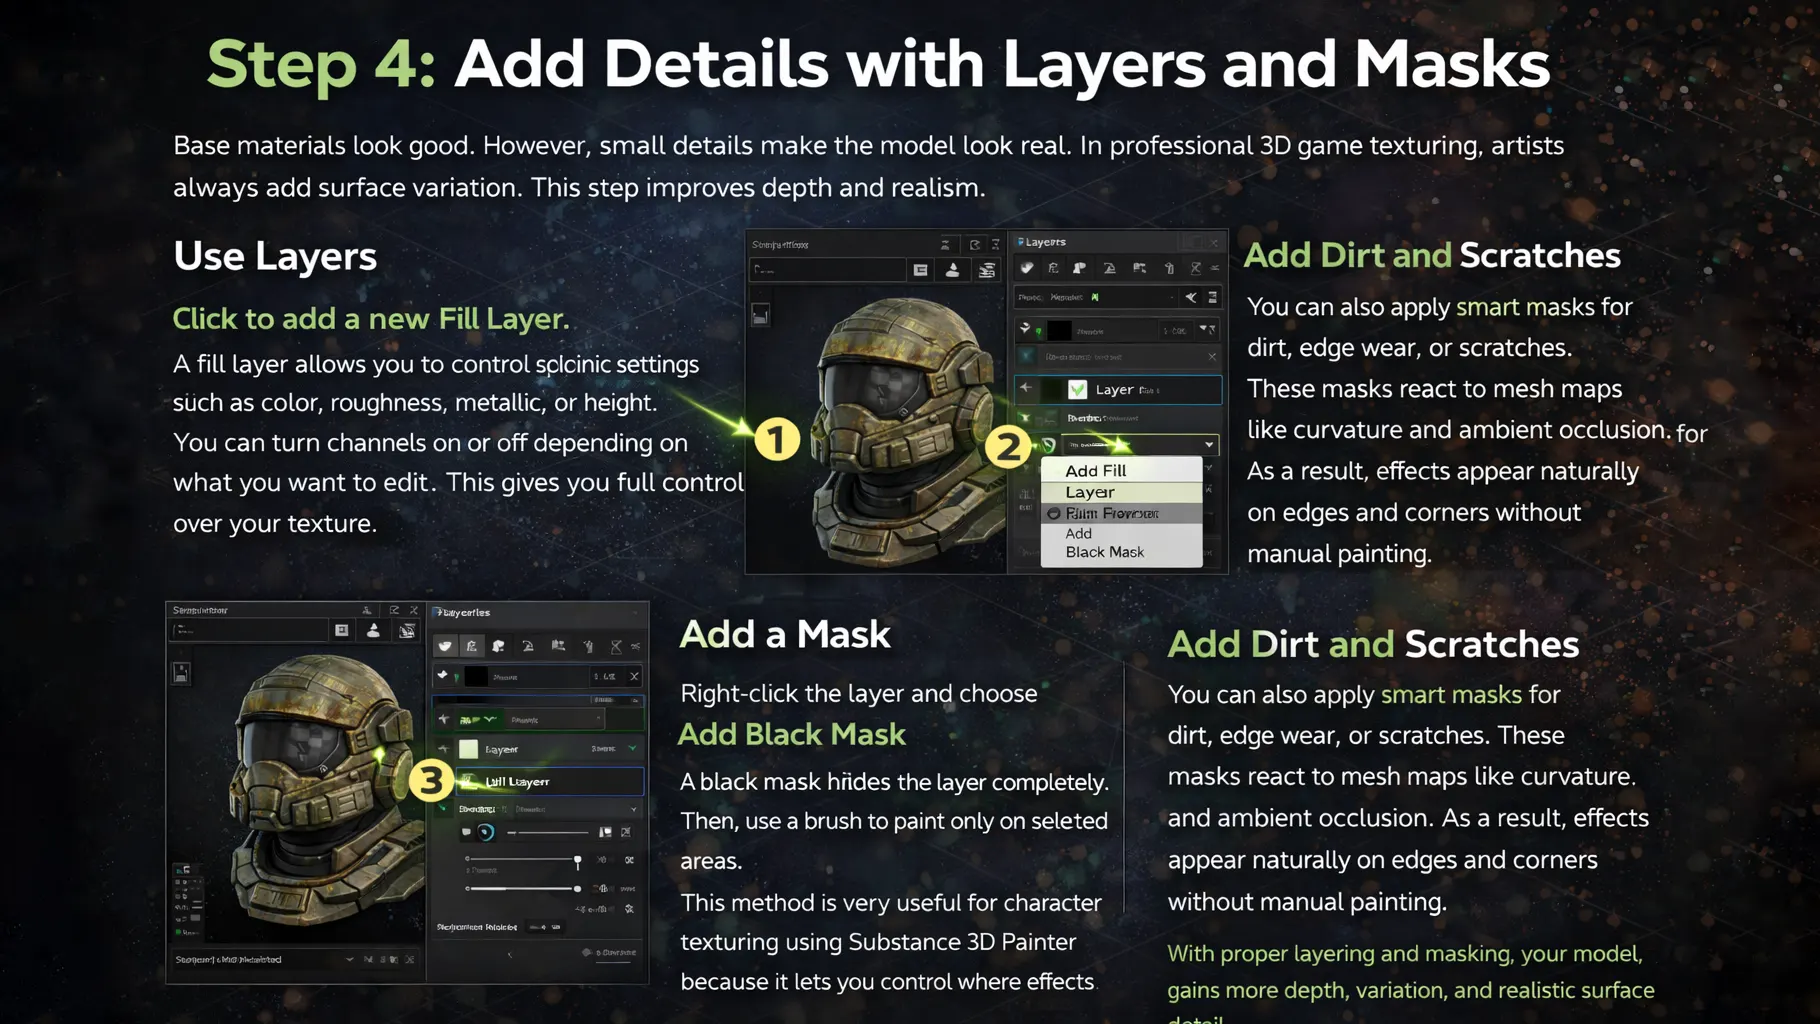
Base materials look good. However, small details make the model look real. In professional 3D game texturing, artists always add surface variation. This step improves depth and realism.
Use Layers
Click to add a new Fill Layer. A fill layer allows you to control specific settings such as color, roughness, metallic, or height. You can turn channels on or off depending on what you want to edit. This gives you full control over your texture.
Add a Mask
Right-click the layer and choose Add Black Mask. A black mask hides the layer completely. Then, use a brush to paint only on selected areas. This method is very useful for character texturing using Substance 3D Painter because it lets you control where effects appear.
Add Dirt and Scratches
You can also apply smart masks for dirt, edge wear, or scratches. These masks react to mesh maps like curvature and ambient occlusion. As a result, effects appear naturally on edges and corners without manual painting.
With proper layering and masking, your model gains more depth, variation, and realistic surface detail.
Step 5: Export Textures
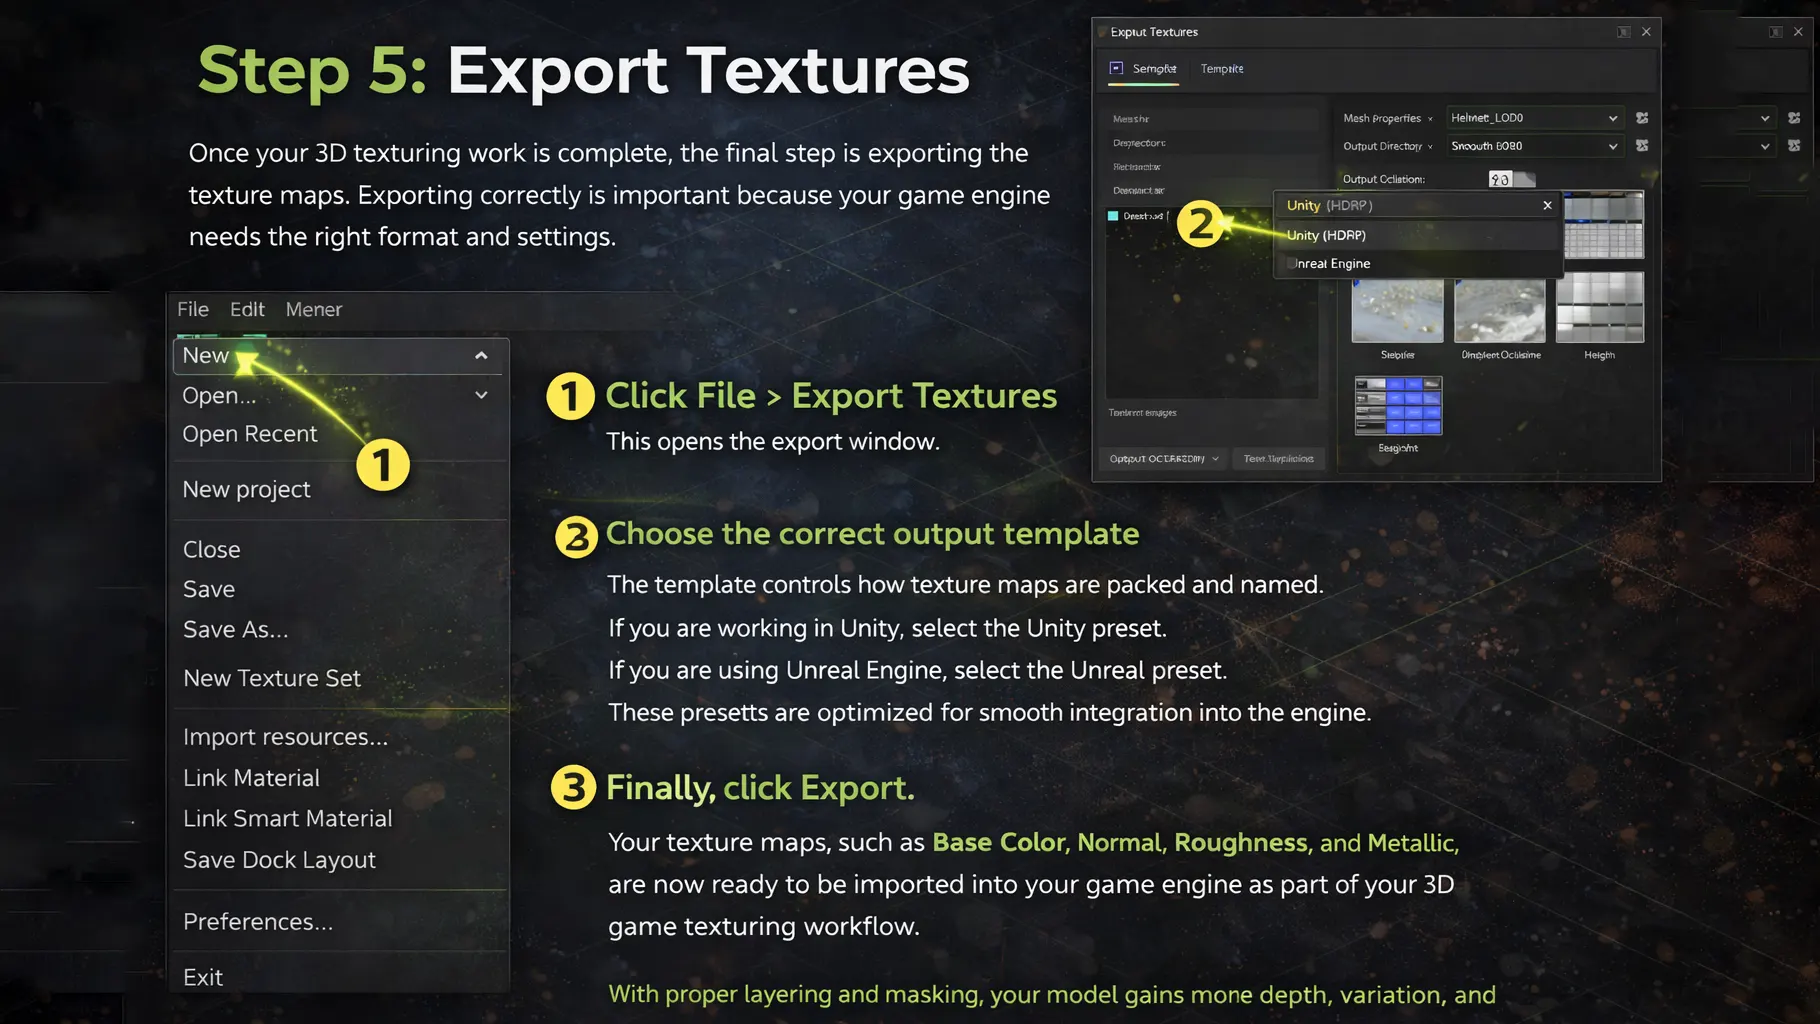
Once your 3D texturing work is complete, the final step is exporting the texture maps. Exporting correctly is important because your game engine needs the right format and settings.
Follow these steps:
- Click File > Export Textures
This opens the export window. - Choose the correct output template
The template controls how texture maps are packed and named.
If you are working in Unity, select the Unity preset. If you are using Unreal Engine, select the Unreal preset. These presets are optimized for smooth integration into the engine.
Next, choose your export location. Make sure you organize your files properly so they are easy to find later.
Finally, click Export.
Your texture maps, such as Base Color, Normal, Roughness, and Metallic, are now ready to be imported into your game engine as part of your 3D game texturing workflow.
Common Mistakes to Avoid
Many beginners make simple mistakes during 3D texturing. These mistakes can reduce quality and slow down your workflow. However, you can avoid them with a little attention.
- Using Low Resolution: Low resolution makes textures look blurry and pixelated. Always choose at least 2K resolution for better clarity, especially in 3D game texturing projects.
- Adding Too Many Effects: Too much dirt, scratches, or edge wear can make the model look unrealistic. Keep effects balanced so the surface feels natural.
- Skipping Mesh Baking: Without proper mesh baking, smart materials in Substance 3D will not react correctly. Always bake mesh maps before applying materials.
Avoiding these common mistakes will help you achieve cleaner, more professional results.
Conclusion
Now you understand how to use Adobe Substance 3D for 3D texturing from start to finish. By creating a project, baking mesh maps, applying smart materials, adding detailed layers, and exporting textures correctly, you can build realistic surfaces for games and 3D models. Practice regularly, begin with simple assets, and gradually move to complex characters to improve your skills and confidence.


