

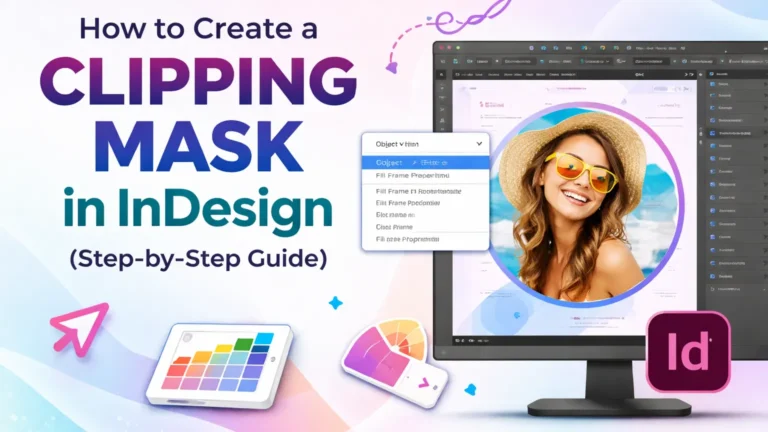
If you work with Adobe InDesign, you often need to control how images appear inside your layout. For example, you may want an image to fit perfectly inside a circle, a custom shape, or a text frame. However, you do not want to edit the original image file. This is where a clipping mask in InDesign becomes very useful.
InDesign uses frames to control how much of an image is visible. As a result, you can crop, adjust, and move images without damaging them. This method is clean, flexible, and fully non-destructive. In this step-by-step guide, you will learn how to create a clipping mask in InDesign, adjust it properly, and fix common issues easily.

What Is a Clipping Mask in InDesign?
A clipping mask in InDesign is a way to control how much of an image is visible inside a frame. InDesign works differently from Illustrator or Photoshop. Instead of using a special “Make Clipping Mask” command, InDesign uses frames to mask images automatically.
In simple terms, every image in InDesign sits inside a frame. Therefore, the frame acts like a container. It hides the parts of the image that go outside its boundaries. As a result, you can crop, resize, and move the image without changing the original file. This makes the process non-destructive and very flexible.
For example, if you place an image inside a circle frame, only the part inside the circle will be visible. However, the full image still exists inside the document. You can adjust it anytime using the Direct Selection Tool.
When Should You Use a Clipping Mask in InDesign?
You should use a clipping mask in InDesign whenever you need to mask an image in InDesign without editing the original file. For example, in brochures, magazines, catalogs, or social media layouts, images must fit inside clean shapes. Instead of cropping the image in Photoshop, you can control everything directly inside InDesign. As a result, your workflow becomes faster and more efficient.
In addition, if you want to insert an image into a shape in InDesign, clipping masks make the process simple. You can place images inside circles, custom shapes, or even text frames. Therefore, your layout looks modern and professional.
Clipping masks are also useful when adjusting image alignment. If you need to crop an image in InDesign or reposition it inside a frame, you can do it without damaging the file. Because of this, designers prefer using frame-based image masking in both print and digital projects.
How to Create a Clipping Mask in InDesign (Step-by-Step)
Now let’s learn how to create a clipping mask in InDesign using frames. InDesign makes it easy to mask an image in InDesign without editing the original file. Follow these simple steps carefully.
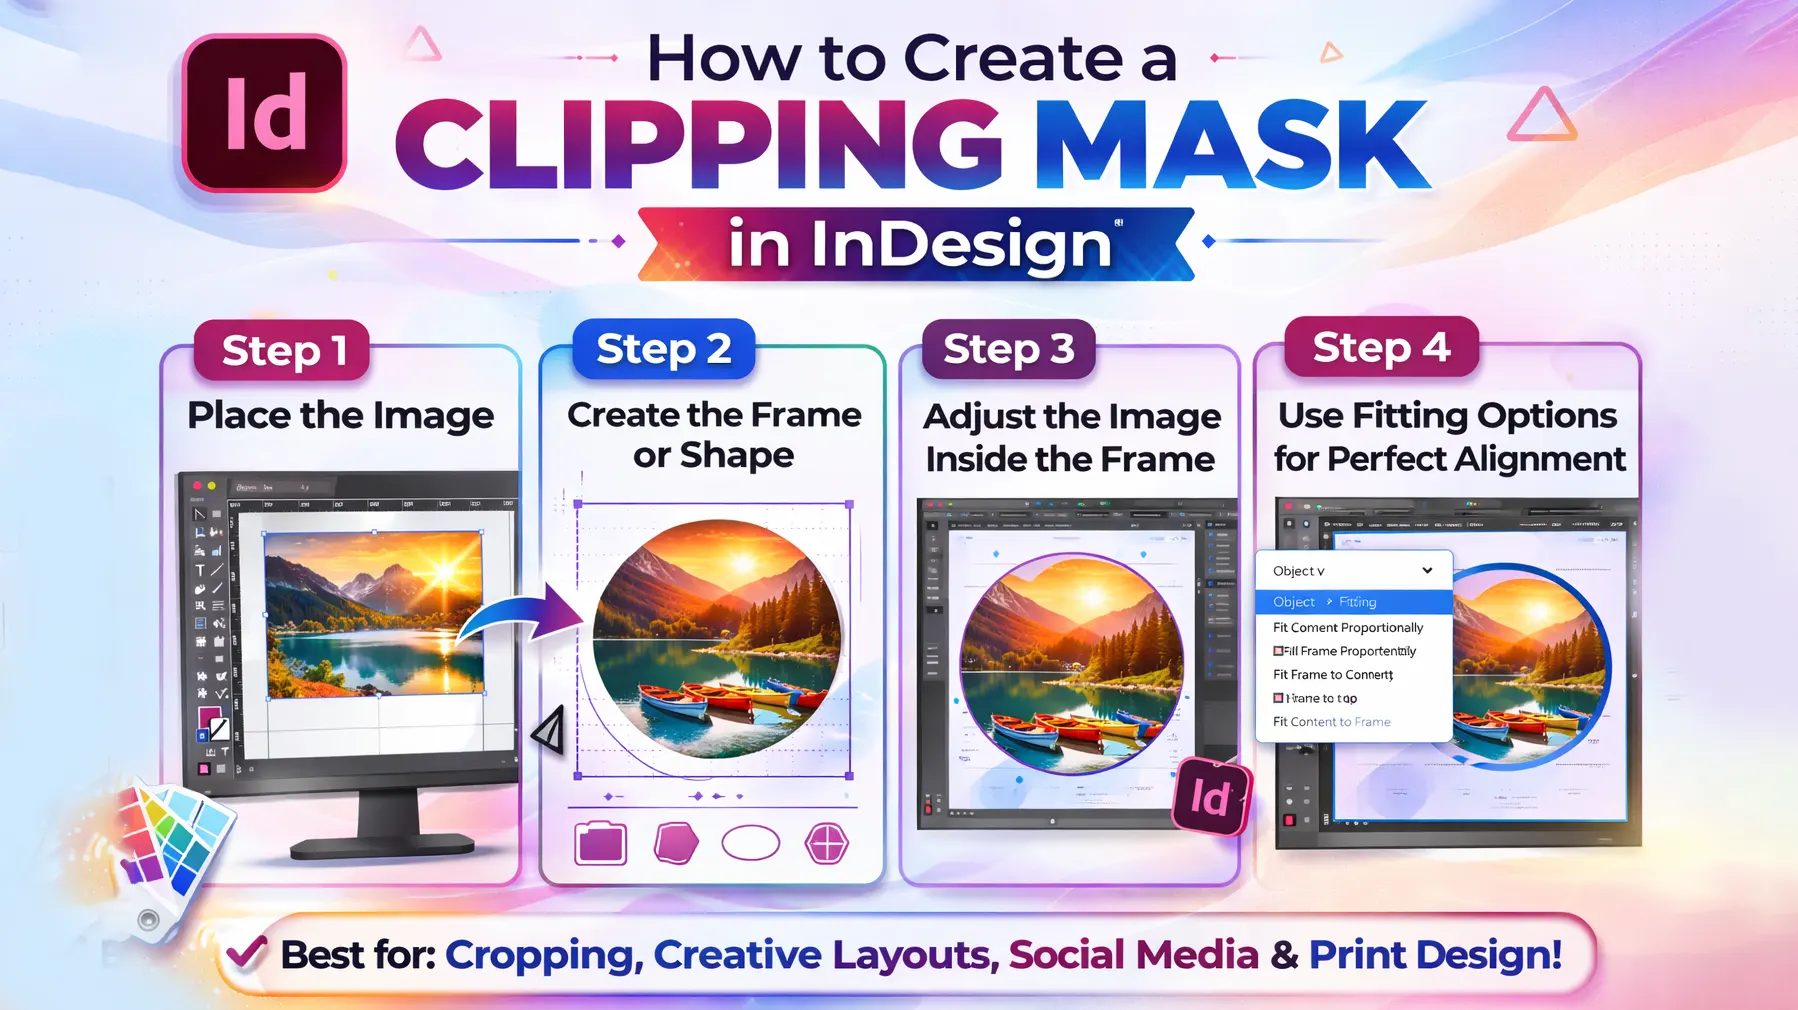
Step 1: Place the Image
First, open your document. Then go to File → Place and select your image. After that, click and drag on the page to place the image inside a frame.
In InDesign, every image sits inside a frame by default. Therefore, you are already working with a basic image mask. This makes it easy to crop an image in InDesign without damaging the file.
Step 2: Create the Frame or Shape
Next, create the shape that will act as your clipping mask. You can use the Rectangle Tool, Ellipse Tool, or Polygon Tool. If you want a custom look, use the Pen Tool to draw a unique shape.
This frame will control how the image appears. In other words, it defines which part of the image stays visible.
Step 3: Adjust the Image Inside the Frame
Now, if the image does not align correctly, use the Direct Selection Tool (white arrow). Click on the image inside the frame and move it until it looks right.
As a result, you can fit an image inside a shape in InDesign without resizing the frame itself. This gives you full control over composition and layout.
Step 4: Use Fitting Options for Perfect Alignment
Finally, go to Object → Fitting. Then choose one of these options:
-
Fit Content Proportionally
-
Fill Frame Proportionally
-
Fit Frame to Content
These tools help you fit an image in a frame in InDesign properly. Therefore, your layout looks clean and professional

Tips for Using Clipping Mask in InDesign
Using a clipping mask in InDesign is simple. However, small adjustments can improve your layout a lot. Here are some practical tips you can apply in real projects.
Use Fill Frame Proportionally for better results.
If your image does not cover the frame properly, go to Object → Fitting → Fill Frame Proportionally. This helps you fit the image inside the frame without distortion.
Use the Direct Selection Tool for precise control.
Instead of resizing the frame, click the image inside it using the white arrow tool. Then move it to adjust the visible area. As a result, you can crop an image in InDesign more accurately.
Keep frame sizes consistent.
If you are designing a magazine or catalog, use equal frame sizes across pages. Therefore, your layout looks balanced and professional.
Use text wrap carefully.
When placing images near text, apply text wrap from the Control Panel. This ensures the content flows cleanly around the masked image.
These small tips will help you improve your InDesign image masking workflow and maintain clean, organized layouts.
Common Clipping Mask Problems and Solutions
Even though creating a clipping mask in InDesign is simple, designers often face small issues. However, most problems are easy to fix once you understand how frames work.
Image Is Not Fitting Inside the Frame
Sometimes the image looks too small or too large inside the frame. In this case, go to Object → Fitting and choose Fill Frame Proportionally or Fit Content Proportionally. This will quickly fix alignment and scaling problems.
Image Looks Cropped Incorrectly
If the wrong part of the image is visible, use the Direct Selection Tool (white arrow). Then click on the image inside the frame and move it. As a result, you can adjust the visible area without changing the frame size.
Cannot Move the Image Separately
Many beginners try to move the frame instead of the image. Therefore, always use the white arrow tool to select the image itself. The black arrow selects the frame, while the white arrow selects the content inside it.
Image Disappears After Placing
If your image seems invisible, check whether the frame is too small. Also, make sure the image is not positioned outside the visible area. Resize the frame or reposition the image to solve the issue.
By understanding these common InDesign image masking problems, you can work faster and avoid layout mistakes.

Clipping Mask vs Other Masking Methods in InDesign
In InDesign, the most common way to mask an image is by using frames. This is often called a clipping mask in InDesign. The frame controls which part of the image is visible. Therefore, you can easily crop an image in InDesign without editing the original file.
However, InDesign also offers other options, such as transparency effects and Photoshop clipping paths. For example, if you import an image with a clipping path from Photoshop, InDesign can detect and use it. This is useful for product cutouts or background removal.
In most layout projects, frame-based image masking is the easiest and safest method. It is non-destructive, flexible, and beginner-friendly. As a result, most designers prefer using frames instead of complex masking techniques.
Frequently Asked Questions (FAQ)
1. Is a clipping mask in InDesign non-destructive?
Yes, it is completely non-destructive. InDesign uses frames to control visibility. Therefore, the original image file remains unchanged. You can move, resize, or adjust the image anytime without losing quality.
2. How do I crop an image in InDesign without Photoshop?
You can crop an image directly inside InDesign using frames. Simply resize the frame to hide unwanted areas. In addition, use Object → Fitting options to adjust alignment properly. This is the easiest way to mask an image in InDesign.
3. Can I insert an image into a shape in InDesign?
Yes, you can. First, draw a shape using the Rectangle, Ellipse, or Polygon Tool. Then place your image inside that shape. As a result, the image will appear only within the boundaries of the shape.
4. Why can’t I move the image inside the frame?
This usually happens when you select the frame instead of the image. Use the Direct Selection Tool (white arrow) to select and move the image inside the frame. The black arrow selects the frame, while the white arrow selects the content.
Conclusion
Now you understand how to create a clipping mask in InDesign using simple frames. This method helps you mask images in InDesign, control layouts, and crop images without damaging the original file. As a result, your design workflow becomes faster and more flexible.
By practicing these steps, you can confidently insert images into shapes, adjust alignment, and build clean, professional layouts. Therefore, whether you are designing a brochure, magazine, or social media post, mastering InDesign image masking will improve both your speed and accuracy.


