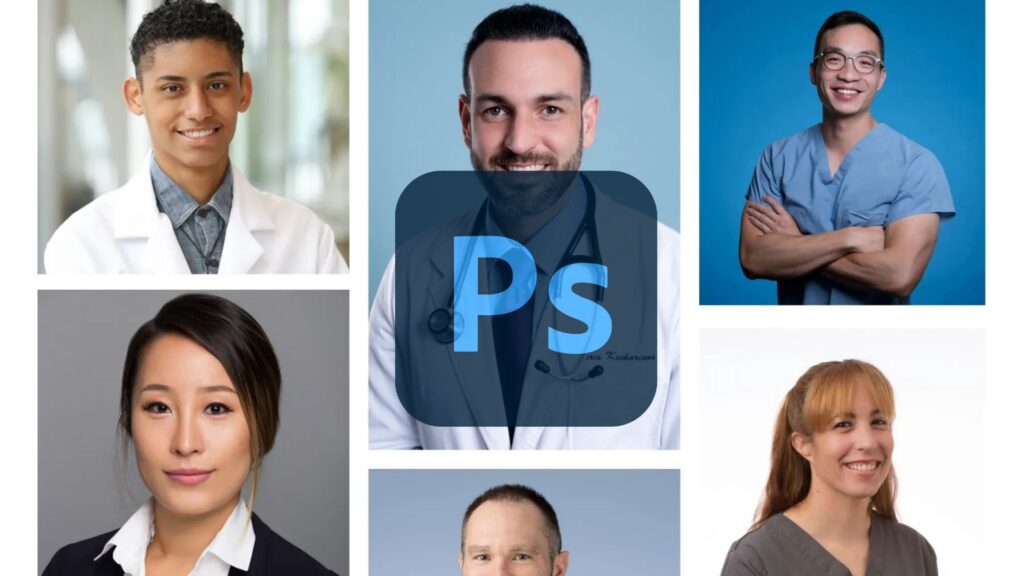
Photoshop remains the go-to tool for professional photographers and designers when it comes to perfecting headshots. Whether you’re looking to enhance the lighting, retouch skin, or create a polished but natural look, mastering a few Photoshop secrets can help you elevate your headshot editing skills. In this article, we’ll explore expert tips and tricks that will take your editing to the next level, ensuring your headshots look professional and authentic.
1. Start with High-Quality RAW Images
The foundation of great editing starts with a high-quality image. Always work with RAW files in Photoshop. RAW files contain more data than JPEGs, allowing for finer adjustments in color correction, exposure, and detail. This extra data gives you more flexibility when retouching and can lead to much better final results.
2. Use Frequency Separation for Natural Skin Retouching
One of the best-kept secrets for professional headshot retouching is frequency separation. This technique separates the texture of the skin from its color, allowing you to edit each independently. Here’s how it works:
- Create two copies of your image.
- Apply a Gaussian blur to the lower copy to smooth the skin tones.
- Use the High Pass filter on the top layer to retain the skin texture.
This method enables you to smooth out blemishes and uneven skin tones without losing the natural texture of the skin, resulting in a polished but authentic look.
3. Dodge & Burn for Precision Light Adjustments
The Dodge & Burn tool in Photoshop is a game-changer for refining the lighting on your headshot. Use Dodge to brighten areas and Burn to darken others. This technique can be used to subtly highlight cheekbones, define the jawline, or even brighten the eyes.
To use this tool effectively:
- Work on a separate layer with 50% gray fill (in soft light mode).
- Paint over areas you want to lighten or darken with a soft brush.
This allows for precise control of shadows and highlights, giving the face more depth and dimension while maintaining a natural appearance.
4. Brighten Eyes Without Overdoing It
Eyes are the focal point of most headshots, and brightening them can make a subject look more lively and engaged. However, over-brightening can lead to an unnatural, alien-like appearance. Here’s a subtle approach:
- Create a new layer and set the blending mode to Soft Light.
- Use a soft white brush at a low opacity (around 10-15%) and carefully paint over the irises to brighten them.
- Adjust the layer’s opacity as needed to keep the effect subtle.
This technique makes the eyes stand out without over-editing, maintaining the authenticity of the image.
5. Fix Stray Hairs with the Clone Stamp Tool
Stray hairs can be distracting in headshots, but they can be easily fixed using the Clone Stamp Tool. Select a nearby area of clean background or hair and use it to clone over the stray strands. Make sure to use a soft brush with low opacity to blend the changes seamlessly into the image.
For more control, zoom in while working on small areas and adjust the brush size as needed to avoid hard lines.
6. Use Liquify for Subtle Shape Adjustments
The Liquify tool in Photoshop is often misunderstood as a tool for extreme distortions, but when used carefully, it’s perfect for making subtle shape adjustments that can enhance a headshot. For example, you can slightly refine the jawline or adjust the posture.
To use Liquify effectively:
- Select the Forward Warp Tool within Liquify.
- Set a low brush pressure (around 10-15%) to make small, controlled adjustments.
Be cautious not to overuse Liquify. The goal is to enhance, not distort, the subject’s natural features.
7. Create Depth with Vignetting
Vignetting—darkening the edges of a photo—can help draw attention to the subject’s face. In Photoshop, you can create a vignette effect using the Lens Correction Filter:
- Go to Filter > Lens Correction.
- Under the “Custom” tab, adjust the Vignette slider to darken the edges.
A slight vignette can add a professional touch to the headshot, making the subject stand out without being too obvious.
8. Master Color Grading for Mood
Color grading can dramatically affect the mood and tone of your headshot. You can use Photoshop’s Curves adjustment layer to fine-tune the color tones.
- Create a new Curves adjustment layer.
- Adjust the Red, Green, and Blue channels individually to create a warm or cool color balance.
For a warm, friendly headshot, add a little more red and yellow to the highlights. For a cooler, more corporate look, focus on adding blue to the shadows.
9. Remove Distracting Background Elements
If your background has distracting elements like bright lights or objects that pull focus from the subject, you can easily remove them with the Content-Aware Fill or Patch Tool.
- Select the area you want to remove using the Lasso Tool.
- Go to Edit > Fill and choose Content-Aware Fill.
Photoshop will automatically blend the surrounding area to remove distractions. This ensures the viewer’s attention stays on the subject, not on the background.
10. Sharpen the Final Image
After completing all your edits, it’s crucial to sharpen the image to ensure that the subject looks crisp. Use the Unsharp Mask filter for controlled sharpening:
- Go to Filter > Sharpen > Unsharp Mask.
- Set the Amount to around 100%, the Radius to 1 pixel, and adjust the Threshold to control which areas are sharpened.
This technique brings out the fine details in the face, eyes, and hair, making the headshot look sharp and professional.
11. Save Presets for Future Edits
To streamline your editing process, save adjustment layers, curves, or color grading as presets. This is especially helpful if you’re editing multiple headshots for the same person or team and want to maintain consistency across all images.
- Once you’ve adjusted your layers, go to File > Save As and save the image as a Photoshop file (.PSD) with all the layers intact.
This way, you can reuse the same settings without starting from scratch each time.
12. Use Layer Masks for Non-Destructive Editing
Layer masks allow you to make adjustments without permanently altering the image. Instead of erasing parts of an image or layer, you can hide or reveal certain areas using a layer mask, giving you greater flexibility in your edits.
- Create a mask on your adjustment layer.
- Use a black brush to hide parts of the layer, or a white brush to reveal them.
This non-destructive approach ensures you can always go back and tweak your edits if needed, which is especially useful when working on detailed headshots.
Conclusion
Photoshop offers a vast array of tools to enhance and perfect headshots, but the key to mastering headshot editing is knowing when to use these tools subtly. From frequency separation to layer masks, these Photoshop secrets will help you elevate your headshot editing skills, ensuring that you produce polished, professional images that still look natural and authentic.
By incorporating these techniques into your workflow, you can take your headshot editing to the next level and create stunning portraits that capture the true essence of your subject.
FAQs
What is frequency separation in Photoshop, and how does it help with headshot editing?
Frequency separation is a technique that separates skin texture from color in a photo. This allows you to smooth out imperfections in the skin tone while keeping the natural skin texture intact, resulting in more realistic retouching without overly airbrushed effects.
How can I brighten eyes in a headshot without making them look unnatural?
To subtly brighten eyes, use a soft white brush with low opacity on a new layer set to “Soft Light” mode. Carefully paint over the irises, and adjust the layer’s opacity to achieve a natural glow without over-brightening.
What is the best way to remove stray hairs from a headshot?
The Clone Stamp Tool is effective for removing stray hairs. Select a clean area of the background or hair, and carefully clone over the stray strands using a soft brush to ensure a seamless blend with the surrounding areas.
How can I create a professional-looking vignette in Photoshop?
You can create a vignette by using the Lens Correction Filter. Adjust the Vignette slider under the “Custom” tab to darken the edges of the photo slightly, drawing more focus to the subject’s face.
Is it possible to sharpen a headshot without making it look grainy?
Yes, you can sharpen a headshot without adding grain by using the Unsharp Mask filter. Set the Amount to around 100%, keep the Radius at 1 pixel, and fine-tune the Threshold to control where sharpening is applied, keeping the overall image clean and crisp.
Experience Perfection: Claim Your Free Trial Today!
Get a firsthand look at our exceptional services with a no-obligation free trial—start transforming your visuals today!


