


Introduction
Understanding the Importance of Natural-Looking Headshots
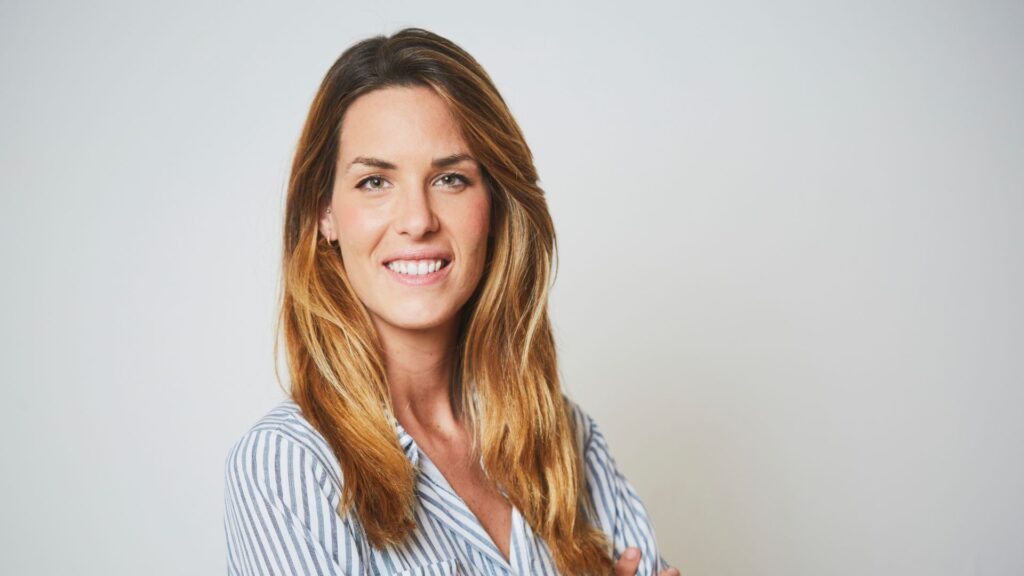
In today’s digital age, where professional and personal branding relies heavily on visual representation, the importance of natural-looking headshots cannot be overstated. Whether you’re a business professional, an artist, or a social media influencer, your headshot often forms the first impression others have of you. Therefore, ensuring that your headshot looks both polished and natural is key to making a positive impact.
Choosing the Right Software for Retouching
Selecting the Best Tools for Professional Results
Before diving into the specifics of retouching techniques, it’s crucial to select the right software that suits your skill level and the complexity of the task. Here are some of the industry-standard tools:
Adobe Photoshop
Adobe Photoshop remains a top choice for its comprehensive toolkit, allowing for detailed retouching, color correction, and fine-tuning of facial features.
Lightroom
Lightroom is preferred for its non-destructive editing capabilities, making it ideal for batch processing and managing large volumes of headshots.
Capture One
Capture One is renowned for its excellent color grading and tethered shooting capabilities, making it a favorite among professional photographers for high-end retouching.
Mastering Skin Retouching Techniques
Retaining Skin Texture and Details
One of the primary goals of retouching headshots is to enhance without making the skin appear overly smooth or artificial. Here are effective techniques to retain natural skin texture:
Frequency Separation Method
This method separates texture from color, allowing you to work on each independently. It preserves fine details while correcting imperfections like blemishes or uneven skin tone.
Dodge and Burn Technique
Using the dodge and burn tools subtly can help emphasize contours and shadows on the face, enhancing dimension while maintaining realism.
Using Healing Brushes
Healing brushes in software like Photoshop enable targeted removal of imperfections like pimples or scars while blending with surrounding textures seamlessly.
Managing Lighting and Color Corrections
Balancing Highlights and Shadows
Proper lighting and color balance are critical for achieving a natural-looking headshot. Here’s how to manage these aspects effectively:
Adjusting Exposure Levels
Ensure that exposure levels are balanced to avoid overly bright highlights or dark shadows that can distort facial features and skin tones.
Correcting White Balance
Adjusting white balance ensures that colors appear true to life, avoiding unnatural tints that can detract from the overall realism of the portrait.
Enhancing Colors Naturally
Subtle adjustments in saturation and vibrancy can bring out natural hues in skin tones and clothing, enhancing the overall appeal of the headshot.
Addressing Common Portrait Flaws
Handling Red-Eye and Glare
Common issues like red-eye or glasses glare can detract from a professional headshot. Here’s how to address them effectively:
Effective Use of Red-Eye Correction Tools
Utilize red-eye correction tools to remove the red reflection from eyes caused by flash photography, ensuring a more natural appearance.
Minimizing Glasses Glare
Adjust lighting angles during photography or use specialized editing tools to minimize glare on glasses, maintaining clarity of the eyes behind them.
Ensuring Facial Features Remain Authentic
Enhancing Eyes and Teeth
Eyes and teeth are focal points in headshots. Enhancing them while keeping them natural requires careful attention to detail:
Brightening Eyes Naturally
Subtle adjustments in brightness and contrast can make eyes appear more vibrant without losing their natural sparkle.
Subtle Teeth Whitening Techniques
Avoid overly brightening teeth. Instead, use gentle techniques to remove stains or discoloration while preserving the natural shading and texture of teeth.
Maintaining Hair Realism
Dealing with Stray Hairs
Hair can be challenging to retouch without making it look artificial. Here’s how to maintain hair realism in headshots:
Using Cloning Tools
Clone stamp and healing brushes can be used to remove stray hairs while blending seamlessly with the surrounding hair texture.
Softening Flyaways
Gently soften flyaways or frizz using blur or smudge tools, ensuring hair looks neat without appearing overly manipulated.
Achieving Natural Background Enhancements
Softening Distractions
A distracting background can take attention away from the subject. Here’s how to enhance backgrounds naturally:
Creating Depth with Bokeh Effects
Bokeh effects can be applied subtly to blur backgrounds while keeping foreground subjects sharp, creating a professional and polished look.
Blurring Backgrounds Gracefully
Use gradient masks or blur tools to soften backgrounds without creating harsh edges or unnatural transitions.

Applying Final Touches for Professional Quality
Checking Overall Image Consistency
Before finalizing a headshot, ensure overall image consistency across color, lighting, and composition:
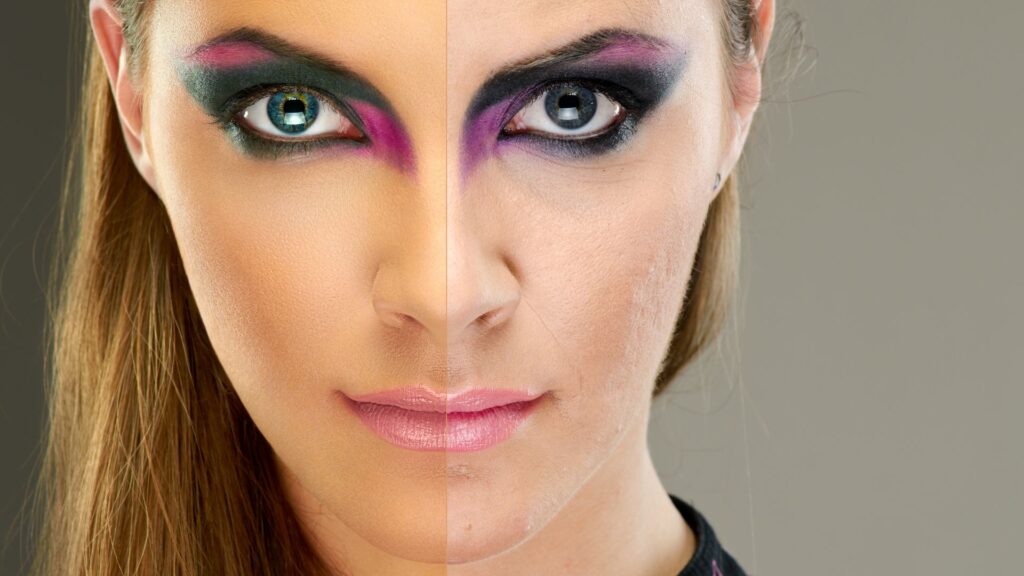
Using Before-and-After Comparisons
Compare edited versions with the original to ensure changes enhance rather than detract from the subject’s natural appearance.
Finalizing with Global Adjustments
Make final adjustments to contrast, sharpness, and tone to unify the image and achieve a professional quality headshot.
Conclusion
Summarizing the Keys to Natural-Looking Headshot Retouching
Mastering the art of natural-looking headshot retouching requires a blend of technical skill and artistic sensibility. By choosing the right tools, applying subtle techniques, and preserving the authenticity of facial features and surroundings, you can create headshots that make a lasting impression while appearing genuine and professional.
I hope you found this article on natural-looking headshot retouching helpful! If you have any questions or would like to share your experiences, feel free to leave a comment below.
FAQs About Natural-Looking Headshot Retouching
1. Should I retouch every headshot the same way? It’s essential to assess each headshot individually based on lighting, skin tone, and the subject’s preferences to achieve the most natural result.
2. How can I avoid over-editing my headshots? Focus on enhancing rather than altering. Keep adjustments subtle and regularly refer to the original photo for comparison.
3. What software is best for beginners in headshot retouching? Adobe Lightroom is user-friendly and offers non-destructive editing, making it an excellent choice for beginners.
4. How can I ensure my headshots still look like me after retouching? Retain natural features like skin texture, facial contours, and expression to maintain a realistic likeness.
5. Are there specific techniques for retouching headshots for different professions? Tailor retouching techniques based on the industry standards and the intended use of the headshots, ensuring they align with professional expectations.


