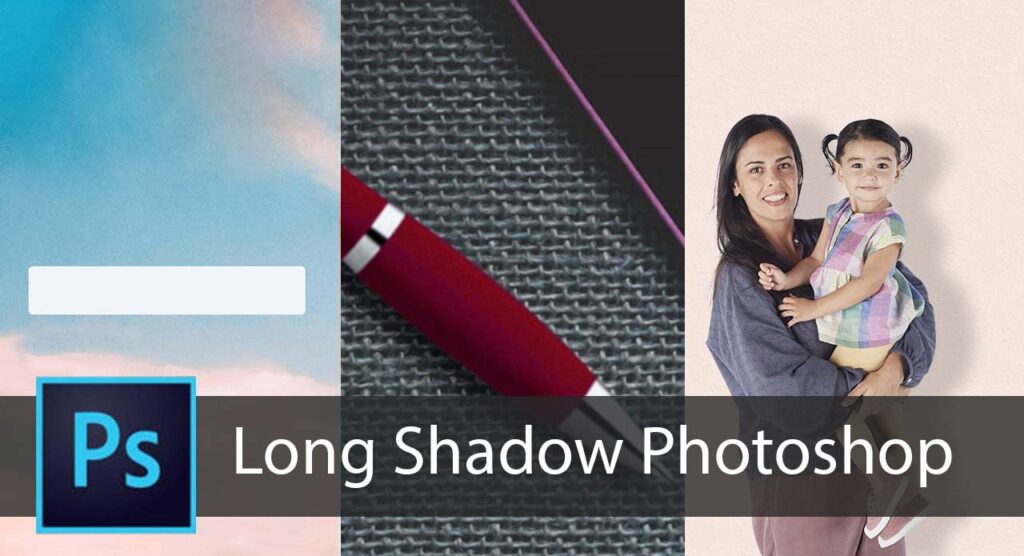
The drop shadow is one of the oldest effects in Photoshop and probably one of the best known. It allows in a few clicks to visually distinguish the creative elements from the background. Long shadow Photoshop is the best way to a product’s unique point. In the following application examples, we show you how to create a modern shadow effect for website content as well as realistic shadows for image processing.
The following application examples are drawn from techniques relating to web design and classic image processing. Do you perhaps remember the thick shades of black that could be seen behind almost every button on websites in the early 2000s? Thankfully, this over-the-top creative trend is now over. After a few years during which we have largely given up on it, we are starting to see the technique of shadows reappear on the Web. The difference however that this time, they are only used in a very discreet and targeted way.
In conventional image processing, the angle of incidence of the light source and the background on which the shadow falls is decisive. We show you how to create a hard drop shadow and a very soft shadow in Photoshop. Long shadow Photoshop is very popular for any image.
The modern design of a shadow for a website
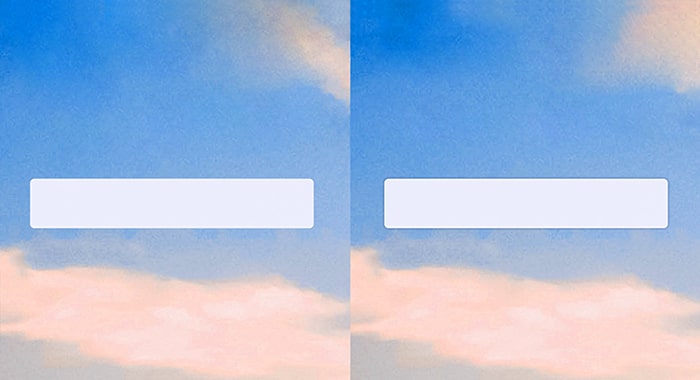
Let’s take as a first application example a colorful and attractive homepage without shadows. It incorporates buttons that could attract a little more attention if they were highlighted with a shadow. To create a drop shadow, first, double-click the left mouse button on the layer with the button. In the fill options, you can then select the last dot at the very bottom labeled Drop Shadow. Long shadow Photoshop makes look more attractive. By testing the opacity of the drop shadow at 100% in the drop shadow options, you will reproduce exactly the trend of the early 2000s: a hard and visible shadow.
Today, the trend is “fewer is better”. So in our example, the drop shadow should highlight the button slightly, but still, be subtle.
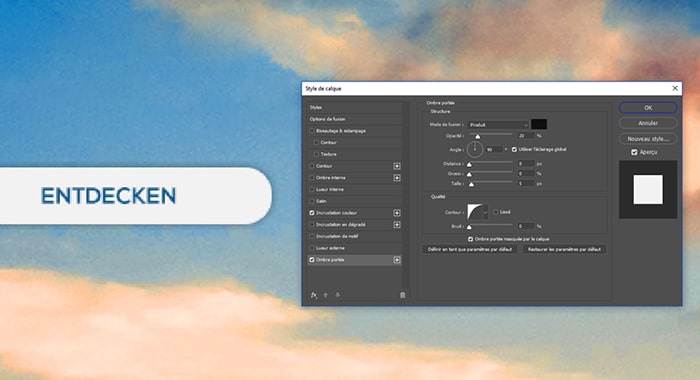
To do this, first, drag the Shadow Opacity slider to 20. Then set the Shadow Distance to 0, so you don’t have to specify a particular angle. The shadow should be the same all around the button. Then set the size to 5 px to soften the shadow. The shadow should now be discreetly visible, but it’s still a little too faint to highlight the button.
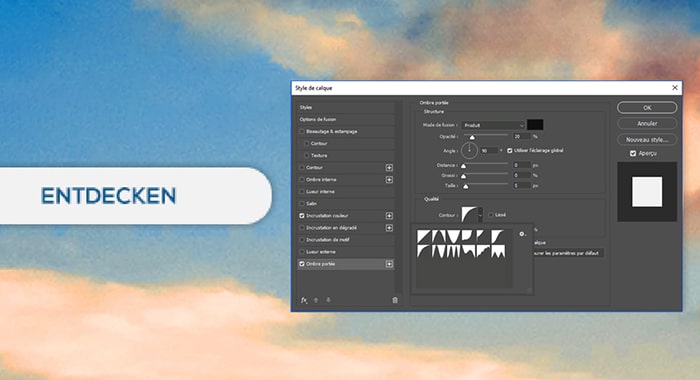
To make the button more visible, click the drop-down menu under Outline. Here you can select different ways to represent your shadow. In this example, we used a rounded outline.
However, you will not need to set these options again for any subsequent buttons. In the Layers window, right-click the button containing the created shadow and select Copy Layer Style. You can now simply apply the effect to all other buttons by right-clicking the layers and selecting Paste Layer Style.
Create a Hard Drop Shadow in Photoshop
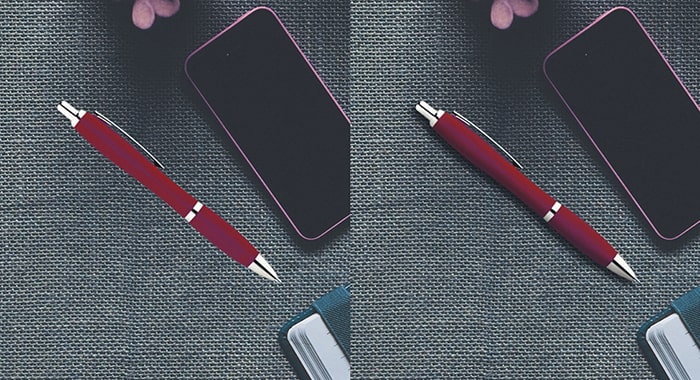
It is often necessary to add shadows during image processing as part of retouching images of objects in another image when these objects were not photographed under the same conditions. In this example, we want to insert a ballpoint pen into an image with other objects. Beforehand, the optical effect and above all the color of the ballpoint pen have already been adapted to the visual style of the image, so only the shadow of this object is missing to achieve a realistic representation.
Due to the shadow cast by other objects in the image, it is very easy to see that the light source is located at the top right of the objects. First, open the Fill Options again via the layer window and check the box under Drop Shadow. The photo has been much better for the long shadow Photoshop service.
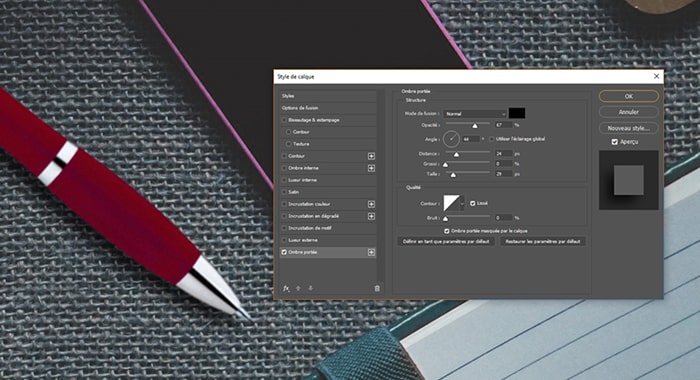
First set the opacity to 67% and the shadow angle to 44 degrees. Thus, the shadow will be aligned with the shadows of other objects. And, Then set the distance to 24 px and the size to 29 px. The shadow cast by the ballpoint pen already looks very realistic. However, for the overall visual impression to be correct, the shadow-light ratio must also be visible on the pen itself.
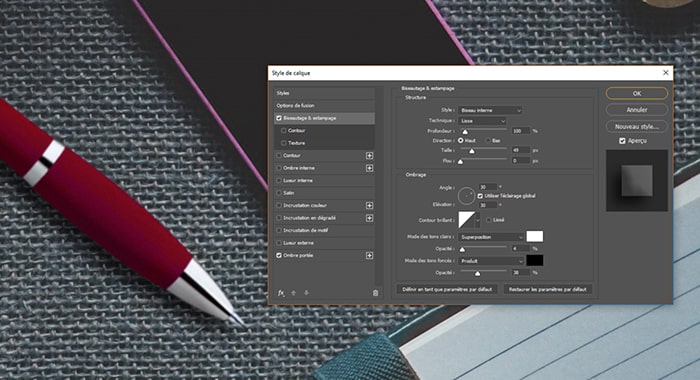
To do this, click on the Flattened edge and relief tab in the Fill options. Set a depth of 100% here and set size of 49px. You can then adjust the exposure of the light using the small circle below the Shading point. Select an angle of 30 degrees at a height of 30 degrees as well. Finally, set the Lights to 4% and the Depths to 38% using the sliders at the bottom. The ballpoint pen is now perfectly adapted to the image.
Video Lesson
Create a Soft Long Shadow in Photoshop
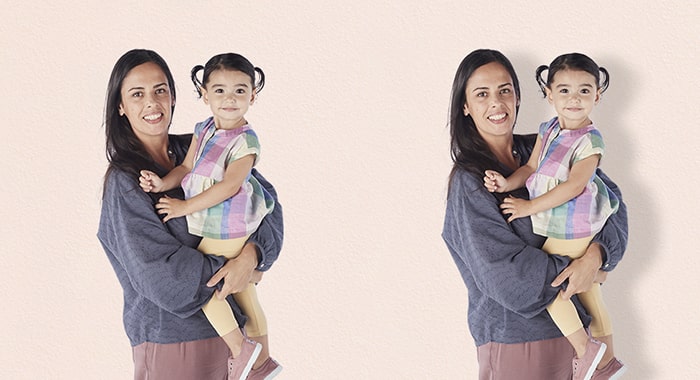
Among all the shadow effects, the great classic remains the shadow that a person casts on the ground or on the background in front of which he stands under the effect of a light source. As in example 2, the contours of a person have already been clipped, and it remains to create a shadow on a plastered wall. Open the Fill Options again from the layer of the cutout person and check the Drop Shadow option.
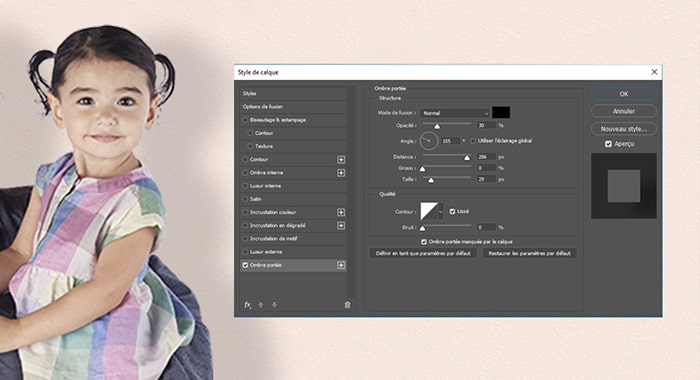
In this case, it is assumed that the light source comes from the top left. For a realistic shadow effect, set the drop shadow opacity to 30% and the angle to 155 degrees. Set Distance to 286 and Size to 18px.
Tip: In Photoshop, if a slider is pulled as far to the right as possible, it doesn’t necessarily mean that the value is set to the maximum. In the example of the shadow distance, you can also just manually enter a much higher value and the shadow will be moved beyond the slider’s maximum. Shadow Creation / Long Shadow Creation is required for each image.
Come and die a soft shadow to the side
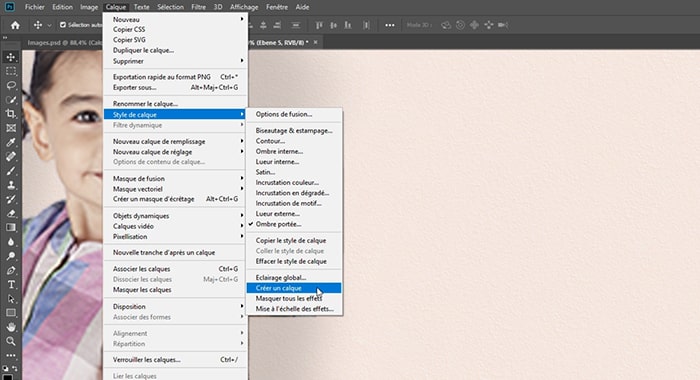
Other drop shadow settings remain at their default values. The peculiarity of a shadow cast by a person is that it first appears sharp and then becomes more and more blurred as the distance from the background increases. To create this effect, the previously created shadow must be set as a separate layer.
To do this, click on Layer > Layer style in the top menu, then on Create a layer. The drop shadow and the cutout person are then on two different layers. Then select the shadow layer and click Filters > Blur Gallery > Field Blur from the top menu.
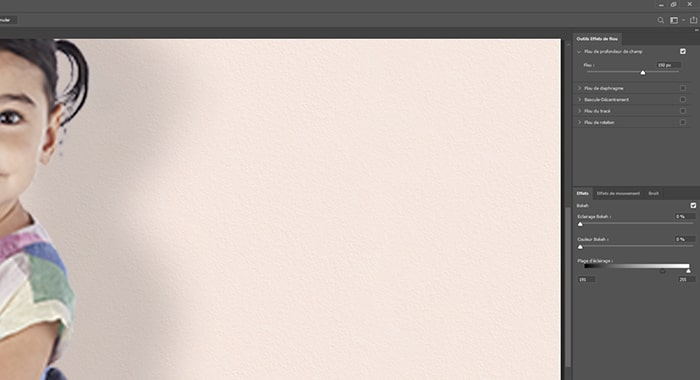
Using this filter, you can now insert a blurred area at positions you have defined. The first point is placed approximately at the height of the elbow. Simply click on your image using the left mouse button. A blurred area is created, the intensity of which you can adjust using the small slider.
Long shadows/shadow creations are needed to make the photos look realistic. This example uses a value of 150 pixels. If necessary, you can also manually change the value in the right configuration panel. Then place a second blur range at the height of the belly and set a value of 130 px. Finally, add a third point slightly below the hip with a value of 80 px. This makes the shadow much more realistic and you can confirm the blur thus set by clicking OK.
If You need this Service Please visit Our Website www.imageexpertindia.com Or
Start Your Free Trial Today
ImageexpertIndia offers cooperation through its unique large-account program, for customers who have more than 100 images a month.
If you would like to place a one-time order, please note that we require a minimum of 500 images.


