

You’re not alone if you find boring, blurry, or inconsistent jewelry images unacceptable. Many jewelry designers and internet vendors find it difficult to convey the beauty and sparkle of their creations. The good news is…The straightforward, practical answer is a lightbox for jewelry photography.
We understand: photographing reflective, complex objects like jewelry can be challenging. With a lightbox, though, you take charge of shadows, reflections, and lighting. This guide will walk you through using a lightbox for jewelry photography to get professional-level images from your house or studio. What you’ll learn:
- What is a lightbox, and why would it help with jewelry photography?
- How best to select a lightbox for your requirements?
- Methodical setup guidelines.
- Lighting and camera techniques.
- Techniques of composition help your products sparkle.
Let’s explore this whole guide and improve the images of your jewelry products right now!

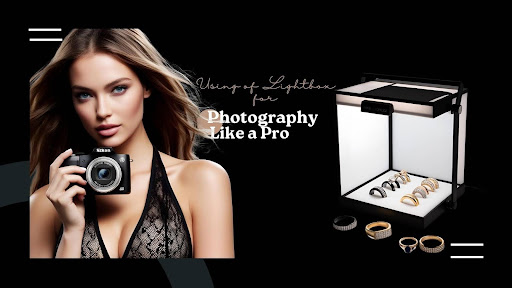
What Is a Lightbox and Why Is It Essential for Jewelry Photography
For jewelry photography, a lightbox is a closed, cube-like construction with evenly diffused translucent walls. Common problems while photographing jewelry are shadows, glares, and reflections; these are minimized here. Why is it essential?
Even lighting: Even the lighting guarantees that every surface of the jewelry is well-lit, free from strong shadows.
Controlled environment: Under a controlled environment, blocks background distractions and outside lighting influences.
Professional finish: Expert finish improves clarity, gloss, and detail to produce retail-ready images.
Product images, claims Shopify, can boost conversion rates by up to forty percent. Using a lightbox guarantees your images are not only beautiful but also consistent and scalable for e-commerce platforms like Amazon, Etsy, or your own site.
Monthly retouching hundreds of lightbox jewelry images at Image_Expert_India helps brands stand out in saturated markets with perfectly clear images.
Choosing the Right Lightbox: Features to Look For
Not every lightbox is produced equally. Look for characteristics of a lightbox for jewelry photography that complement the size and reflecting quality of your pieces.
Key Features:
Size Appropriateness: Rings and earrings fit a 12×12-inch box; necklaces and bracelets call for a 20×20-inch model.
Built-In LED Lights: Make sure built-in LED lights (about 5500K) are high-lumen, daylight-balanced for exact color representation.
Multiple Openings: Multiple Openings: For front, top, and side flexibility in shooting angles.
Backdrop Options: For jewelry, white, black, and gray are the most flexible backdrop options.
Portability: Foldable designs let small business owners set up anywhere with great simplicity.
We suggest models from the Foldio3 or Neewer lightbox series. Product photographers love them and they fit DSLR or smartphone configurations.
We frequently offer custom recommendations depending on the type of jewelry and desired output quality for customers of Image_Expert_India.

Setting Up Your Lightbox for Maximum Jewelry Sparkle
The phase of setup is very important. If not correctly positioned, even the best lightbox for jewelry photography won’t produce desired effects.
Step-by-Step Setup:
Assemble the Lightbox: in a space free from external light interference
Install LED lights: to guarantee multidirectional lighting from both sides and the top.
Insert Background: Insert a spotless, wrinkle-free backdrop. White is perfect for everyone.
Clean the Jewelry: Polish to clear fingerprints and dust from the jewelry.
Position Your Camera: Mount your camera on a tripod exactly facing the jewelry.
Test Shots: Early results will guide changes in light angles or intensity.
Photograph every piece from several angles to be sure. This improves the appearance of products and drives more time spent on their pages.
Our photo editing staff at Image_Expert_India polishes final images by adjusting lighting discrepancies even after the shoot, ensuring perfect results.
How to Position Jewelry Inside a Lightbox for Perfect Shots
Good lightbox placement accentuates the design, detail, and glitter of every piece. The focus is on beauty and workmanship.
Advice on Ideal Positioning:
Center the Piece: For balanced lighting, always center the piece—the jewelry—in the middle of the lightbox.
Use Props Sparingly: Use props to accentuate structure, but avoid distracting ring holders or necklace stands.
Angle for Sparkle: For Sparkle, tilt gemstones slightly toward the main light source.
Use Sticky Wax or Museum Gel: To keep little objects like rings in place without obvious sight, use sticky wax or museum gel.
Remember that jewelry should always face the camera at its most pleasing perspective. Try several configurations for matte against reflecting finishes. Need assistance removing props after a shoot or editing background work? Image_Expert_India provides specialist retouching and background removal techniques catered to jewelry.

Background Choices for Lightbox Jewelry Photography
Your background should complement—not compete with—your jewelry. Simplicity is everything inside a lightbox for jewelry photography.
Best Background Choices:
White is preferred for e-commerce sites, clean, professional.
Black adds luxury and contrast; it’s ideal for diamonds and silver
Gray is neutral and perfect for color grading.
Brand-specific: If your identity aligns with textured or patterned backgrounds, so too should they.
Steer clear of busy designs or colors that detract from the product. Furthermore, enhancing brand recognition is consistency across your catalog.
Image_Expert_India offers professional post-processing services fit for your branding for flawless and customized background editing.
Using Reflectors and Diffusers Inside the Lightbox
For jewelry photography, diffusers and reflectors cooperate to control light flow in your lightbox.
How They Help:
Diffusers: Soften strong LED lights to prevent overexposure.
Reflectors: Correct balance by bouncing light into shadow areas.
White foam boards can be used as reflectors or purchased circular reflectors designed for use in photography. Although they are sometimes built into high-end lightboxes, diffusers can be homemade with parchment paper.Clever use of these tools produces a soft, shadow-free environment that accentuates every gem and metal surface.

Camera Settings That Work Best With a Lightbox Setup
Bad camera settings can ruin your shots even with ideal illumination. Manual settings give the best results when photographing jewelry using a lightbox. Suggested Conditions: Deep depth of field and whole product in focus are guaranteed by an aperture (f/8–f/16). Lower ISO (100–200) reduces graininess. Shutter speed (1/60–2 sec) should be changed depending on the lighting; a tripod will help to avoid blur. White Balance: Use a gray card or match LED temperature, usually 5500 K. Manual focus lets you more precisely control detail.
These settings help get sharp, clear jewelry shots whether you’re using a DSLR or a smartphone with a pro camera app.
How to Photograph Gemstones in a Lightbox Without Losing Clarity
Gemstones reflect and refract light, thus, they are rather challenging to obtain. Lighting and placement greatly affect jewelry photography using a lightbox. Notes on Clarity: Directional lighting angles lights to highlight internal facets. Use side or top lighting to prevent flatness in front flash. Change Angles: Little movement can highlight more brilliance . Essential for catching complex gemstone cuts is a macro lens.
Should the gem not glitter straight out of the camera, you should not panic. Our focus at Image_Expert_India is gemstone enhancement methods that accentuate brilliance without changing color authenticity.

Lightbox Vs. Natural Light: Pros and Cons for Jewelry Photography
Understanding the special advantages and restrictions of both natural lighting and a Lightbox for Jewelry Photography will help one make an informed decision between them. Although natural light is free and plentiful, it can be erratic and difficult to manage. Conversely, a lightbox provides a consistent, diffused illumination environment perfect for reflecting surfaces like polished metals and gemstones.
Pros of Using a Lightbox:
Using a lightbox allows you to capture anywhere without regard to the time of day or the weather. Diffusers cut strong shadows and glare in a controlled environment.
Professional Results: improves clarity and color correctness.
Cons of a lightbox:
First Investment: Calls for either building or buying a box.
Setup Time: Possibly more than it would be to capture in daylight.
Pros of Natural Light:
Economic: No equipment is needed.
Soft Look: Perfect during golden hours, early morning, or late afternoon is a soft look.
Cons of Natural Light:
Unpredictable: Cloudy days or strong sunlight can ruin your pictures.
Restricted Hours: You only have specific times for the best light.
Using a Lightbox for Photography will help Image_Expert_India guarantee consistent, studio-quality images independent of outside conditions.
How to Eliminate Shadows and Glare in Lightbox Photography
Two of the toughest problems in Lightbox for Jewelry Photography are shadows and glare. Although a lightbox is made to distribute light evenly, incorrect arrangement or angles can still cause visual problems.
Proven Techniques:
Use Multiple Light Sources: Install LED lights on both sides and above the jewelry to guarantee equal lighting.
Position Jewelry Carefully: Lift pieces gently off the base using acrylic risers to minimize grounding shadows.
Adjust Angles: Slightly tilting can help focus light away from reflecting surfaces.
Use Reflectors: Without overexposing the picture, silver or white cards can fill shadows and accentuate sparkle.
Our area of expertise at Image_Expert_India is editing methods that eliminate tough glares and shadows while maintaining the integrity of the work. Perfect results depend on combining a well-lit shot with professional post-processing.Recall that 80% of the work in a good Lightbox for Jewelry Photography is done; the remaining work is mostly on strategic placement and testing.

Editing Tips to Complement Your Lightbox Jewelry Shots
Lightbox jewelry photography depends on post-processing even with ideal lighting. It accentuates the sparkle, fixes colors, and gets any flaws left behind gone.
Must-Use Editing Tips:
Correct color: Match gemstone hues to actual appearances.
Spot Healing: Clear blemishes, fingerprints, or dust.
Sharpening: Without overprocessing, improve minute details.
Background Cleaning: Make sure the background—black or white—is flawless and unbroken.
Brightness & Contrast : Contrast and brightness will help the metal stand out without overpowering the stones.
Our jewelry retouching experts at Image_Expert_India take your lightbox images and perfect them. A well-edited picture not only looks better but also increases credibility and conversion power.
Remember, top-notch editing transforms decent images into spectacular ones regardless of the quality of your Lightbox for Jewelry Photography.
Common Lightbox Photography Challenges and How to Overcome Them
While it solves many lighting problems, using a Lightbox for Jewelry Photography presents unique difficulties. Knowing these in advance will enable you to troubleshoot successfully.
Frequent Issues:
Color Shifts: Use daylight-balanced LED lights for inconsistent light temperature.
Unwanted Reflections: Try using a polarizing filter or repositioning the product; glossy jewelry can reflect the camera.
Shadow Lines Uneven lighting creates shadow lines; balance with fill lights or reflectors
Flat-Looking Images: Experiment with side or rear lighting to add depth in flat-looking images.
Solutions:
- Change the lighting angles at will.
- Slightly raise the product.
- Control clarity and contrast using post-production.
- Using a Lightbox for Jewelry Photography setup,
Our team at Image_Expert_India has helped many clients overcome these obstacles and produce magazine-quality images.

Capturing Macro Details in a Lightbox for Small Jewelry Pieces
Without macro capability, small gemstones and complex designs are challenging to photograph. Macro photography reveals texture, cuts, and workmanship that drive value in a Lightbox for Jewelry Photography setup. Advice on capturing macro details:
- Optimal sharpness comes from a 90mm or 100mm macro lens.
- Autofocus suffers at close range most of the time; switch to manual for accuracy.
- To stop motion blur, steady your camera with a tripod.
- Control lighting so that highlights aren’t washed out.
- Use a small aperture (f/8 to f/16) for sharpness over the frame.
Macro shots taken within a Lightbox for Jewelry Photography setup are then improved with detail sharpening and contrast balancing to guarantee every element is perfect in our workflow at Image_Expert_India.
How a Lightbox Improves Consistency Across Your Jewelry Catalog
Developing trust depends mostly on consistent brand. Using a Lightbox for Jewelry Photography helps you to keep consistent lighting, color tones, and product positioning over your range.
Advantages of consistency:
- Professional Presentation: On social media and product pages, looks more unified.
- Improved Shopping Experience:Enhanced shopping experience by simpler item comparison
- Faster Editing: Like lighting configurations, they shorten retouching time
Using lightboxes, we at Image_Expert_India assist customers in creating visual guidelines to ensure photo consistency over their whole catalog.Brand recognition results from visual consistency; a Lightbox for Jewelry Photography simplifies, repeatable process of reaching this level.
Lightbox Accessories That Enhance Jewelry Product Photography
Think about adding some basic accessories to maximize your Lightbox for Jewelry Photography’s output on your final shots.
Useful Accessories:
- Little stands to raise jewelry and remove base shadows.
- Change the background to match your brand.
- Acrylic Base Plates: Reflective surfaces to accentuate quality
- Provide extra directional lighting
- Useful for 360° product views or video, turntables
- Depending on their product type and marketing objectives, at Image_Expert_India, we frequently counsel our customers on the ideal accessories for their lightbox configuration. While preserving quality, accessorizing your lightbox increases its creative possibilities.
Frequently Asked Questions (FAQ)
Q1: Could I take jewelry photos with my smartphone using a lightbox?
Indeed, when used with a quality lightbox and stable setup, many high-end cellphones with high-resolution cameras can generate outstanding results.
Q2: What ideal lightbox size would be for earrings and rings?
For smaller pieces like rings and earrings, a 12x 12 inch lightbox is perfect.
Q3: How might I eliminate reflections from metal surfaces?
Use diffusers; change light angles; stay away from direct illumination. Additionally useful in
helping to eradicate residual reflections are post-editing services.
Q4: For each product, how many pictures should I grab?
Get buyers a whole view by capturing at least three to five angles.
Q5: After using a lightbox, do I need professional editing?
Professional editing improves clarity, contrast, and general presentation, even while lightboxes help to minimize defects. For that, Image_Expert_India can assist.
Conclusion
Jewelry photography done using a lightbox will significantly raise the consistency and quality of your product photos. Professional-grade images created with correct setup, camera settings, and post-production touch-ups will increase confidence and drive conversions. Key Takeaways:
- A lightbox offers a regulated setting for capturing jewelry.
- Clearance depends critically on background, illumination, and posture.
- Correct camera angles improve sharpness and detail.
- Image_Expert_India’s editing services guarantee polished, market-ready images.
Are your jewelry pictures shining? Try these methods or call Image_Expert_India’s team for professional photo retouching and editing solutions.


