

Have you ever taken a photo that looked perfect in the moment but later appeared to have strange, off-putting colors? Whether it’s a warm, reddish tint or an overall greenish hue, tinted photos can be quite frustrating. The good news is that with the right techniques and tools, you can fix these color issues and restore your images to their true, vibrant selves. This guide will walk you through various methods for correcting tinted photos, from basic adjustments to more advanced techniques. We’ll cover everything you need to know to make your photos look as natural and appealing as they did when you first captured them.
Understanding Tinted Photos
What Causes Tints in Photos?
Tinted photos often result from a variety of factors related to how the photo was captured or processed. Incorrect camera settings, such as improper white balance or exposure levels, can lead to unnatural color casts. For instance, taking a photo under fluorescent lighting can give it a greenish tint, while other lighting conditions might produce different color shifts. Additionally, post-processing errors or using the wrong filters during editing can also result in tinted photos. Understanding these causes is crucial for selecting the appropriate correction method and achieving the desired outcome.
Types of Tints and Their Impact on Images
Different types of tints can have varying effects on your photos. A red tint might make the image appear overly warm, creating an unnatural look that distorts the intended mood. On the other hand, a blue or green tint can give the photo a cold, uninviting appearance. Each type of tint impacts the overall aesthetic of the image, often leading to a misrepresentation of the original scene. Correcting these tints not only improves the visual appeal but also helps in preserving the authenticity of the captured moment.
Basic Color Correction Techniques
Using Software for Quick Fixes
One of the easiest ways to correct tinted photos is by using built-in tools available in most photo editing software. Many programs offer automatic correction features that can address common color issues with minimal effort. These tools often include automatic white balance adjustments and color correction options that can quickly improve the overall appearance of your image. While these fixes might not always be perfect, they provide a good starting point for further manual adjustments.
Adjusting White Balance
White balance adjustments are among the most effective methods for correcting tinted photos. Most photo editing software allows you to manually set the white balance or choose from preset options designed for different lighting conditions. By correcting the white balance, you neutralize any unwanted color casts and bring your photo closer to its original, true colors. This adjustment can make a significant difference, especially in photos with noticeable color shifts.
Advanced Color Correction Methods
Color Balance Adjustments
For more precise color correction, you might need to delve deeper into the color balance settings of your photo editing software. This involves adjusting the levels of red, green, and blue to counteract any unwanted tints. By tweaking these values, you can achieve a more natural color balance and correct specific color issues. This method requires a bit more effort but can yield excellent results, especially for photos with subtle tint problems.
Using Curves for Precision
The Curves tool is another powerful feature for advanced color correction. It provides a high level of control over the brightness and contrast of individual color channels. By manipulating the curves, you can make detailed adjustments to correct color tints and improve the overall appearance of your photo. This tool is particularly useful for addressing specific color issues and achieving precise corrections.
Hue and Saturation Tweaks
Adjusting hue and saturation can also help in correcting tinted photos. Changing the hue allows you to shift the colors in the photo to better match the original scene, while adjusting saturation helps in making the colors more vibrant or subdued as needed. These tweaks can help fine-tune the overall color balance and improve the visual quality of your photo.
Manual Color Correction
Identifying and Fixing Color Casts
Manual color correction involves a more hands-on approach to fixing tinted photos. Start by identifying any unwanted color casts and then make corrections accordingly. For example, if your photo has a greenish tint, you may need to reduce the green channel or increase the red and blue channels to balance it out. This method requires a keen eye and some practice but can be highly effective in achieving accurate color restoration.
Applying Color Filters
Color filters can also be useful in correcting tints. Many photo editing software options offer filters designed to remove specific color casts or enhance certain hues. By experimenting with different filters, you can often find one that effectively corrects the tint issue and improves the overall look of your photo. Filters can provide a quick solution, but they might not always be as precise as manual adjustments.
Using Photo Editing Software
Adobe Photoshop
Adobe Photoshop is widely regarded as one of the most powerful tools for photo correction. It offers a range of features specifically designed for fixing tinted photos, including advanced color balance and correction tools. The Levels and Color Balance adjustments in Photoshop allow for in-depth control over color correction, making it a popular choice for professional photographers and editors.
Lightroom
Lightroom is another excellent choice for color correction, particularly for batch processing multiple photos. Its user-friendly interface and effective white balance and color correction tools make it ideal for both novice and advanced users. Lightroom also offers a range of presets and adjustment options to help you achieve the desired color restoration with ease.
Free Alternatives (GIMP, Paint.NET)
If you’re looking for free alternatives, GIMP and Paint.NET are great options. Both programs provide various tools for color correction, including white balance adjustments and color curves. While they might not have all the features of paid software, they are more than capable of handling most tint issues effectively.
Restoring Color in Different Scenarios
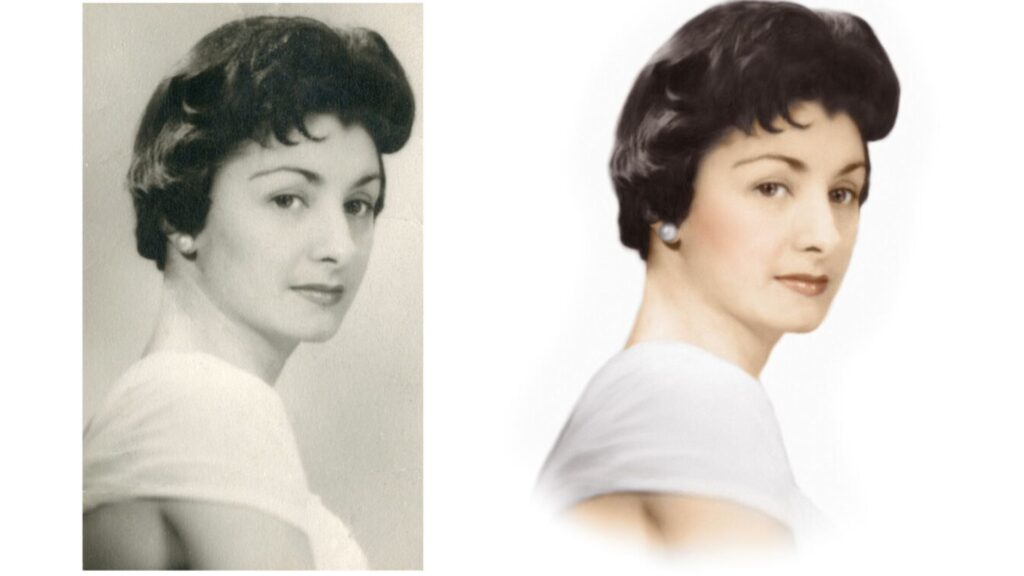
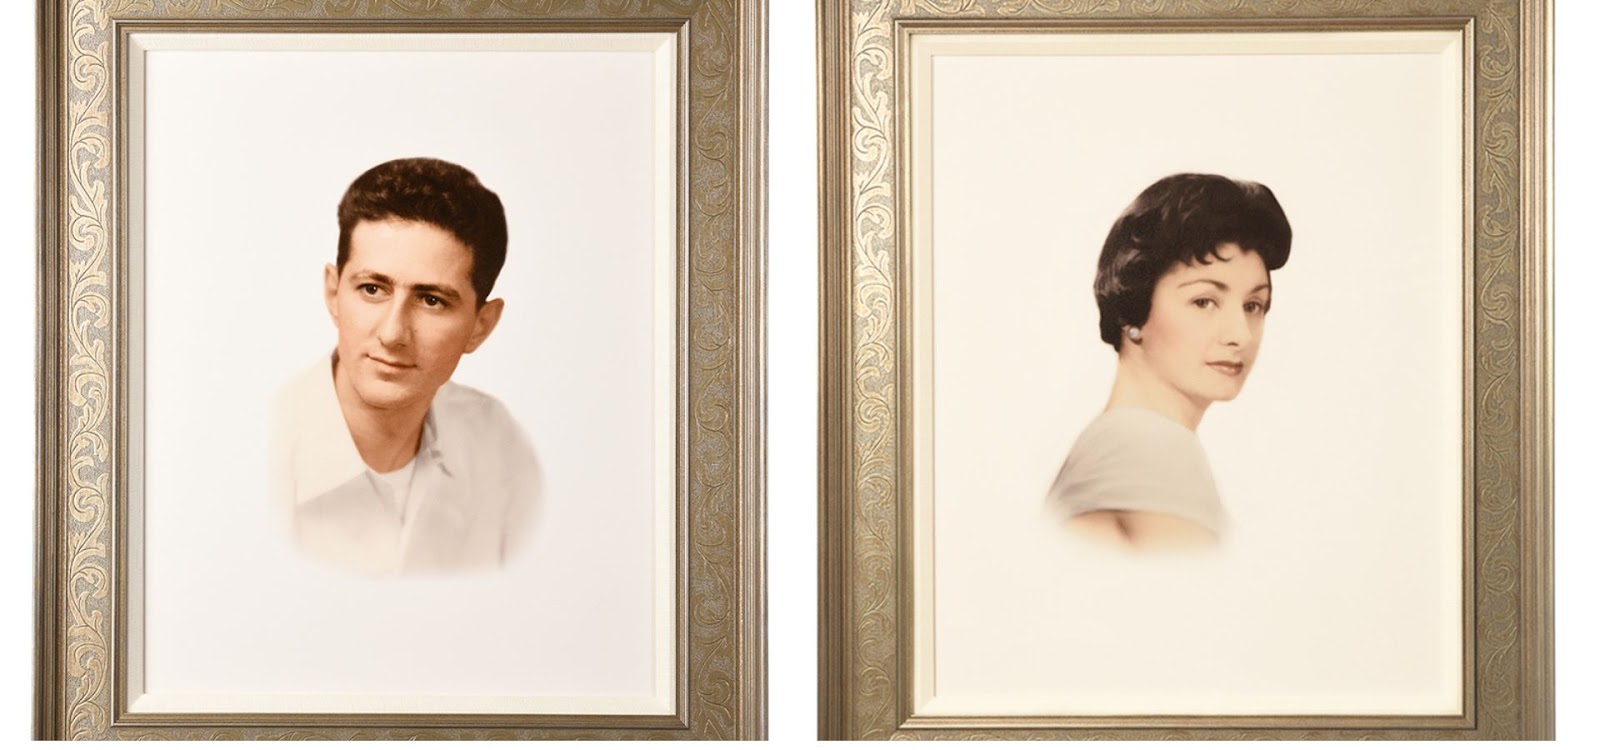
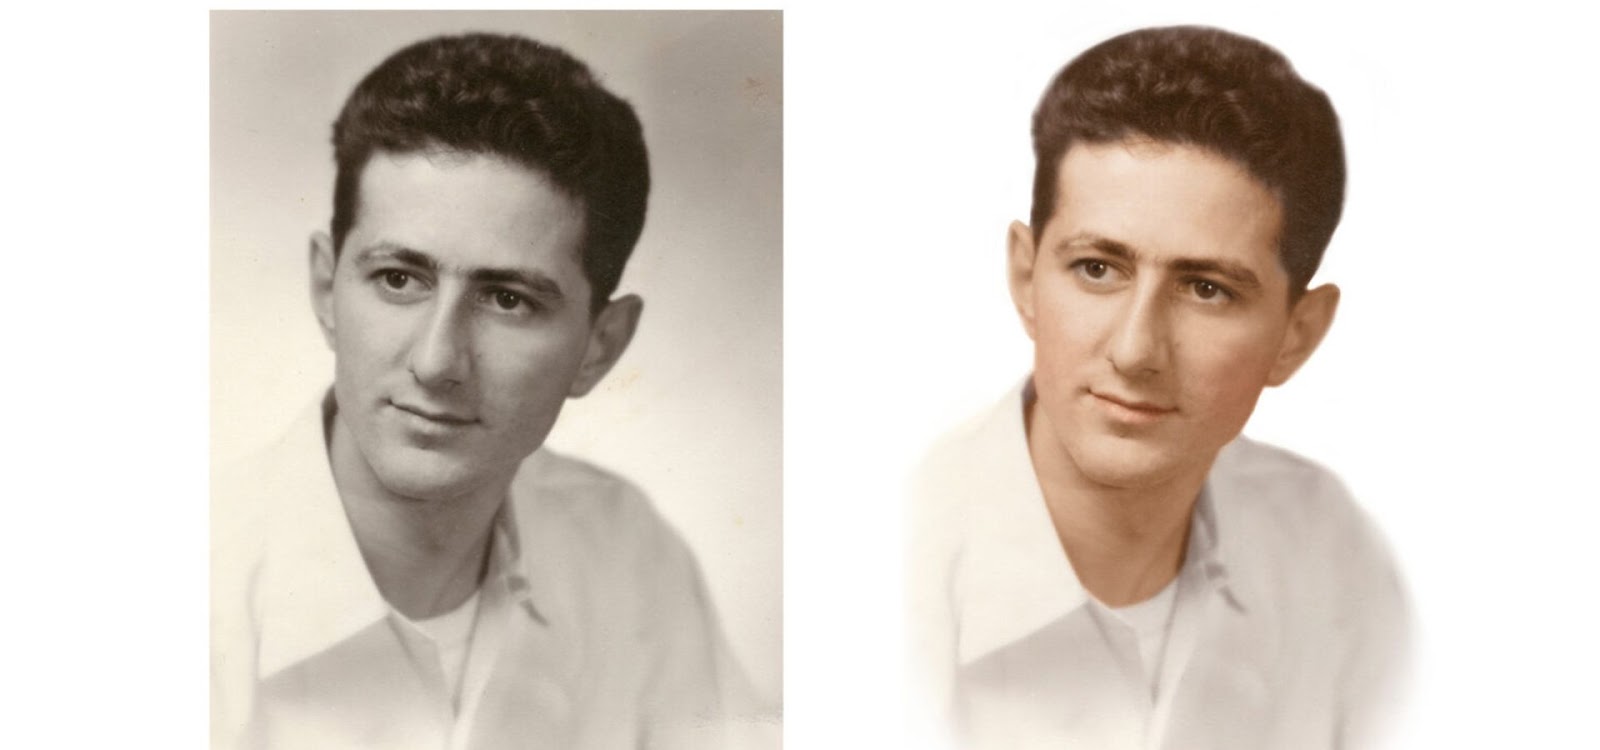
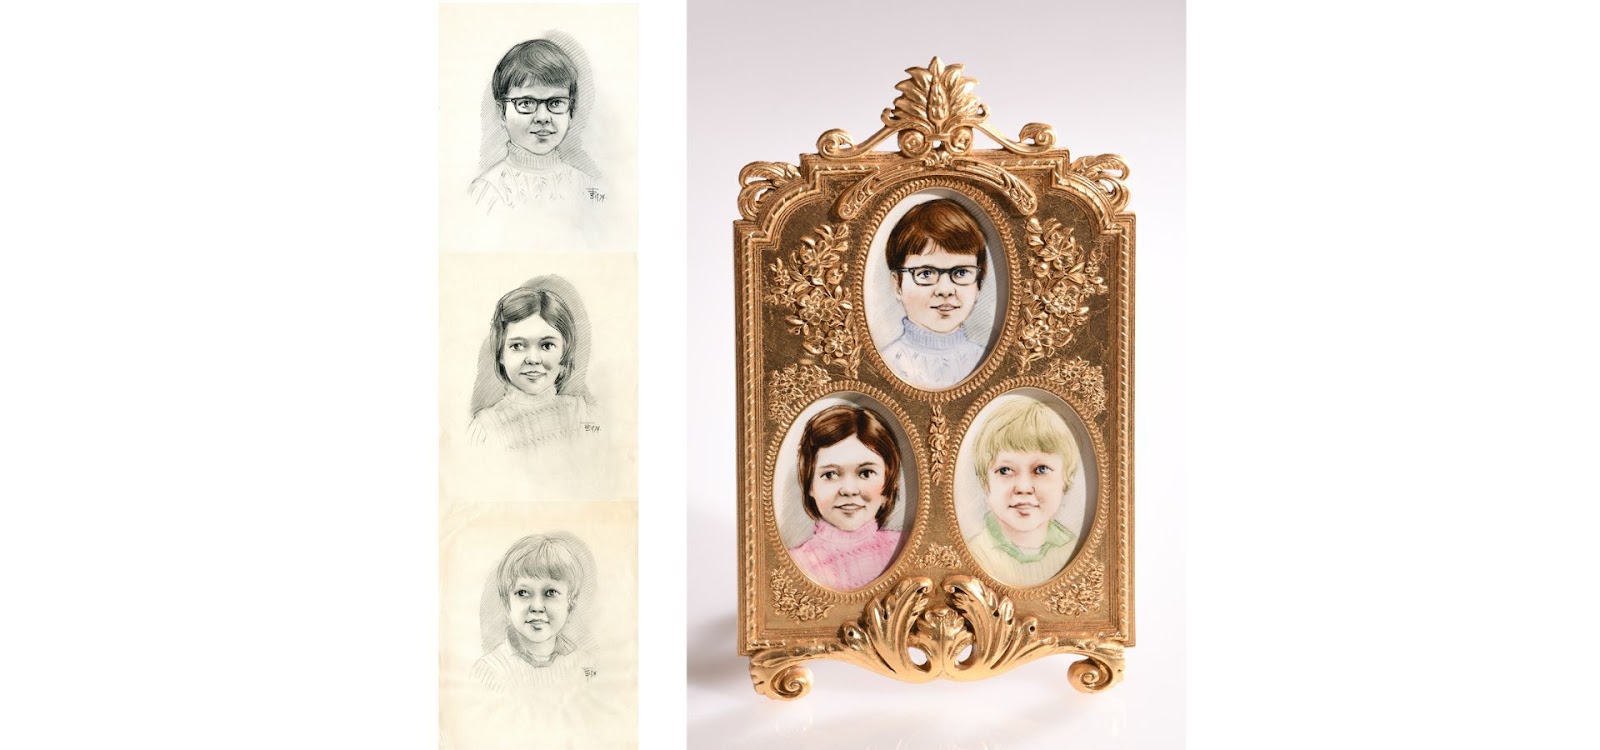
Fixing Old Photos with Faded Colors
Old photos often suffer from color fading, which can be corrected using similar techniques to those used for fixing tints. Adjusting the color balance, saturation, and contrast can help revive the original colors of vintage images. By carefully applying these adjustments, you can bring new life to old photos and preserve their historical value.
Correcting Overexposed or Underexposed Images
Overexposed or underexposed photos can also present tint issues. By adjusting exposure levels and using tools to correct highlights and shadows, you can improve the overall color accuracy and make the photo look more natural. These corrections help balance the image and restore its intended appearance.
Best Practices for Avoiding Tinted Photos
Camera Settings to Prevent Tint Issues
To prevent color tints in your photos, it’s essential to ensure that your camera settings are properly configured. Set the white balance according to the lighting conditions and avoid relying on auto settings that might not be optimal for your environment. By taking control of your camera settings, you can reduce the likelihood of encountering tint issues in your photos.
Lighting Tips for Accurate Color Representation
Good lighting plays a crucial role in achieving accurate color representation. Whenever possible, use natural light or well-balanced artificial lighting to capture your photos. Avoid harsh light sources that can cause color casts and distortions. By carefully managing your lighting conditions, you can help ensure that your photos reflect the true colors of the scene.
Conclusion
Restoring true colors in tinted photos is a valuable skill for any photographer or photo enthusiast. By employing a combination of basic and advanced color correction techniques, along with the right software tools, you can effectively address tint issues and enhance the quality of your images. Whether you’re working with old photos or recent captures, these methods will help you achieve vibrant and accurate colors, preserving the essence of your cherished memories.
FAQs
How do I know if a photo has a tint problem?
A photo with a tint problem will often exhibit a consistent color cast that deviates from the natural colors of the scene. This can manifest as an overall hue that makes the photo look unnaturally warm, cool, or colored. Identifying this tint is the first step in correcting it.
Can I fix a heavily tinted photo without losing detail?
Yes, it is possible to fix a heavily tinted photo without losing detail. Using advanced color correction techniques and tools, you can make precise adjustments to correct color issues while preserving the fine details of the image. Careful application of these techniques ensures that your photo retains its quality.
Are there any online tools for quick color correction?
Several online tools offer quick color correction options. Websites like Fotor, Pixlr, and Canva provide easy-to-use features for adjusting color balance and correcting tints. These tools can be useful for fast fixes but may not offer the same level of precision as dedicated photo editing software.
How can I prevent color tints in future photos?
To prevent color tints in future photos, ensure that your camera settings are correctly configured for the lighting conditions. Set the white balance appropriately and avoid using auto settings that may not suit your environment. Additionally, use good lighting practices to achieve accurate color representation.
What are the best software options for photo color correction?
Adobe Photoshop and Lightroom are among the best software options for photo color correction. They offer a range of advanced features for precise adjustments. For free alternatives, GIMP and Paint.NET are excellent choices with robust color correction tools.


