In the digital age, photography has become an essential part of our lives, whether for personal memories or professional purposes. One of the most powerful techniques to enhance your photos is colour retouching. But what exactly is it, and how can you master it to take your photos from good to stunning? This article will guide you through the process step by step, ensuring you have the knowledge and tools to transform your images effectively.
What is Colour Retouching?
Colour retouching involves altering the colours in an image to improve its overall appearance. Unlike simple filters, this process requires a more nuanced approach, as it focuses on enhancing specific colours, correcting any inconsistencies, and ensuring the image conveys the desired mood and tone.
The Difference Between Colour Correction and Colour Grading
Before diving into the process, it’s crucial to understand the distinction between colour correction and colour grading.
- Colour Correction is the initial phase where you fix any issues with the image’s colours, such as improper white balance, exposure problems, and unwanted colour casts.
- Colour Grading comes after correction and involves creatively adjusting the colours to achieve a specific look or feel. It’s more about the artistic direction and mood you want the image to convey.
Why Colour Retouching Matters for Photographers
For photographers, colour retouching is not just about making an image look better; it’s about telling a story through colours. Whether you’re capturing a wedding, a portrait, or a landscape, the colours you choose to highlight can evoke emotions, create atmosphere, and draw attention to specific elements of the photograph.
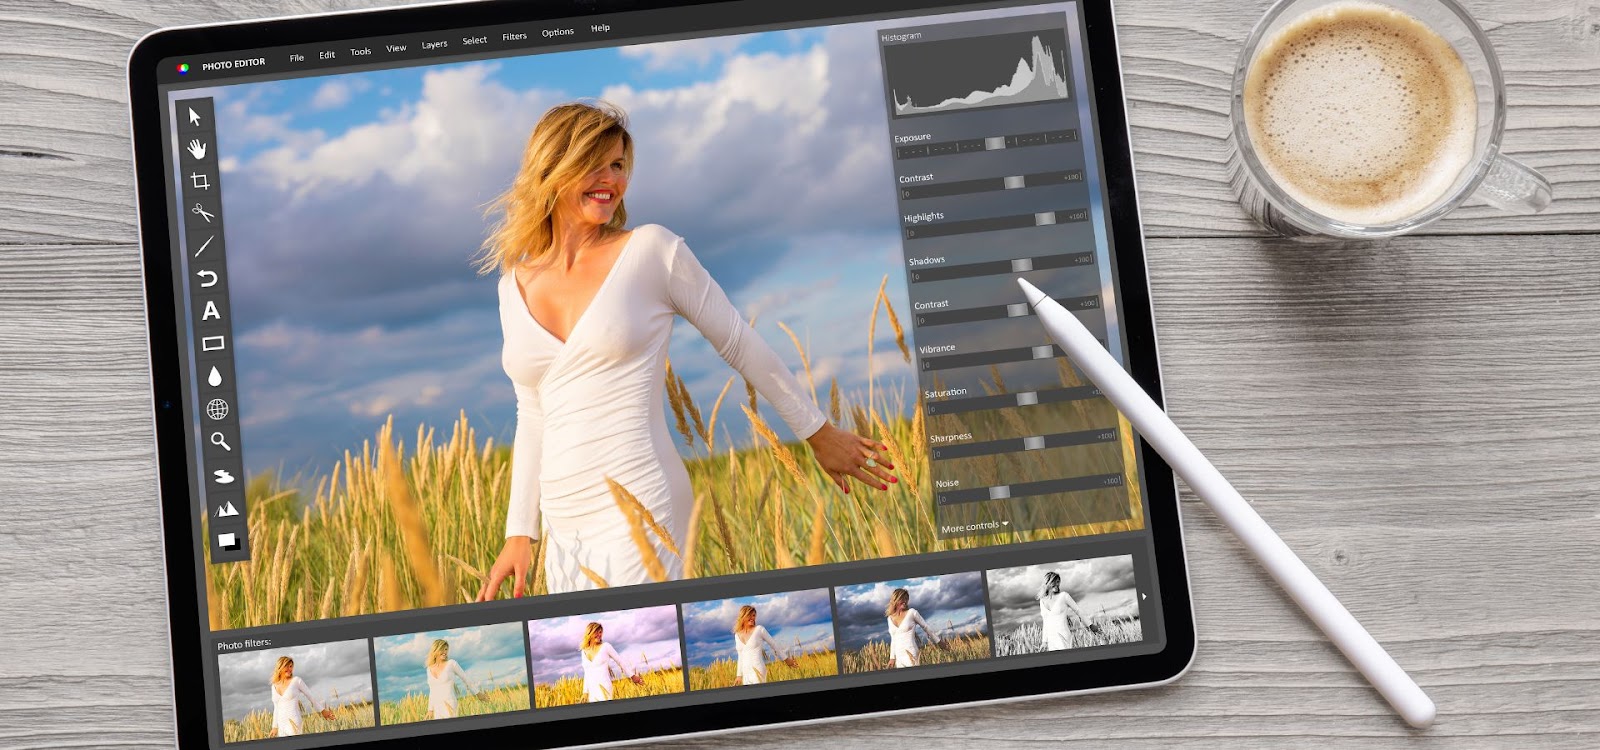
Tools You Need for Colour Retouching
To get started with colour retouching, you’ll need the right tools. The software you choose will depend on your skill level and the complexity of the retouching you plan to do.
Best Software for Colour Retouching
- Adobe Photoshop: A powerful tool for detailed colour retouching, Photoshop offers extensive features like layers, masks, and advanced adjustment tools.
- Lightroom: Ideal for photographers who need to process large batches of images, Lightroom combines powerful editing tools with an intuitive interface.
- Other Useful Tools: Programs like Capture One and Affinity Photo also provide robust colour retouching capabilities.
Preparing Your Image for Colour Retouching
Importance of RAW Files
Working with RAW files is essential in colour retouching. RAW files contain all the data captured by your camera’s sensor, allowing for greater flexibility in post-processing. JPEG files, on the other hand, are compressed and lose some of this data, limiting your ability to make significant adjustments.
How to Convert Images to RAW
If you’re shooting in JPEG, converting your images to RAW won’t be possible. Therefore, it’s important to set your camera to shoot in RAW format from the beginning. This setting is usually found in your camera’s image quality menu.
Organizing Your Workflow
Before diving into retouching, organize your files and set up a consistent workflow. This involves importing your images into your editing software, sorting through them to select the best ones, and creating a backup before making any changes.

Step-by-Step Colour Retouching Process
Step 1: Assess the Image
The first step in colour retouching is assessing your image to identify any colour issues and determine the goals for the final look.
Identifying Colour Issues
Look for any problems such as incorrect white balance, colour casts, or areas where colours don’t seem natural. These are the issues you’ll need to correct first.
Setting Goals for the Final Look
Decide on the overall mood and tone you want to achieve with your image. Are you going for a warm, vibrant look or something cooler and more subdued? Having a clear vision will guide your retouching process.
Step 2: Basic Colour Correction
Once you’ve assessed the image, the next step is to correct any colour issues.
Adjusting White Balance
White balance refers to the colour temperature of your image. Adjusting it can remove any unwanted colour casts and ensure that whites appear true to life. This step is crucial for making sure that the colours in your image are accurate.
Tweaking Exposure and Contrast
After fixing the white balance, adjust the exposure and contrast to make sure your image is well-lit and has the right amount of contrast between light and dark areas.
Step 3: Advanced Colour Grading
With the basics out of the way, it’s time to get creative with colour grading.
Working with Curves
The Curves tool is a powerful way to adjust the brightness and contrast of specific colour channels. By manipulating the RGB curves, you can fine-tune the overall look of your image and create striking effects.
Using HSL (Hue, Saturation, Lightness) Adjustments
HSL adjustments allow you to modify the hue, saturation, and lightness of individual colours in your image. This tool is particularly useful for enhancing or muting specific colours to achieve the desired look.
Step 4: Final Touches
The final step involves making any last adjustments to enhance your image further.
Enhancing Specific Colours
If there are particular colours you want to stand out, use selective colour adjustments to boost their intensity. This can help draw attention to key areas of the image.
Sharpening and Noise Reduction
Finally, apply sharpening to enhance the details in your image and use noise reduction to smooth out any graininess that may have been introduced during editing.
Saving and Exporting Your Image
Once you’re satisfied with your retouching, save your work and export your image in the desired format. If you plan to print your image, make sure to export it at a high resolution.
Common Mistakes to Avoid
While colour retouching can significantly enhance your images, it’s important to avoid common mistakes.
Overdoing Colour Adjustments
One of the most common mistakes is overdoing colour adjustments, which can result in unnatural-looking images. Always strive for balance and subtlety.
Ignoring Skin Tones
When retouching portraits, be mindful of skin tones. Over-editing can lead to unnatural or overly saturated skin colours, which can detract from the overall quality of the image.
Neglecting the Background
Don’t focus solely on the subject of your image. The background also plays a crucial role in the overall composition and should be given due attention during the retouching process.
Tips for Consistent Colour Retouching
To ensure your colour retouching is consistent across multiple images, consider the following tips:
Using Presets
Presets can help maintain consistency across a series of images. You can create your own presets based on your preferred settings or use presets designed by other photographers.
Creating a Colour Palette
Establish a colour palette that aligns with your style or the project’s theme. This will help guide your retouching process and ensure a cohesive look across all your images.
Keeping Your Monitor Calibrated
A calibrated monitor ensures that the colours you see on your screen accurately represent the final output. Regularly calibrate your monitor to avoid any discrepancies in colour.
Conclusion
Colour retouching is an essential skill for photographers who want to elevate their work. By understanding the basics, using the right tools, and following a structured approach, you can transform your photos and make them stand out. Practice is key, so keep experimenting and refining your techniques.
FAQs
How long does it take to become proficient in colour retouching?
Becoming proficient in colour retouching varies from person to person. With consistent practice, you can start seeing significant improvement within a few months.
What is the best software for beginners?
For beginners, Adobe Lightroom is highly recommended due to its user-friendly interface and powerful editing tools.
Can colour retouching fix poorly lit photos?
Yes, colour retouching can help improve poorly lit photos by adjusting exposure, contrast, and white balance. However, the results will depend on the quality of the original image.
How can I ensure my retouched photos look good on all devices?
To ensure your photos look good on all devices, calibrate your monitor, export images in appropriate formats, and test them on different screens.
Is it better to retouch in RAW or JPEG format?
Retouching in RAW format is preferable as it retains more data from the original image, giving you more flexibility in editing.