

Have you ever faced the daunting task of resizing hundreds of images for a project? It can be a tedious and time-consuming process, especially if you do it manually. But don’t worry—there’s a much easier way! This guide will walk you through the steps to batch resize images using Adobe Photoshop, allowing you to resize multiple images all at once quickly. Whether you’re a photographer needing to resize images for a portfolio or a graphic designer preparing a batch of images for a website, this guide has got you covered.
Batch resizing is a game-changer, especially when you’re working with a large volume of images. It helps you save time, maintain consistency, and avoid the repetitive task of resizing each image individually. In this article, we’ll explain what batch resizing is, why you might want to use it, and how you can do it effectively in Photoshop. Let’s dive in!
What is Batch Resizing?
Batch resizing is the process of automatically resizing multiple images at once to a specific dimension or file size. Instead of opening each image one by one and resizing it manually, you can set up a command in Photoshop to resize all your images in one go. This not only saves time but also ensures all images are resized consistently. Batch resizing is especially useful when you have a large number of images that need to be the same size, such as for a website gallery, social media posts, or print materials. It’s a powerful feature that can drastically improve your workflow and productivity.
Why Batch Resize Images in Photoshop?
Photoshop is a go-to tool for batch resizing because of its advanced capabilities and flexibility. It allows you to create “Actions” that automate repetitive tasks, such as resizing images. Actions save you from having to perform the same steps over and over again, which is incredibly useful when dealing with large volumes of images. Moreover, Photoshop provides high-quality resizing options that ensure your images retain their sharpness and clarity, even after being resized. This makes it an ideal choice for professionals who need precise control over their image processing workflows.
Getting Started with Photoshop
Before you begin batch resizing images, it’s essential to prepare your tools and workspace to ensure a smooth process. Here’s what you need to know to get started.
Prerequisites for Batch Resizing
To effectively batch resize images in Photoshop, you’ll need a few things in place:
Adobe Photoshop Installed: Make sure you have Adobe Photoshop installed on your computer. It’s best to use the latest version to take advantage of all the newest features and bug fixes.
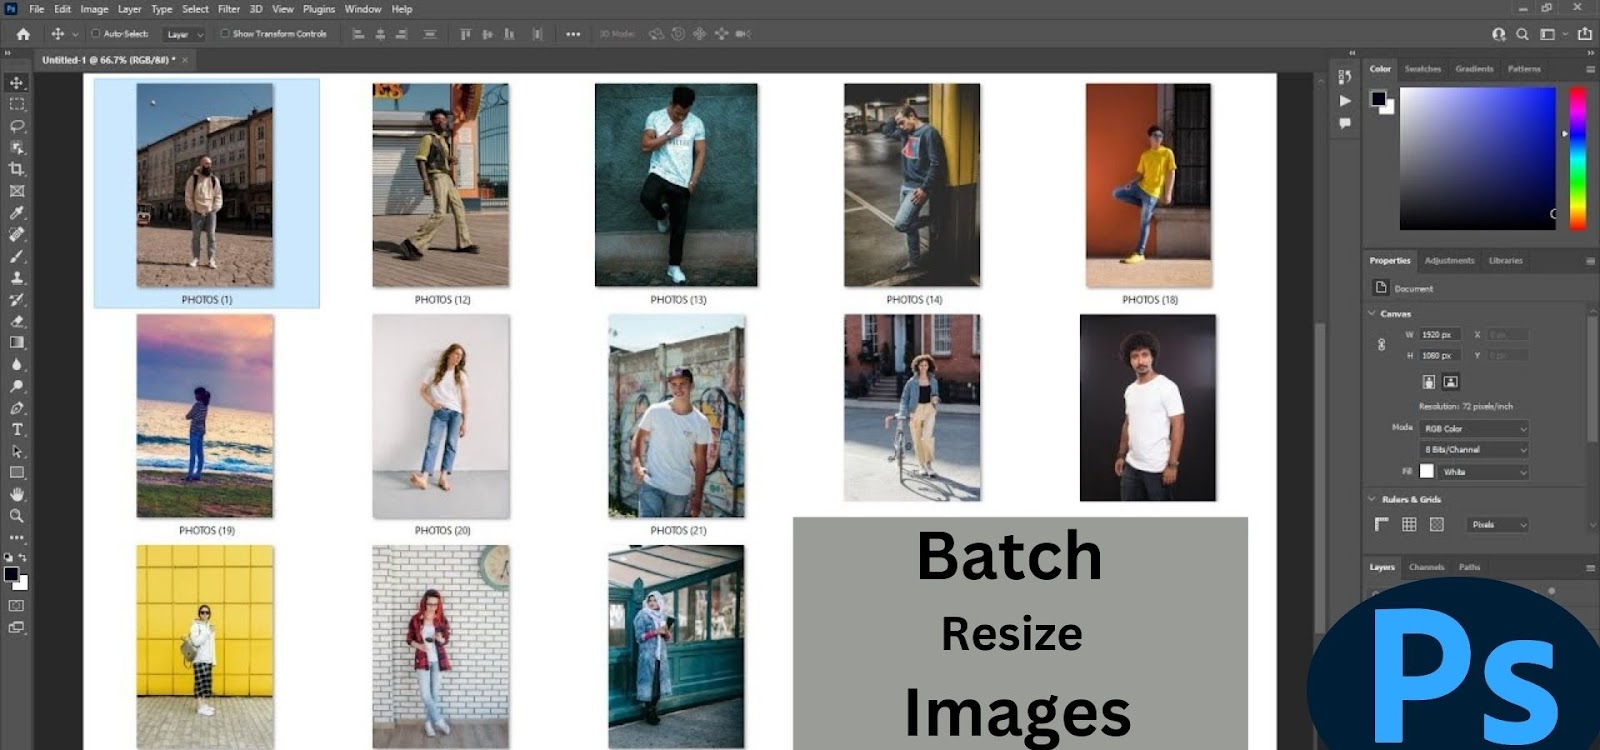
Image Files Ready: Gather all the images you want to resize into a single folder. This organization will make the batch resizing process more manageable and prevent any mistakes. Also, consider making a backup of your original images in case something goes wrong.
Preparing Your Images
Preparation is key when it comes to batch resizing. Before you start, ensure all your images are named correctly and stored in the same folder. You should also decide on the final dimensions or file size you want for your resized images. If your images have different orientations (portrait vs. landscape), you might need to create separate actions for each orientation to ensure they resize correctly.
Step-by-Step Guide to Batch Resizing in Photoshop
Now, let’s dive into the step-by-step process of batch resizing images in Photoshop. Follow these instructions carefully to ensure a smooth resizing process.
Step 1: Open Photoshop and Prepare the Workspace
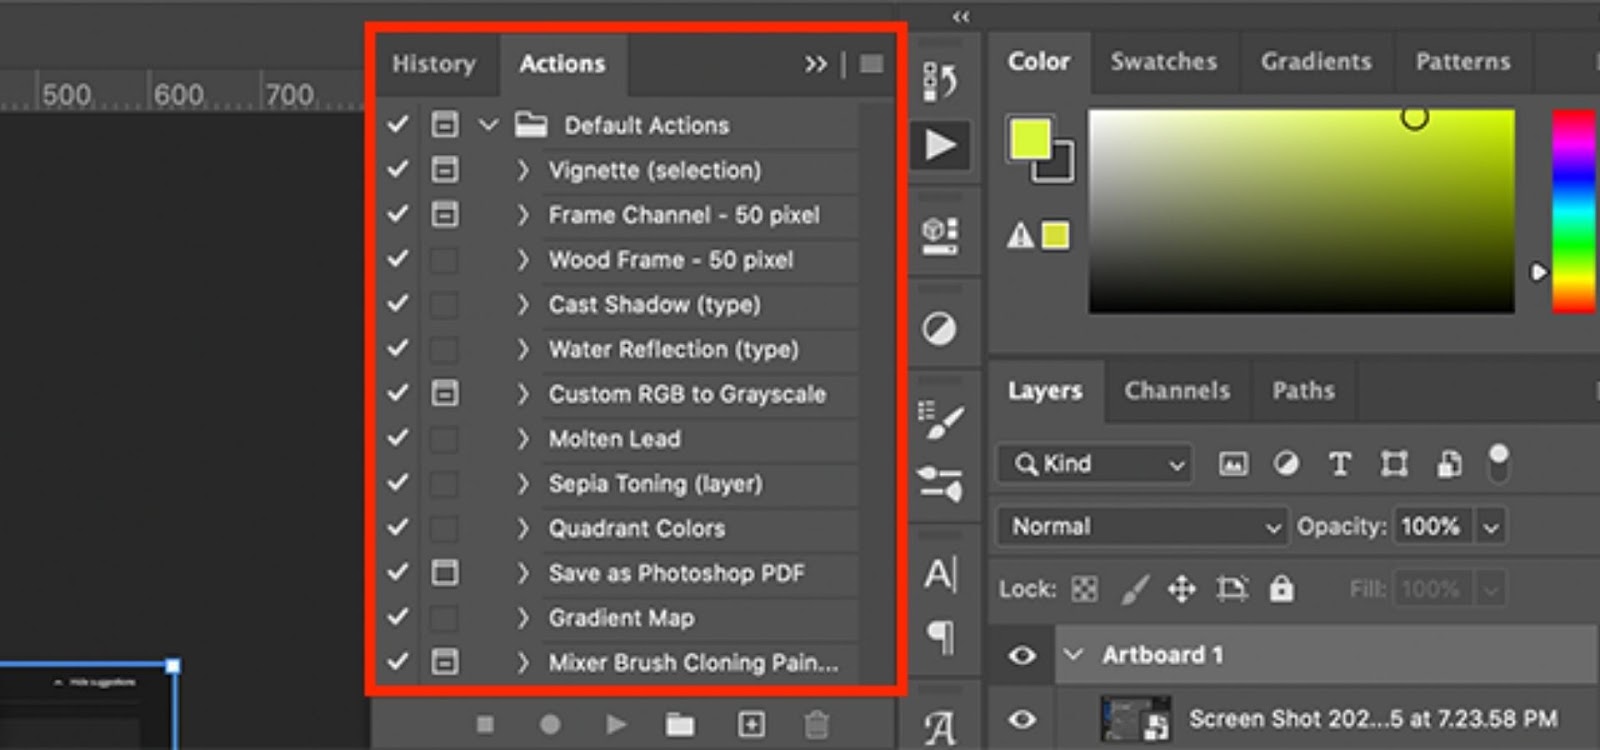
The first step is to open Photoshop and set up your workspace. Make sure your workspace is clean and that you have all the necessary panels, such as the Actions and History panels, visible. You can reset the workspace to the default settings by going to Window > Workspace > Reset Essentials. This will give you a clutter-free workspace to create and run your batch resizing actions.
Step 2: Create an Action for Resizing
Photoshop’s Actions feature is a powerful tool that allows you to record a series of steps and then apply those steps to multiple images.
- What is an Action in Photoshop?
An action in Photoshop is essentially a recorded series of steps that you can replay at any time. This is incredibly useful for repetitive tasks like resizing multiple images. By creating an action, you can ensure that each image is processed in the exact same way, which saves time and maintains consistency. - Setting Up a New Action: To create a new action, open the Actions panel by navigating to Window > Actions. Click on the folder icon to create a new set and then click the plus (+) icon to create a new action. Give your action a descriptive name, such as “Batch Resize,” and then hit Record. Photoshop will now start recording every step you take.
Step 3: Resize Your First Image
With your action recording, the next step is to resize your first image. This will serve as the template for all subsequent images.
- Choosing the Right Image Size: Go to Image > Image Size. A dialog box will pop up where you can enter your desired dimensions (width and height). Make sure the Resample option is checked. This allows Photoshop to add or remove pixels as necessary to achieve the desired size without sacrificing quality. Input the dimensions that best suit your needs, whether it’s for web use, printing, or another purpose.
- Saving the Resized Image: After resizing the image, you’ll need to save it. Go to File > Save As, choose your desired format (such as JPEG or PNG), and select the destination folder where you want the resized image to be saved. Once done, close the image. Photoshop will record each of these steps, which will be repeated for every image in the batch.
Step 4: Automate the Batch Process
With the resizing action created and saved, you can now automate the process for all your images.
- Using the Batch Command:
To start the batch process, go to File > Automate > Batch. This will open the Batch dialog window. - Selecting the Folder with Images:
In the Batch dialog, select the set and action you just created. Under Source, choose Folder, and click Choose… to navigate to the folder containing your images. Under Destination, select where you want the resized images to be saved. Ensure that you have the options set correctly to avoid overwriting the original images.
Click OK to start the batch process. Photoshop will now automatically apply the resizing action to every image in the specified folder, one by one, until all images are resized.
Tips for Effective Batch Resizing
To get the best results from batch resizing in Photoshop, consider the following tips:
- Choosing the Right Dimensions: Consider the intended use of your images. If you’re resizing for a website, smaller dimensions (like 800×600 pixels) are often sufficient. For print, higher resolutions (300 DPI) are generally required to ensure quality.
- Maintaining Aspect Ratios: Always keep the Constrain Proportions or Lock Aspect Ratio option enabled. This ensures that your images maintain their original aspect ratio, preventing distortion.
- Considerations for Different Image Formats: Different image formats, such as JPEG, PNG, and TIFF, have different properties and use cases. JPEG is ideal for web use due to its small file size, while PNG is better for images requiring transparency.
Common Mistakes and How to Avoid Them
Even with a straightforward process like batch resizing, mistakes can happen. Here’s how to avoid some common pitfalls:
- Overwriting Original Files: Always save the resized images in a new folder or with a different file name. This prevents accidental overwriting of your original files, which could be irreversible.
- Forgetting to Save Actions: Make sure you save your action before starting the batch process. If Photoshop crashes or if you need to redo the batch process, having a saved action will save you a lot of time.
- Choosing Incorrect Settings: Double-check your settings before running the batch process. This includes checking the image size, file format, and destination folder to avoid any unintended outcomes.
Advanced Techniques for Batch Resizing
Once you’ve mastered the basics of batch resizing, you can explore more advanced techniques to refine your workflow.
- Using Scripts for Batch Processing: Scripts can offer more control over the batch resizing process, allowing for more customized automation. If you’re comfortable with JavaScript, you can write your own scripts to handle more complex tasks or find pre-made scripts online.
- Resizing Images with Different Orientations: If your batch contains images with both portrait and landscape orientations, consider creating separate actions for each orientation. This ensures that all images are resized correctly without any distortion or cropping.
Benefits of Batch Resizing in Photoshop
Batch resizing in Photoshop offers several advantages, especially for professionals who handle large volumes of images regularly.
- Time Efficiency: Instead of resizing each image individually, batch resizing allows you to process hundreds or even thousands of images in just a few minutes. This efficiency can save you hours of tedious work.
- Consistency Across Images: By using the same resizing settings and actions for all images, you ensure a consistent look and feel across your project. This is particularly important for maintaining brand standards or visual coherence in a gallery or website.
- Enhanced Workflow: Batch resizing can be integrated into a larger workflow that includes other automated tasks, such as color correction or watermarking, allowing for a seamless, efficient image processing pipeline.
Conclusion
Batch resizing images in Photoshop is a powerful technique that can save you a lot of time and effort. Whether you’re working with a handful of images or thousands, the steps outlined in this guide will help you resize your images quickly and efficiently. By automating repetitive tasks, you can focus more on the creative aspects of your work and less on the technical details. Remember to always back up your original files, double-check your settings, and use the appropriate tools and techniques to achieve the best results. Happy editing!
FAQs
Can I Batch Resize Images of Different Formats in Photoshop?
Yes, Photoshop allows you to batch resize images of different formats. However, the output format will be the same for all resized images unless you specify different formats using a script or action.
Is There a Limit to the Number of Images I Can Batch Resize?
Technically, there isn’t a hard limit to the number of images you can batch resize in Photoshop, but the process will depend on your computer’s hardware capabilities. For a large number of images, ensure you have enough RAM and processing power to handle the workload.
Can I Undo a Batch Resize?
Unfortunately, once you have resized and saved your images, you cannot undo the batch resize process. This is why it’s crucial to work on copies of your original images or to save them in a separate folder.
How Does Batch Resizing Affect Image Quality?
Resizing can affect image quality, especially if you enlarge images. It’s always best to start with high-resolution images and only resize them smaller to maintain quality. Enlarging images can lead to pixelation and a loss of detail.
What Other Software Can I Use for Batch Resizing?
Besides Photoshop, you can use other software for batch resizing, such as Adobe Lightroom, GIMP, IrfanView, or built-in features in operating systems like macOS Preview. These tools may offer different features and ease of use depending on your needs.


