
In the realm of professional photo editing, natural shadows play a vital role in enhancing realism and depth. Whether you’re working on product photography, portraits, or creative visuals, a well-crafted shadow can make your images look more dynamic and engaging. Adobe Photoshop offers powerful tools for creating natural-looking shadows, but mastering the technique requires precision and understanding of light and angles. This guide will walk you through the process of creating natural shadows in Photoshop step by step, ensuring that your images look as lifelike and professional as possible.
Why Natural Shadows Matter in Photo Editing
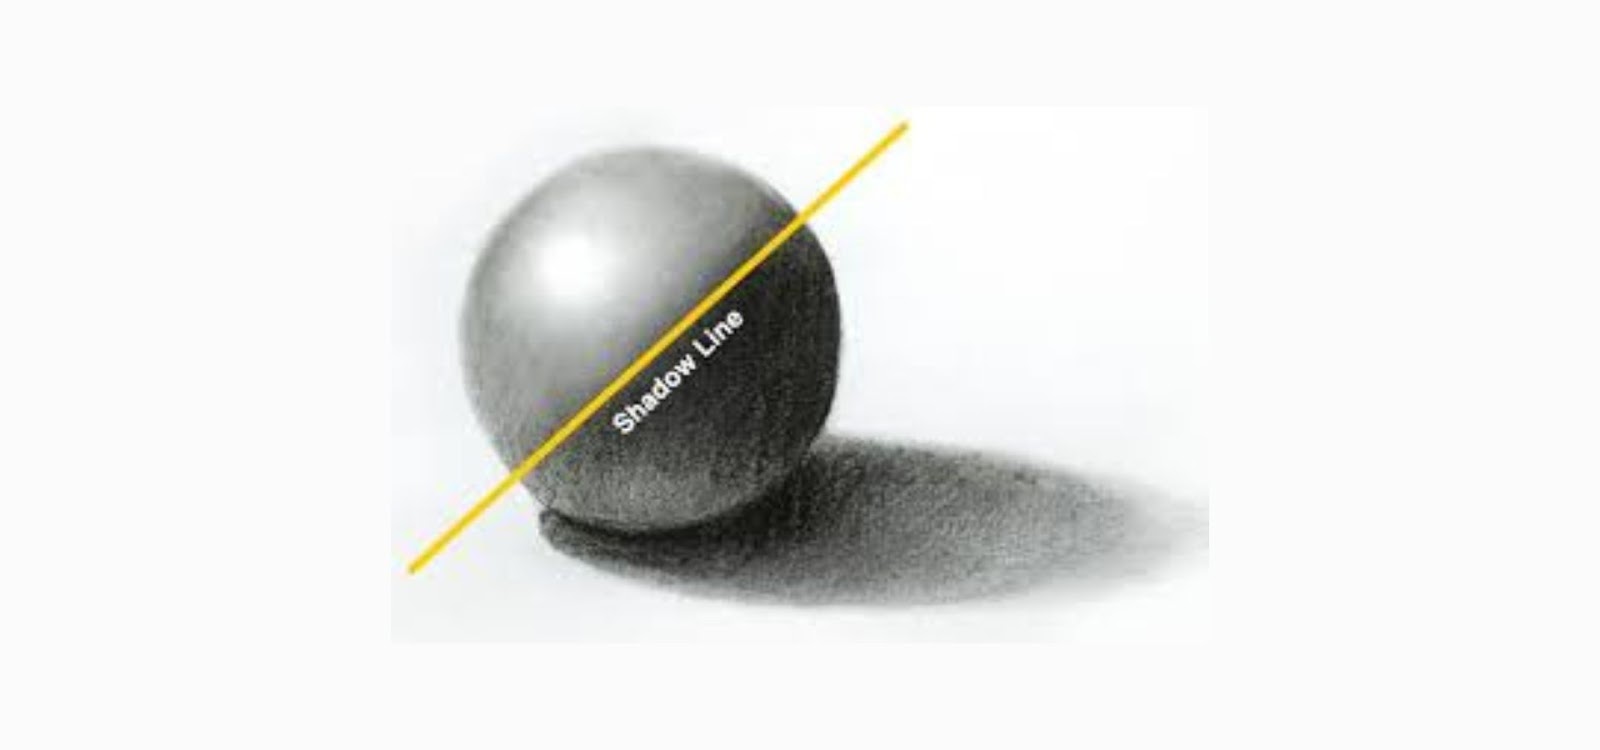
Before diving into the step-by-step process, it’s essential to understand why natural shadows are so important. Shadows are a product of light and play a crucial role in defining the shape, size, and position of objects in a space. Without the presence of shadows, images appear flat and artificial. Natural shadows add:
- Depth and dimension to the image.
- Realism by mimicking the natural behavior of light.
- Focus on key objects by emphasizing their position in relation to the background.
By mastering the creation of natural shadows, you can elevate your designs and give them a professional edge.
Tools Needed to Create Natural Shadows in Photoshop
Before starting, make sure you have the following tools ready:
- Adobe Photoshop: Any version will work, but the newer versions have enhanced shadow tools.
- Graphics Tablet (optional): For more precise brush control.
- Good Quality Image: The quality of the image will significantly affect how well the shadow integrates.
Step 1: Select the Object to Apply a Shadow
To create a natural shadow, the first step is selecting the object to which you’ll apply the shadow. Follow these steps:
- Open your image in Photoshop.
- Use the Pen Tool (P) or the Lasso Tool (L) to make a precise selection around the object.
- Once selected, press Ctrl + J (Cmd + J for Mac) to duplicate the object on a new layer.
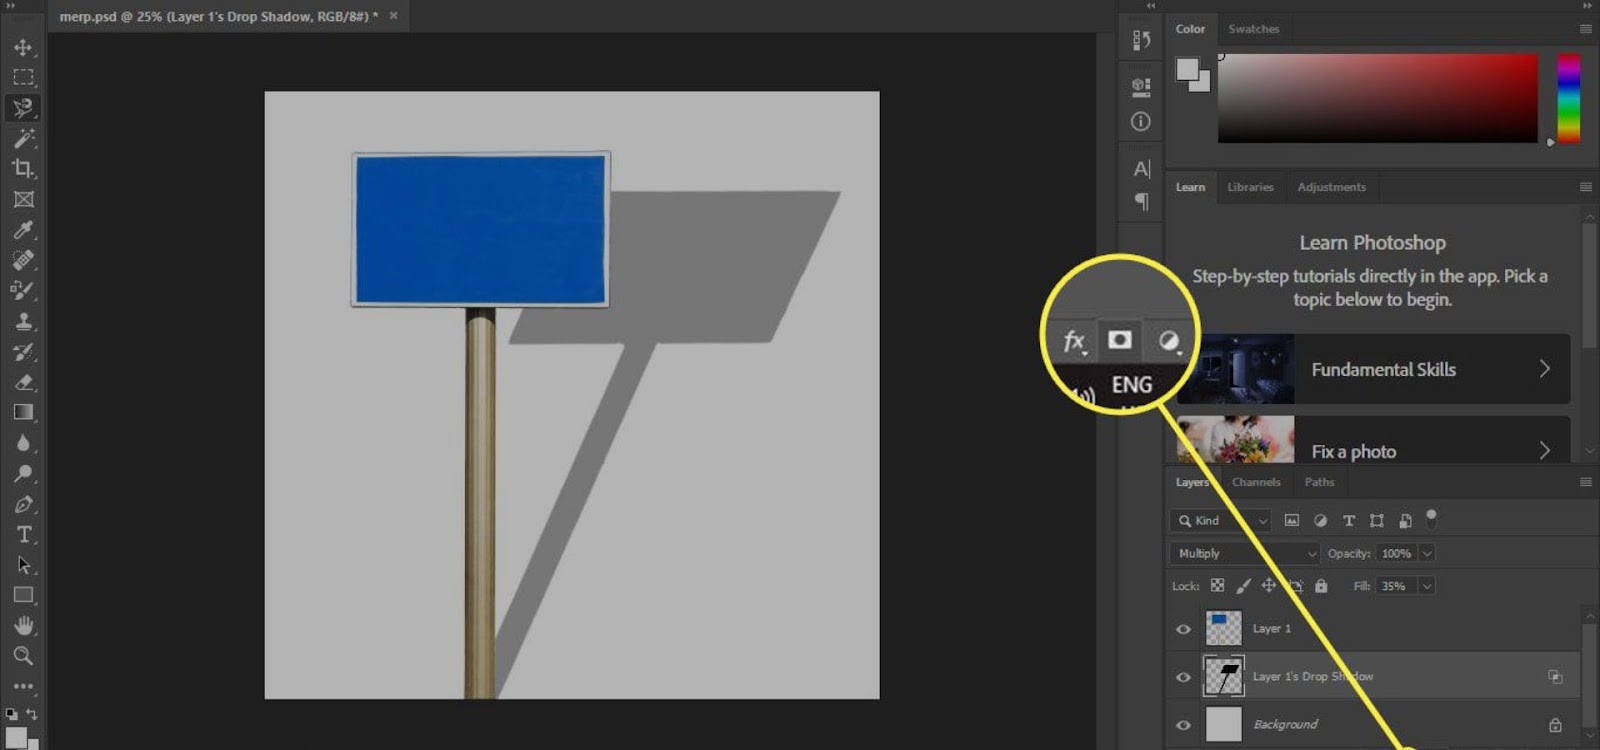
Step 2: Create a New Layer for the Shadow
After selecting the object, you’ll need to create a new layer that will be used exclusively for the shadow. Here’s how:
- Go to the Layers Panel and click the New Layer button at the bottom.
- Place this new layer directly beneath the object layer. This ensures that the shadow will appear behind the object.
Step 3: Apply the Gradient Tool
To start building the natural shadow effect:
- Select the Gradient Tool (G) from the toolbar.
- Choose a Black to Transparent gradient in the gradient panel.
- On the shadow layer, apply the gradient starting from where the shadow will begin and extending outward. Keep in mind the light source, as the shadow should move away from it.
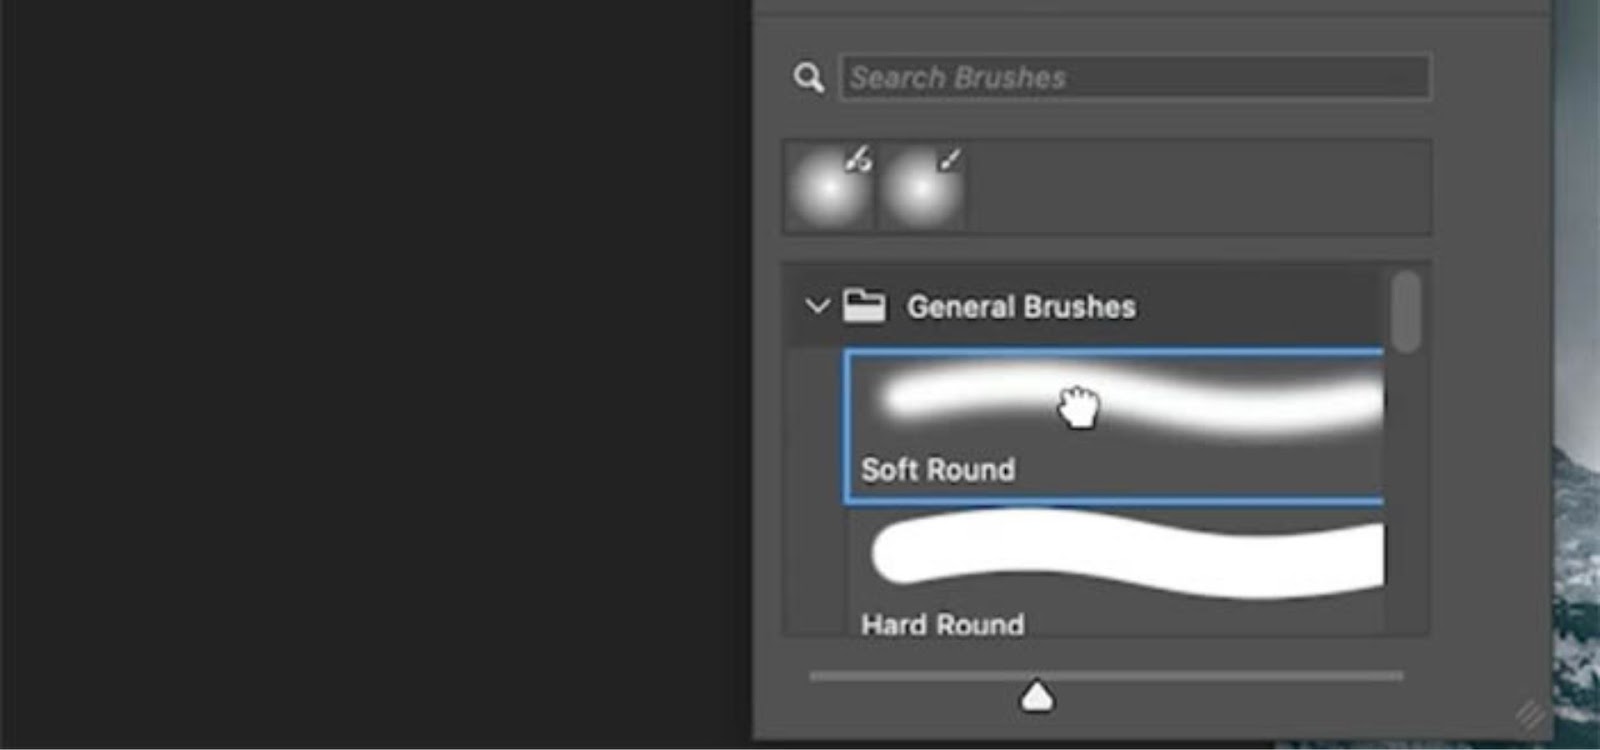
Step 4: Use the Brush Tool for Refinement
For added realism, you can refine your shadow using the Brush Tool (B).
- Set your brush to a soft, round brush with low opacity (around 20-30%).
- Gently paint along the edges of your object, darkening areas where the shadow would naturally be strongest, such as under the object or where the object meets the surface.
Step 5: Apply Gaussian Blur for Softness
Natural shadows are rarely harsh and sharp, so adding a blur will make the shadow softer and more realistic.
- Select the shadow layer in the Layers Panel.
- Go to Filter > Blur > Gaussian Blur.
- Adjust the radius until the shadow appears smooth and naturally diffused. The right amount of blur will depend on the distance between the object and the surface beneath it.
Step 6: Adjust the Shadow Opacity
Natural shadows are often semi-transparent. To achieve this effect:
- Select the shadow layer and reduce the opacity (found in the Layers Panel) to around 50-70%, depending on how strong or subtle you want the shadow to appear.
Step 7: Transform the Shadow for Perspective
Shadows fall in different directions based on the light source and the surface. To give your shadow the correct perspective:
- Select the shadow layer and press Ctrl + T (Cmd + T for Mac) to open the Transform Tool.
- Right-click and choose Skew or Distort from the context menu.
- Adjust the shadow so that it follows the natural line of the surface on which the object is placed.
Step 8: Use Layer Masks for Precision
For more control over the shadow’s placement, you can use a layer mask. This helps blend the shadow seamlessly into the image.
- Click on the Add Layer Mask icon at the bottom of the Layers Panel.
- Use the Brush Tool with black and white colors to hide or reveal parts of the shadow as needed, ensuring it blends naturally with the background.
Step 9: Fine-Tuning the Light Source
Understanding where your light source is coming from is essential for shadow realism. Adjust the angle, distance, and direction of your shadow accordingly to match the light source in your image.
- Double-check the shadow’s length and shape to ensure it aligns with how the light interacts with the object.
- For complex lighting, consider adding multiple layers of shadows, such as a soft shadow for ambient lighting and a sharper shadow for direct light.
Common Mistakes to Avoid When Creating Natural Shadows
While creating natural shadows in Photoshop is a powerful skill, there are some common pitfalls to avoid:
- Overly dark shadows: Shadows that are too dark can look unrealistic and distracting. Make sure to adjust the opacity to keep the shadow subtle.
- Unnatural shadow angles: Always follow the direction of the light source. If your shadow doesn’t align with the lighting in the image, it will look unnatural.
- Harsh edges: Natural shadows have soft, gradual edges. Always use Gaussian Blur and a soft brush to achieve a smooth transition.
- Ignoring the environment: Shadows change depending on the surface they fall on. Make sure your shadow interacts with the background properly.
Enhancing Natural Shadows with Blending Modes
In Photoshop, blending modes can help make your shadows blend better with the image.
- Select the shadow layer and go to the Blending Mode dropdown at the top of the Layers Panel.
- Try switching to Multiply or Overlay, as these blending modes often work best for shadows.
- Adjust the opacity to fine-tune the blending effect.
Advanced Shadow Techniques for Professionals
If you’re looking to push your shadow work further, here are some advanced techniques:
1. Create Multiple Layers of Shadows
To add complexity, try using multiple layers for different parts of the shadow. For example, one layer for the hard shadow directly beneath the object and another for the softer shadow further away. This mimics real-world shadows that have varying degrees of sharpness depending on distance from the object.
2. Use 3D Shadow Techniques
For a more realistic effect, consider using Photoshop’s 3D tools. By rendering a 3D object in Photoshop, you can generate realistic shadows based on the object’s shape, size, and light source, taking your design to a professional level.
Conclusion
Creating natural shadows in Photoshop is an essential skill for anyone involved in professional photo editing or graphic design. By following these steps, you can add depth, realism, and a polished touch to your images, ensuring they look more engaging and professional. Whether you’re working on e-commerce product photography, creative visuals, or high-end marketing campaigns, mastering shadow creation can make a significant difference in your visual presentation. Practice and attention to detail will help you perfect this technique and deliver stunning, lifelike results.
FAQs
Why do natural shadows enhance realism in images?
Natural shadows mimic how light behaves in real-world environments, adding depth, dimension, and a sense of realism to flat images.
Can I use any light source for natural shadows?
Yes, but it’s important to make sure your shadow aligns with the direction and intensity of the light source to create a realistic effect.
How do I soften the edges of a shadow in Photoshop?
Use the Gaussian Blur filter to soften the edges of your shadow and give it a more natural, diffused look.
What blending mode is best for shadows?
The Multiply blending mode often works best for shadows as it darkens the underlying layers without losing the shadow’s subtlety.
Can I create realistic shadows for complex objects?
Yes, by using advanced techniques such as multiple shadow layers and 3D rendering tools, you can create highly realistic shadows for complex objects.
Experience Perfection: Claim Your Free Trial Today!
Get a firsthand look at our exceptional services with a no-obligation free trial—start transforming your visuals today!


